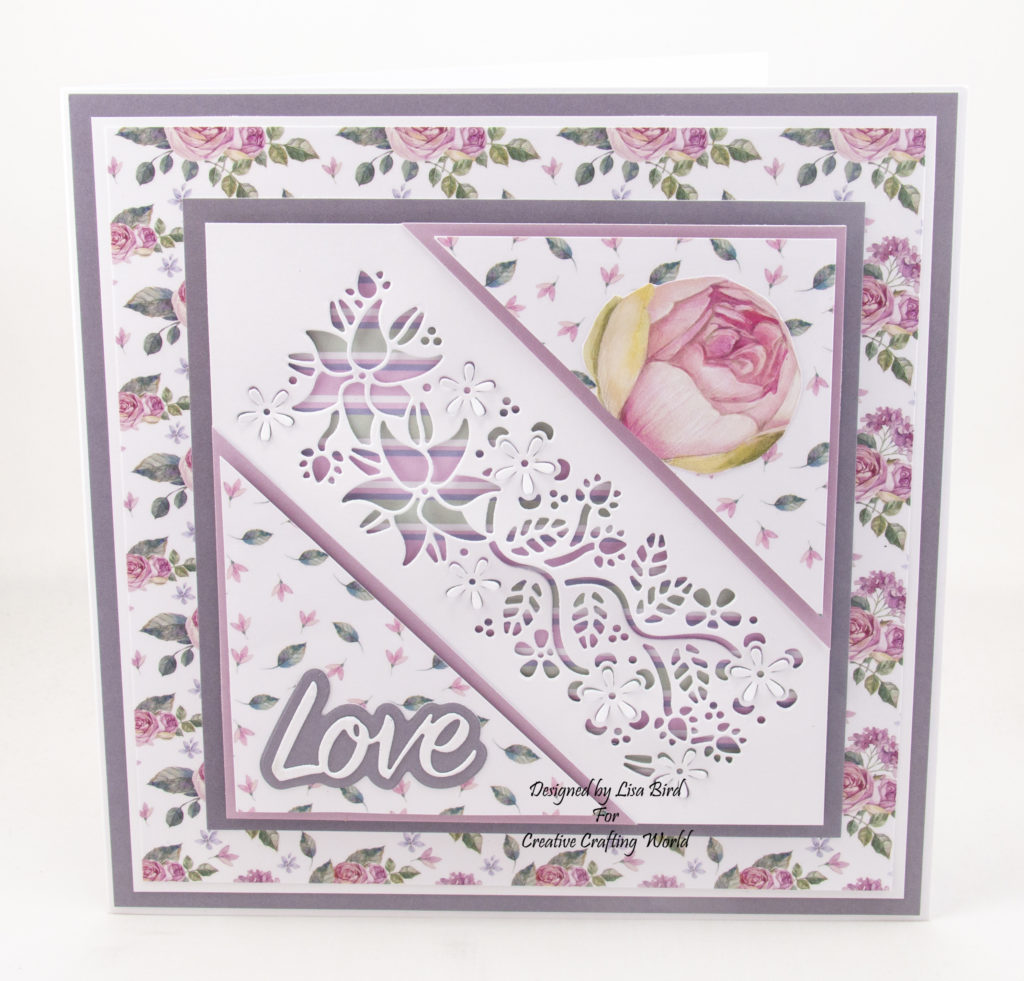
This handmade card has been created using a new paper collection called A Garden In Provence and die collection called Beyond Borders.
These new collections are from The Paper Boutique range from Creative Crafting World
Here is a tutorial on how I created this card.
You will need :
8″ by 8″ White Card
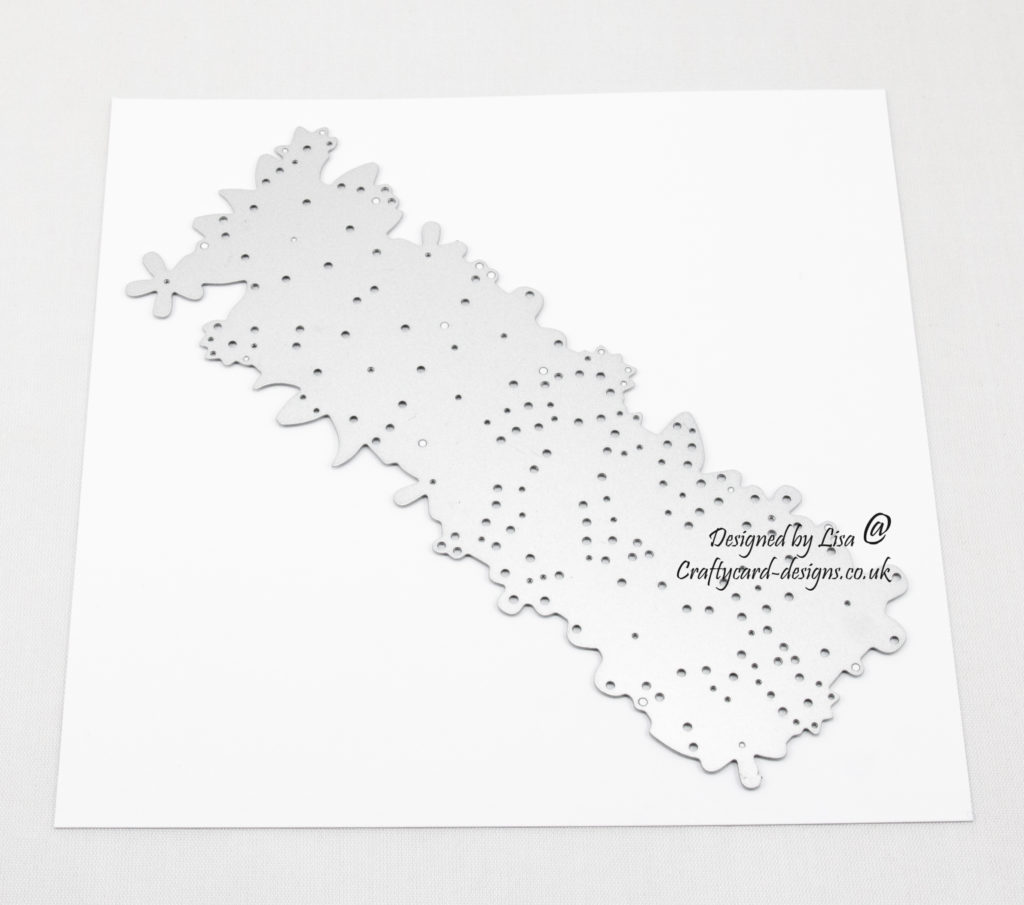
The Paper Boutique Beyond Border – Floral Bouquet Die Collection
The Paper Boutique A Garden In Provence – Embellishment Pad
The Paper Boutique A Garden In Provence – Coloured Card Collection
The Paper Boutique A Garden In Provence – Paper Pad
White Card
Wet Glue / Double Sided Tape
Foam Pads
Instructions:
Choose two coloured cards, three patterned papers and a large rose image from the embellishment pad.
Layer one:
Cut a square from one of the coloured cards measuring 20 cms by 20 cms.
Cut a square from white card measuring 19 cms by 19 cms.
Cut a square from one of the patterned papers measuring 18.5 cms by 18.5 cms.
Then cut a square from the same coloured card measuring 15.5 cms by 15.5 cms
Matt and layer together and attach to the card base.
Layer two:
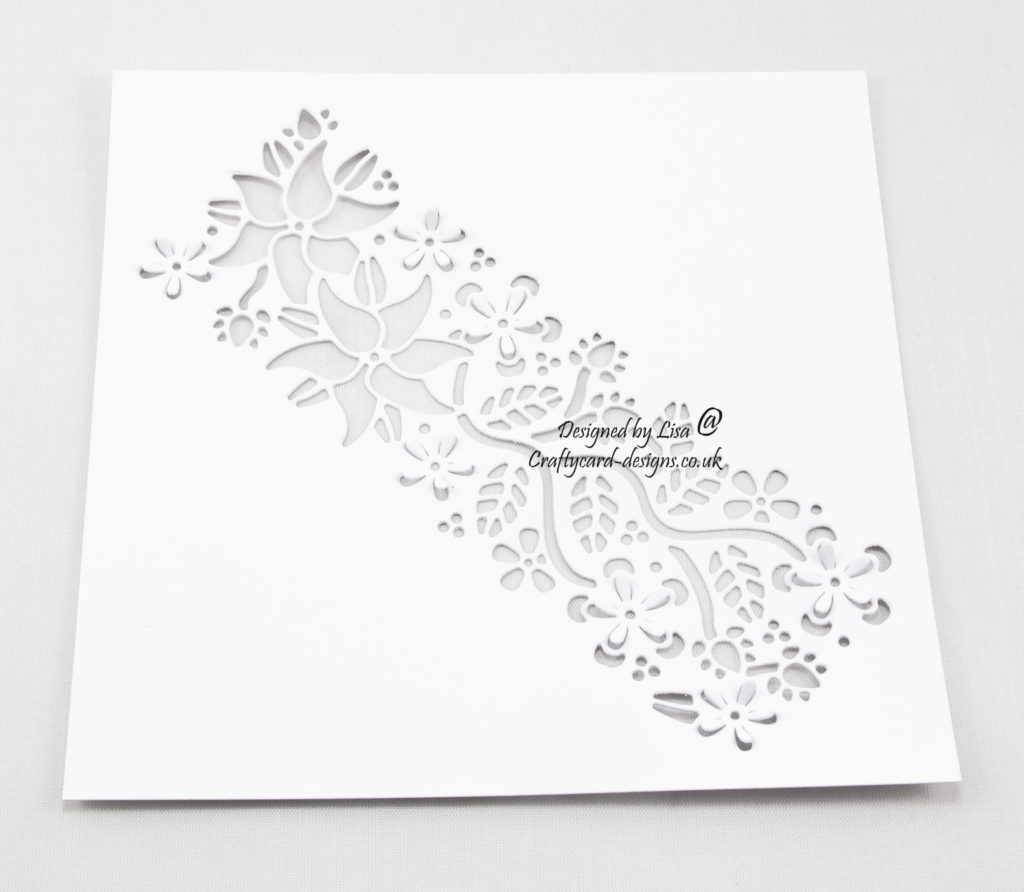
Cut a square from white card measuring 14.5 cms by 14.5 cms.
Lay the decorative die diagonally across the white card and cut into the card.
Next cut a square from one of the patterned papers measuring 14 cms by 14 cms, matt this behind the white card using foam pads.
Then attach to the card base.
Layer three:
Cut a square from the second coloured paper measuring 10 cms by 10 cms.
Cut a square from one of the patterned papers measuring 9 cms by 9 cms.
Then cut both squares in half from corner to corner.
Matt and layer each half together and attach to the top right and bottom left of layer two using foam pads.
Next using the sentiment die cut the matt layer out in on of the coloured card.
The cut the sentiment out in white card.
Matt and layer together and attach to the bottom left of layer three.
Cut out a large rose from the embellishment pad and attach to the top right of layer three.
To finish add an insert to the center of the card base.
………………………………………………………………………….
Thank you for visiting my blog and please feel free to follow any of my handmade card tutorials.
Please leave a comment and let me know you’ve visited.
If you would like to see other cards using Creative Crafting World products please have a look here:
Ocean Breeze – Birthday Wishes
Pollyanna Pickering – Family Portraits Dogs
Steampunk Romance – Love And Romance
World Wildlife Volume III – Best Wishes
Stunning card and dies Ginny
My Blog As I do Rodos
A lovely card. Waiting for my set to arrive.
Oh wow – love that centre panel – a very elegant design,
hugz Tinz
Love it Lisa can’t wait to see the rest of your samples for this set.x