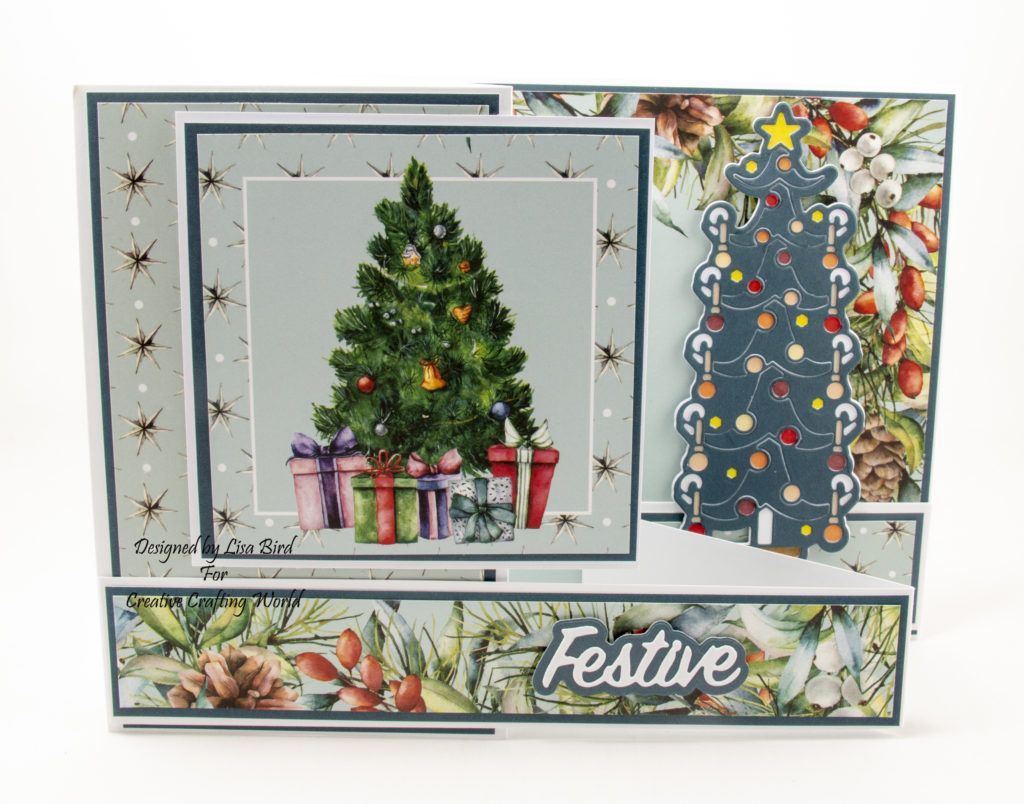
This handmade Christmas card has been created using a new paper collection called A Traditional Christmas and die collection called Festive Trimmings.
These new collections are from The Paper Boutique range from Creative Crafting World
Here is a tutorial on how I created this card.
You will need :
8″ by 8″ White Card
The Paper Boutique Festive Trimmings – Festive Tree Die Collection
The Paper Boutique A Traditional Christmas – Embellishment Pad
The Paper Boutique A Traditional Christmas – Coloured Card Collection
The Paper Boutique A Traditional Christmas – Paper Pad
White Card
Wet Glue / Double Sided Tape
Foam Pads
Instructions:
Choose one square topper from the embellishment pad, one coloured card and two backing papers.
Fold and score the front of the 8″ by 8″ card base in half to make a z fold card.
Then cut a 4 cm strip from the bottom.
Layer one:
Cut a piece from coloured card measuring 16 cms by 9.5 cms.
Cut a piece from one of the papers measuring 15.5 cms by 9 cms.
Matt and layer together and attach to the front of the card base.
Layer two:
Cut a piece from coloured card measuring 16 cms by 20 cms.
Cut a piece from the second paper measuring 15.5 cms by 19.5 cms.
Matt and layer together and attach to the inside of the card base.
Layer three:
Cut a piece from coloured card measuring 3.5 cms by 20 cms.
Using the left over piece from the second paper cut to measuring 3 cms by 19.5 cms.
Matt and layer together and attach to the 4 cm strip.
Next cut two pieces from coloured card measuring 3.5 cms by 9.5 cms.
Cut a piece from the first paper measuring 3 cms by 9 cms.
Matt and layer together and attach to the 4 cm strip.
Attach the shortest piece of the 4 cms strip to the inside of the card base at the bottom.
Then attach the longest piece to the front of the card base.
Layer four:
Cut a square from white card measuring 11 cms by 11 cms.
Cut a square from coloured card measuring 10.5 cms by 10.5 cms.
Matt and layer together and attach the square topper using foam pads.
Then attach to the front of the card base using foam pads.
Layer five:
Using the die collection, cut the matt layer from white card.
Then cut the Christmas tree die from coloured card.
Matt and layer together and paper piece the centre Christmas tree pieces back into the Christmas tree die cut.
Using promarkers add colour to the Christmas tree.
Promarkers used were:
Tan, Burnt Sienna, pumpkin, berry red, burgundy, apricot, pastel yellow and canary.
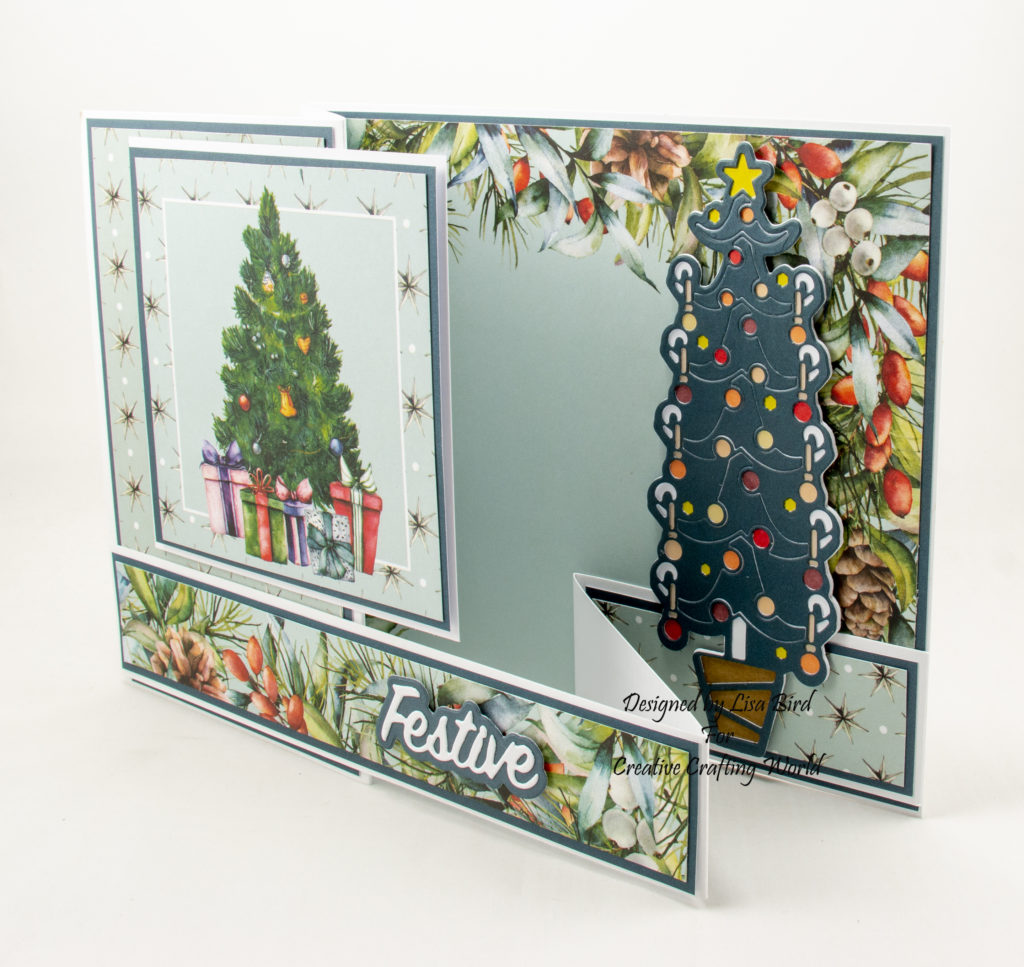
Using foam pads attach the Christmas tree to the inside of the card base.
Layer six:
To finish add a sentiment.
Cut the matt layer out in coloured card.
Cut the sentiment out in white card.
Matt and layer together and attach to the front of the card base.
………………………………………………………………………….
Thank you for visiting my blog and please feel free to follow and make any of my handmade card tutorials.
It would be great if you left a comment to let me know you’ve visited.
If you would like to see other cards using Creative Crafting World products please have a look here:
Live, Laugh, Love – Granddaughter
Ocean Breeze – Birthday Wishes
A Christmas Visitor – Sending Best Wishes
Butterfly Ballet Collection – Little Kisses From The Heart
wonderful card design
Ginny
My Blog As I do Rodos
This is gorgeous,
Hugz Tinz