Today’s handmade card has been created using a paper collection called Enchanted Forest from The Paper Tree range at Creative Crafting World.
Here is a tutorial on how I created this card.
You will need :
8″ By 8″ White Card
DL White Card
The Paper Tree Enchanted Forest – Die Cut Collection
The Paper Tree Enchanted Forest – Essential Coloured Card Collection
The Paper Tree Enchanted Forest – Insert Collection
The Paper Tree Enchanted Forest – Decorative Paper Collection
The Paper Boutique Lovely Lattice – Posy Embellishment Die Collection
Peach Card
White Card
Green Card
Pearl Bead
Wet Glue / Double Sided Tape
Foam Pads
Instructions:
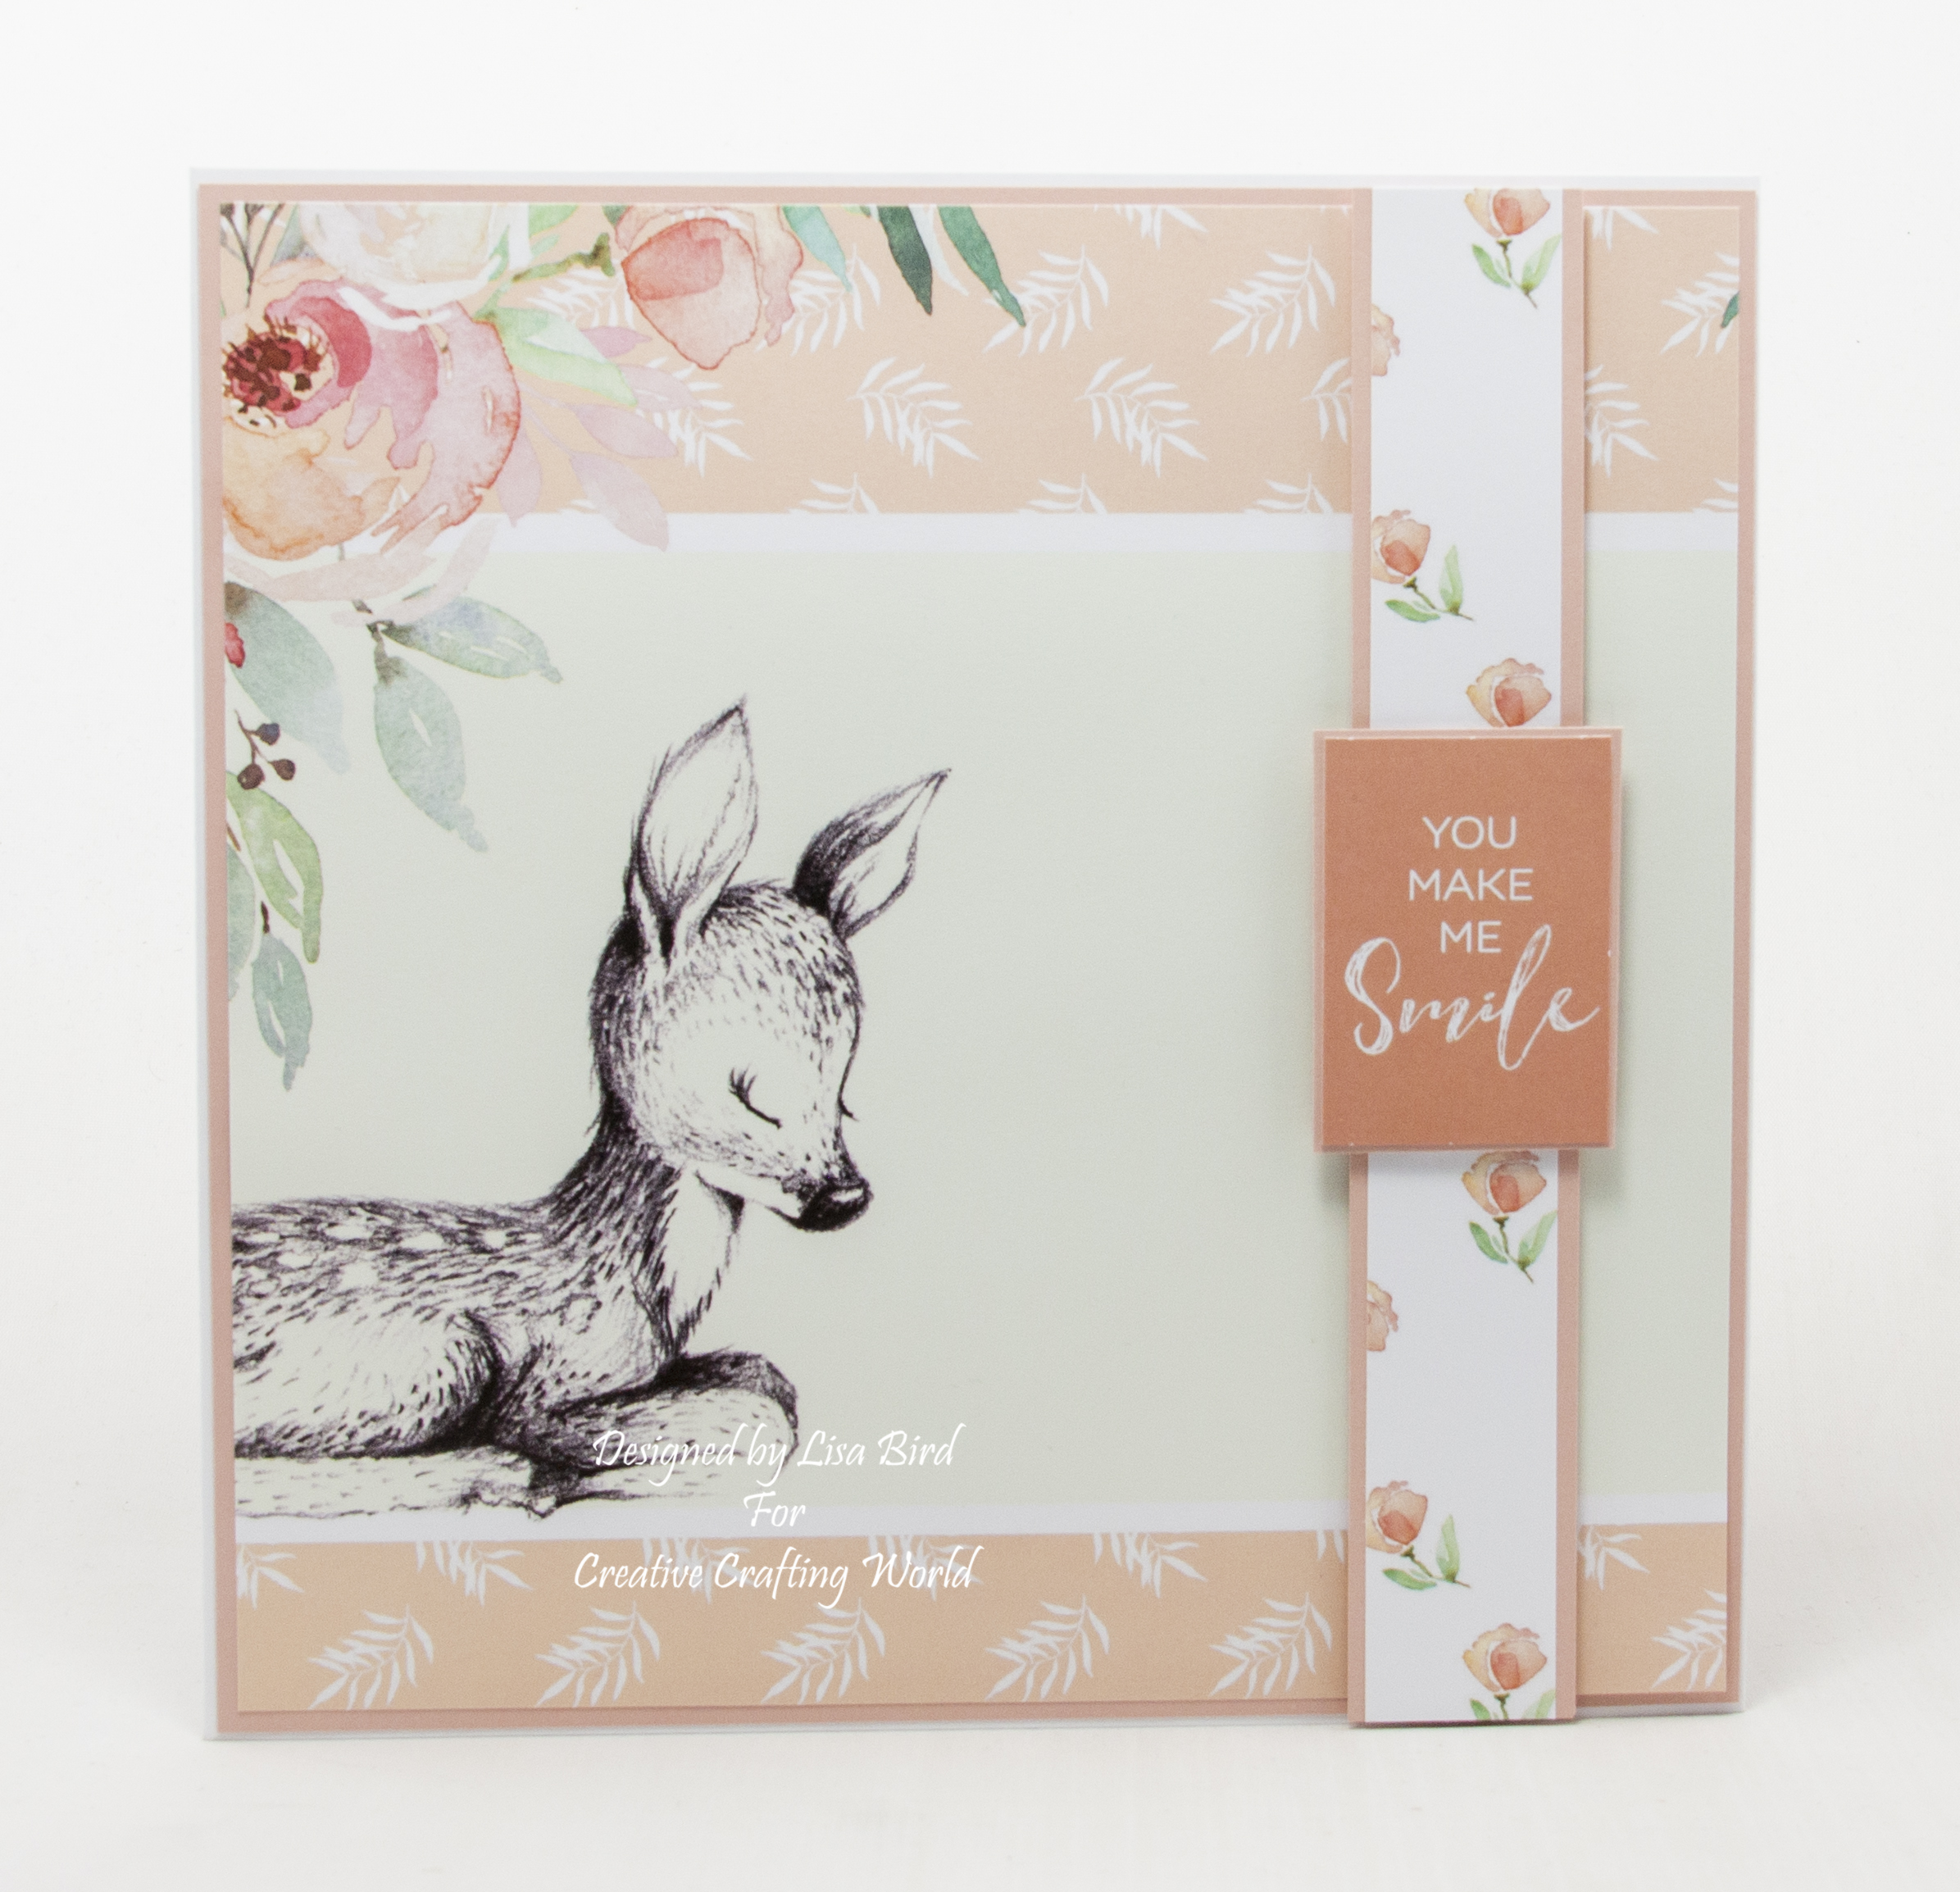
You will need one insert, one coloured card, three patterned papers, one small sentiment and three square toppers.
Layer one:
Cut a square from peach card measuring 20 cms by 20 cms.
Cut a square from the insert measuring 19.5 cms by 19.5 cms.
Matt and layer together and attach to the front of the card base.
Layer two:
Cut a piece from peach card measuring 20 cms by 3 cms.
Cut a piece from the first paper measuring 20 cms by 2.5 cms.
Matt and layer together and attach to the front of the card base on the right using foam pads.
Layer three:
Cut a piece from peach card measuring 5.5 cms by 4 cms.
Matt and layer together with the sentiment.
Attach to the centre of layer two.
Layer four:
Cut two squares from peach card measuring 20 cms by 20 cms.
Cut two squares from the second paper measuring 19.5 cms by 19.5 cms.
Matt and layer together and attach each to the inside of the card base.
Layer five:
Cut the DL card in half and fold one piece into four.
Cut four pieces from the coloured card measuring 5.5 cms by 9.5 cms.
Attach each piece to the four sections of the DL card.
Attach the two ends of the DL card strip to the inside of the card base.
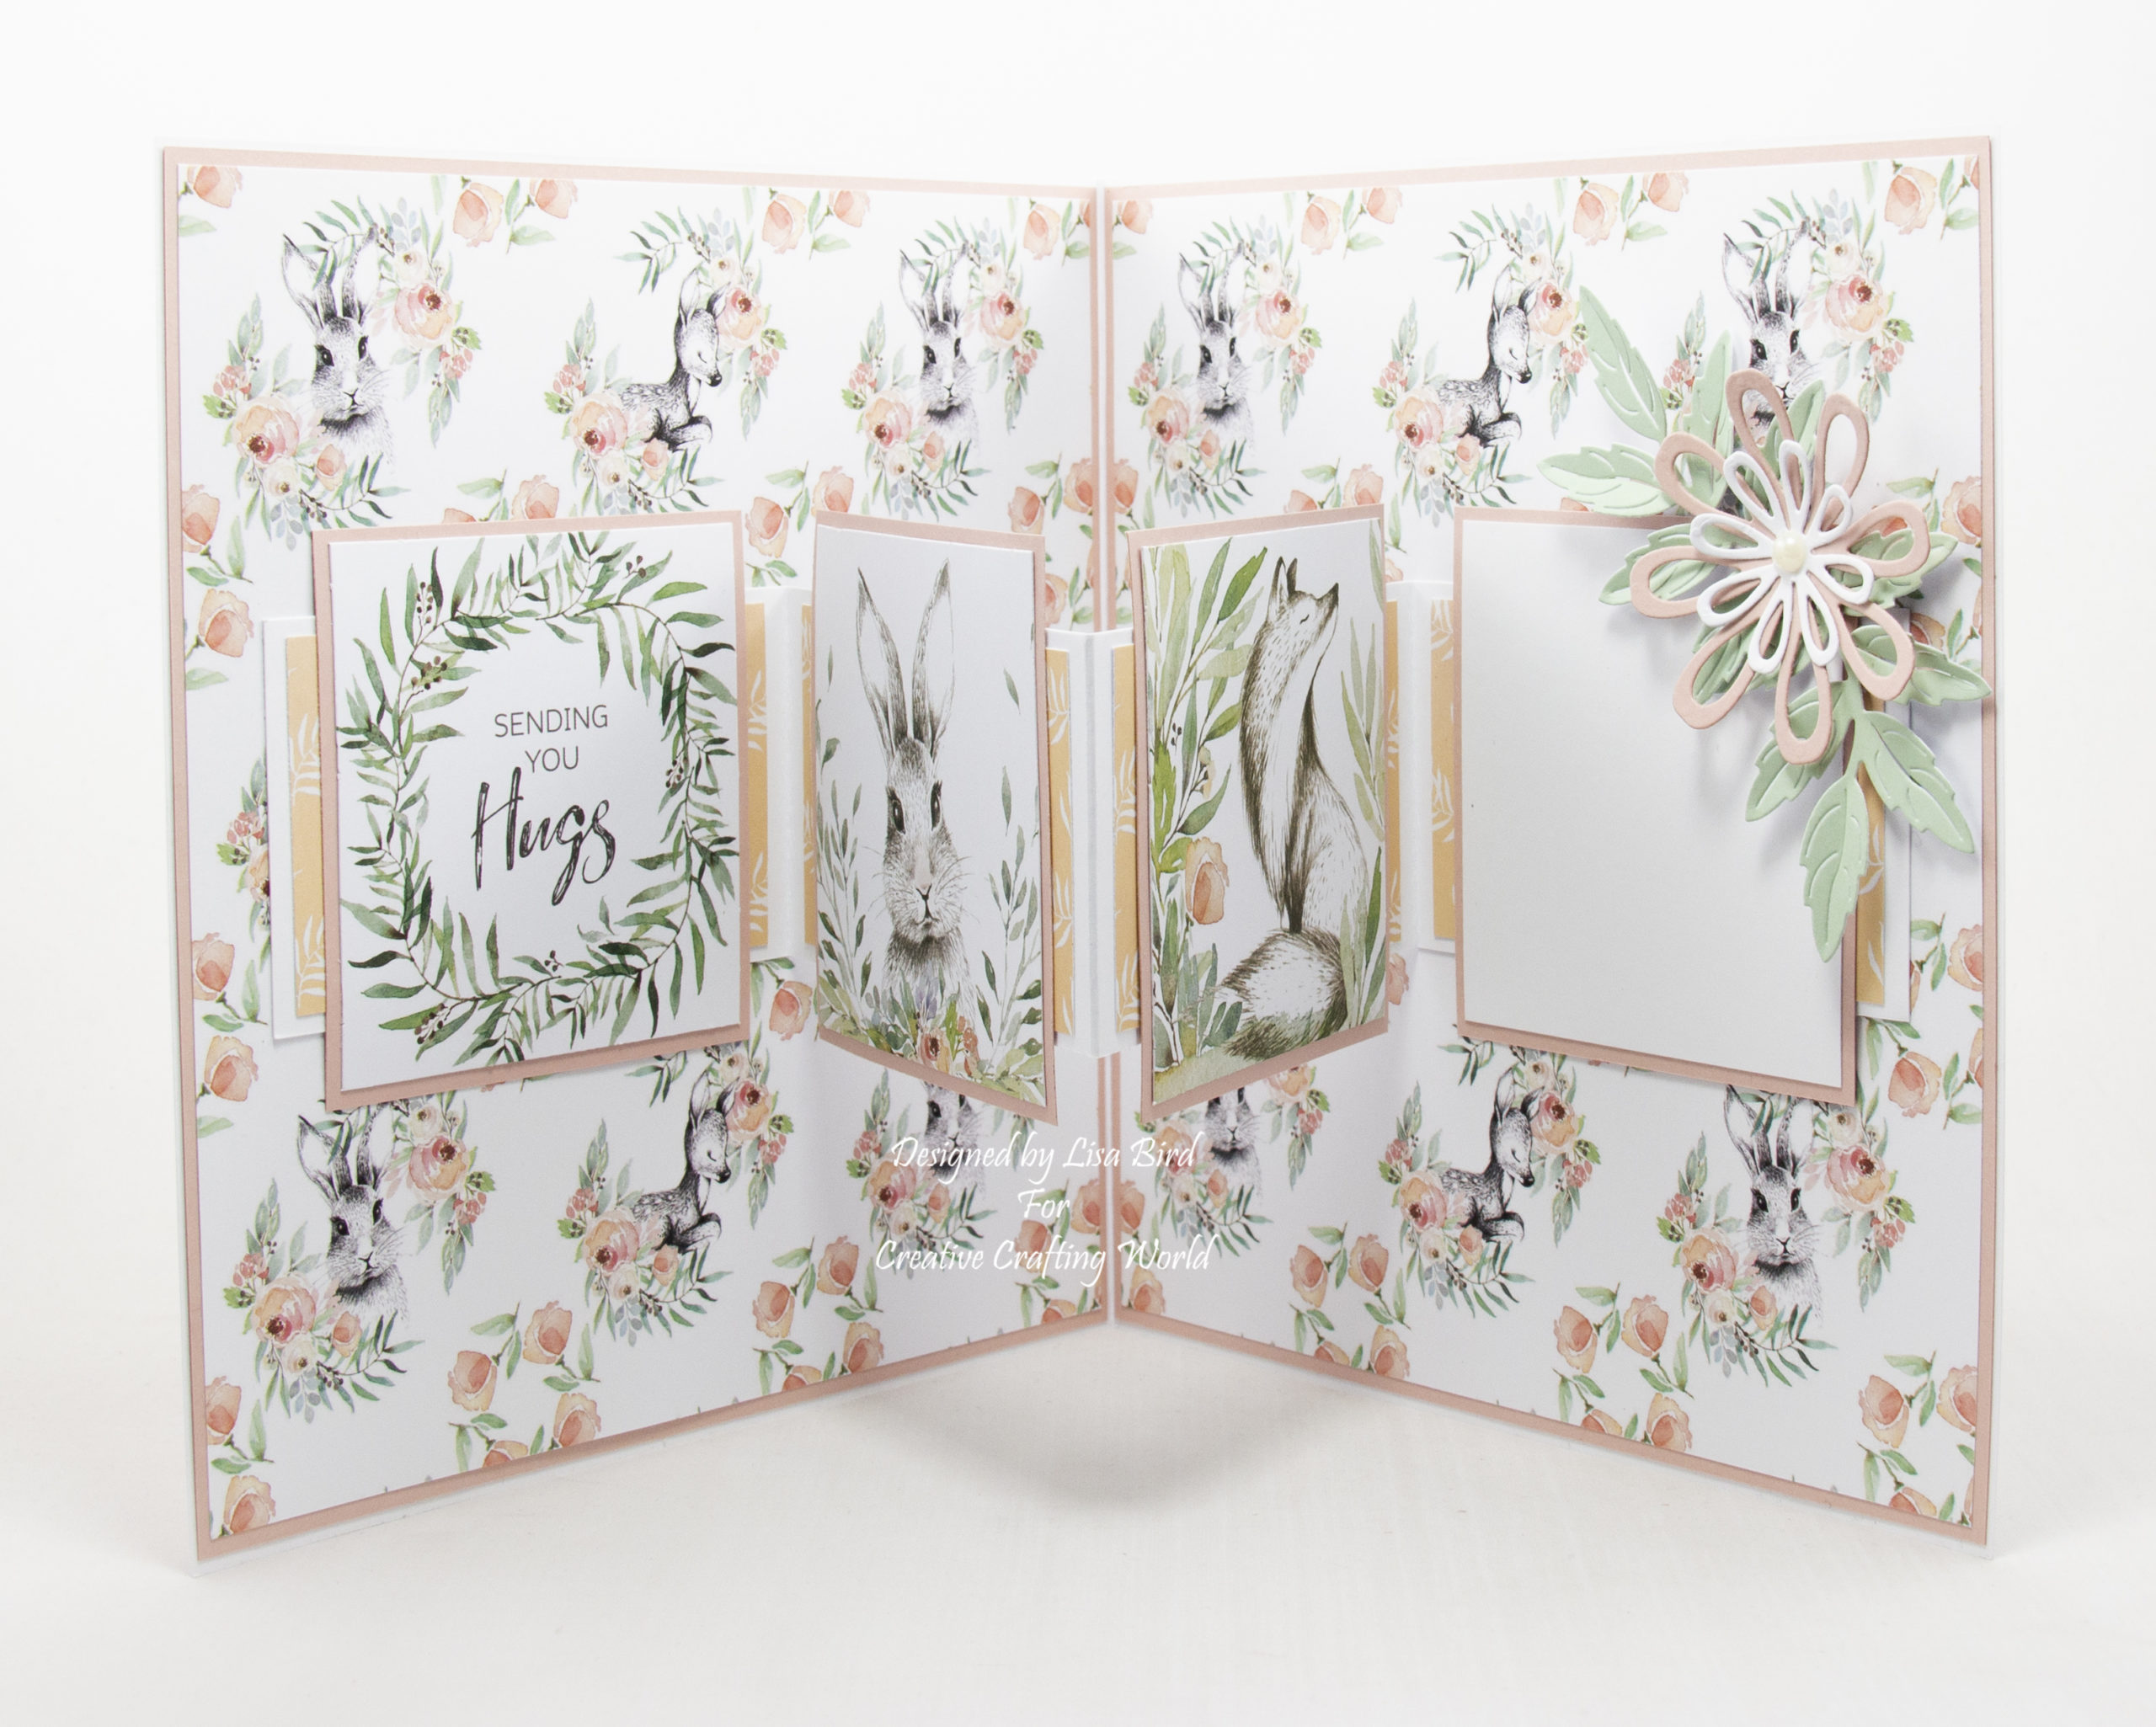
Layer six:
Cut four squares from peach card measuring 8.5 cms by 8.5 cms.
Matt and layer three squares with three square toppers.
Cut a square from white card measuring 8 cms by 8 cms.
Matt and layer with the last peach square.
Attach all to layer five.
Layer six:
Using a flower from the die set, make a flower using peach and white card.
Using the leaf die, cut two from green card.
Attach the leaves to the inside of the card base adding the flower.
To finish add a pearl bead to the centre of the flower.
………………………………………………………………………….
Thank you for visiting my blog and please feel free to follow and make any of my handmade card tutorials.
If you would like to see other cards using Creative Crafting World products please have a look here:
Pink Paradise : Life Shouldn’t Only Be Lived
Springtime Pals – The Best Nan
The Walled Garden – Especially For You
Wickedly Wonderful Dies And Paper Kit Collection
Garden Visitors Cd-Rom And Paper Kit Samples
Floral Daze – The Most Important Things
Stunning card Ginny x
My Blog As I do Rodos
Wow – super design and so cute!
Hugz Tinz