Here are a selection of handmade cards that I have created for Creative Crafting World.
This paper collection is from The Paper Boutique brand called Floral Daze.
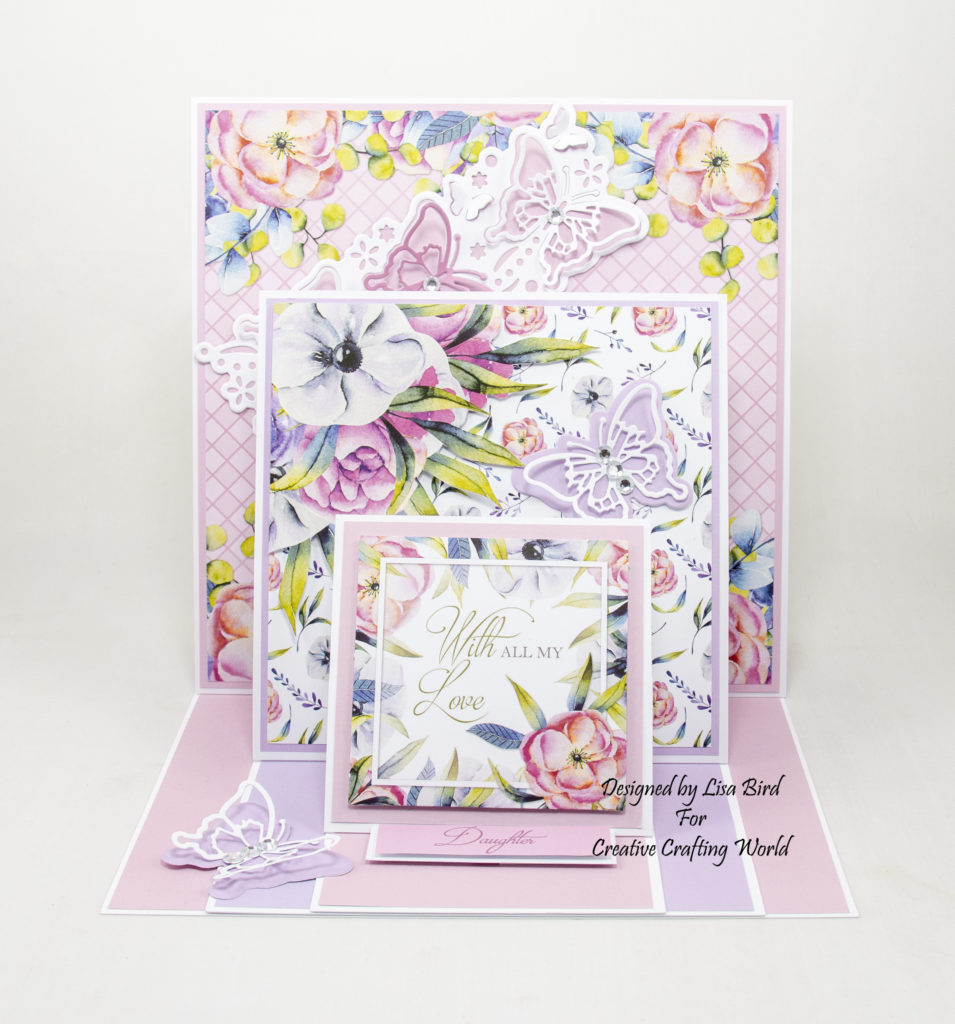
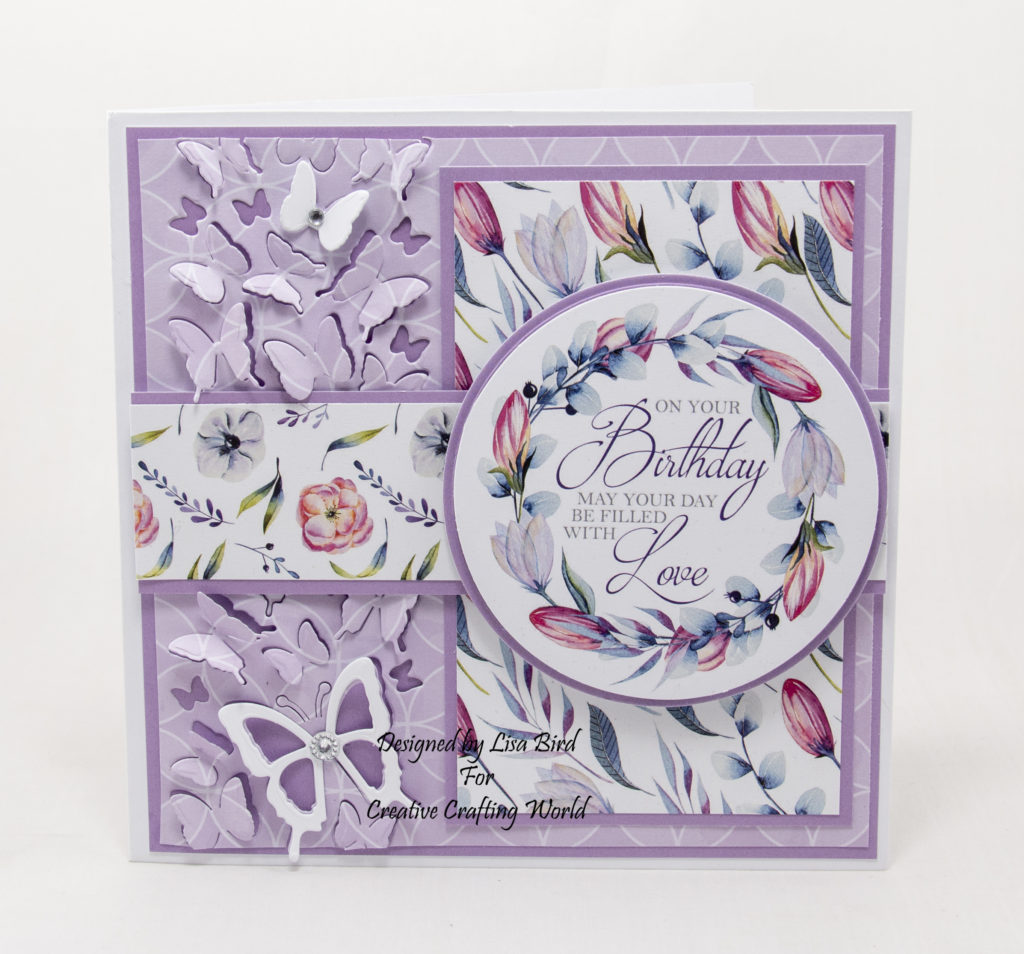
Card One
A tripe easel card
Here is a tutorial on how I created this card.
You will need :
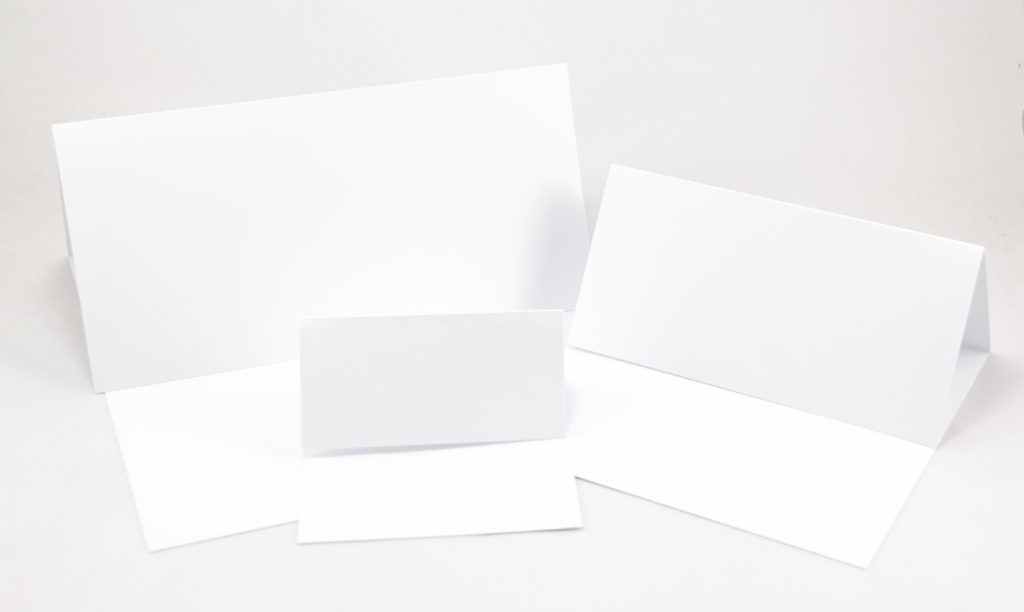
8″ by 8″ White Card
6″ By 6″ White Card
4″ By 4″ White Card
The Paper Boutique Floral Daze – Paper Kit
The Paper Boutique Floral Daze – Embellishment Pad
The Paper Boutique Floral Daze – Insert Collection
The Paper Boutique Floral Daze – Coloured Card Collection
The Paper Boutique Blissful Butterflies – Butterfly Flutter Border Die Collection
White Card
Wet Glue / Double Sided Tape
Foam Pads
Instructions:
Choose three coloured cards, two papers, one insert with flower corners, one square topper and one sentiment from the embellishment pad.
Fold the front of each card base in half to make them into easel cards.
Layer one:
8″ by 8″ card base
Cut a square from white card measuring 20.3 cms by 20.3 cms.
Cut a square from the first coloured card measuring 20 cms by 20 cms.
Cut a square from the first paper measuring 19.5 cms by 19.5 cms.
Matt and layer together and attach to the card base on the front fold.
Next cut a square from the first coloured card measuring 20 cms by 20 cms.
Attach to the bottom of the card base.
Layer two:
6″ by 6″ card base
Cut a square from white card measuring 15 cms by 15 cms.
Cut a square from the second coloured card measuring 14.5 cms by 14.5 cms.
Cut a square from the second paper measuring 14 cms by 14 cms.
Matt and layer together and attach to the card base on the front fold.
Next cut a square from the second coloured card measuring 14.5 cms by 14.5 cms.
Attach to the bottom of the card base.
Layer three:
4″ by 4″ card base
Cut a square from white card measuring 9.5 cms by 9.5 cms.
Cut a square from the third coloured card measuring 9 cms by 9 cms.
Matt and layer together and add the square topper using foam pads.
Attach to the card base on the front fold.
Next cut a square from the third coloured card measuring 9.5 cms by 9.5 cms.
Attach to the bottom of the card base.
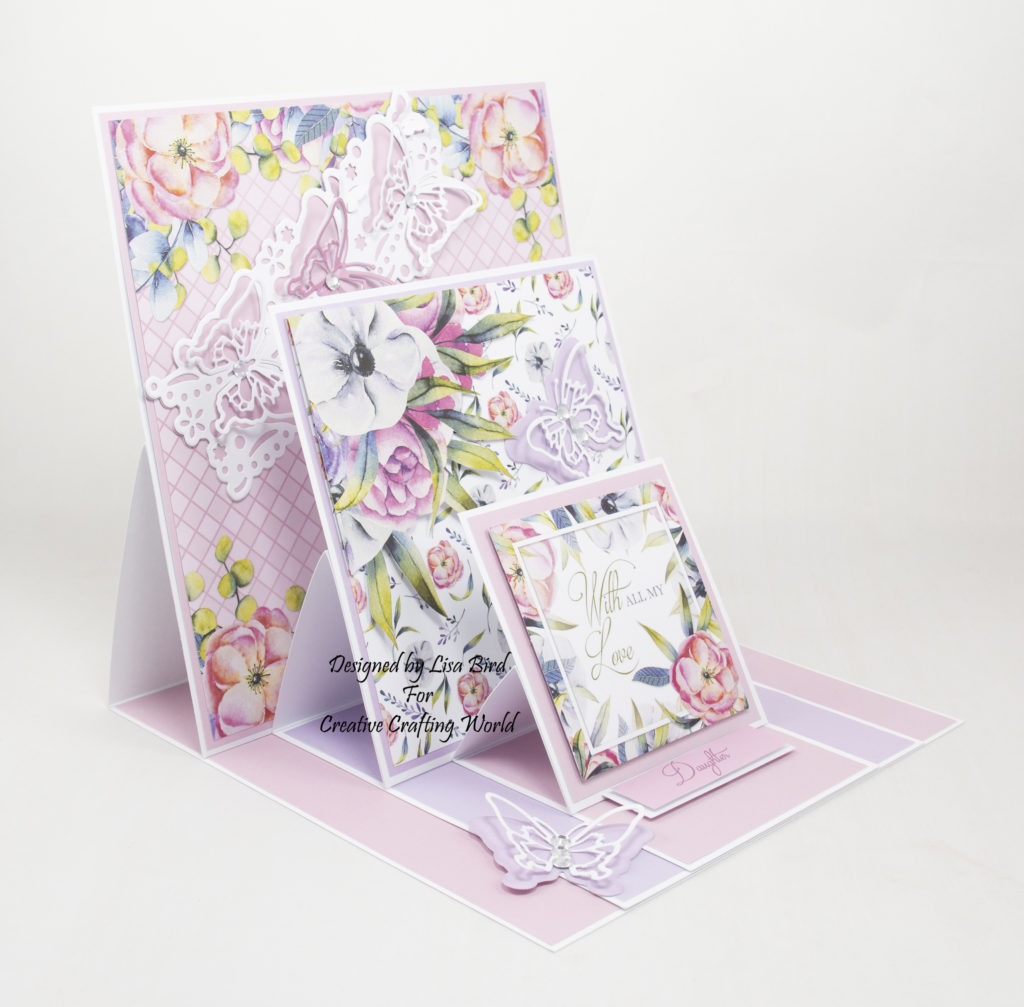
Next attach the 6″ by 6″ card base to the bottom of the 8″ by 8″ card base.
Then attach the 4″ by 4″ card base to the 6″ by 6″ card base.
Make sure that the non of the card bases over lap the front edge of the 8″ by 8″ card base.
Layer four:
Using the butterfly die set, cut the matt die from the third coloured card.
Cut the butterfly die from white card.
Matt and layer together and attach to the 8″ by 8″ card base.
Cut the centre butterfly embellishment die from the third coloured card..
Attach to the centre butterfly on the main die cut.
Add silver gems to the centre of the butterflies.
Layer five:
Using the butterfly embellishment dies, cut the matt die from the second coloured card.
Cut the butterfly dies from white card.
Matt and layer together and attach to the card base.
Add silver gems to the centre of the butterflies.
Layer six:
Cut a piece from white card measuring 2.5 cms by 7.5 cms.
Matt and layer with the sentiment using foam pads.
Attach to the bottom of the 4″ by 4″ card base.
This will act as a stopper for the front of the card base.
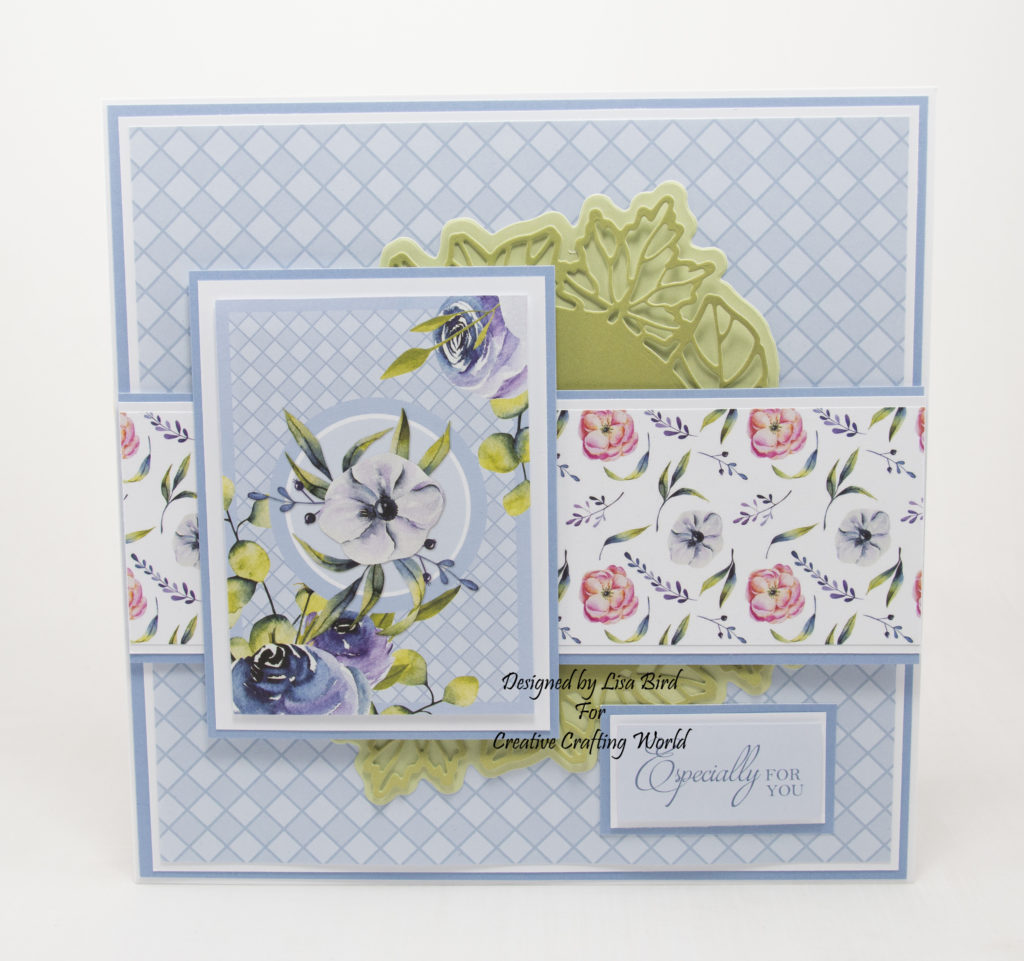
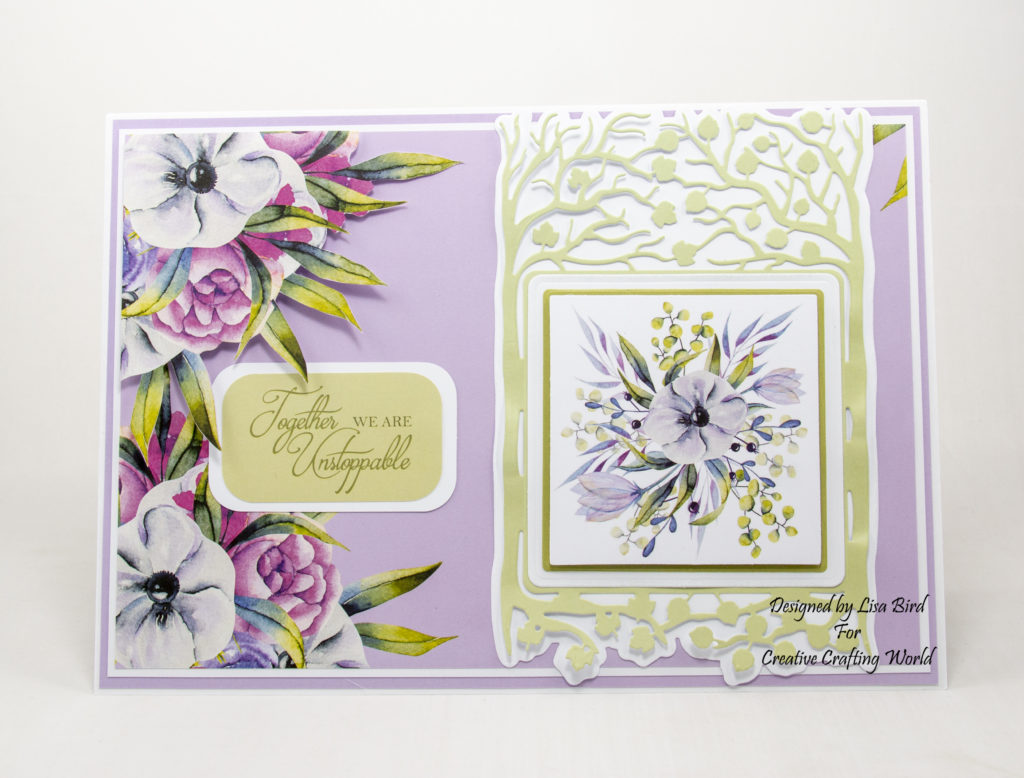
Card Two
8″ by 8″ Card
Here is a tutorial on how I created this card.
You will need :
8″ by 8″ White Card
The Paper Boutique Floral Daze – Paper Kit
The Paper Boutique Floral Daze – Embellishment Pad
The Paper Boutique Floral Daze – Coloured Card Collection
The Paper Boutique A Whisper Of Autumn – Leaf Your Troubles Behind Die Collection
White Card
Wet Glue / Double Sided Tape
Foam Pads
Instructions:
Choose two papers, three coloured cards, one topper and sentiment from the embellishment pad.
Layer one:
Cut a square from the first coloured card measuring 20 cms by 20 cms.
Cut a square from white card measuring 19.5 cms by 19.5 cms.
Then cut a square from the first paper measuring 19 cms by 19 cms.
Matt and layer together and attach to the card base.
Layer two:
Using the doily die set, cut the matt die from the second coloured card.
Cut the decorative die from third coloured card.
Matt and layer together and attach to the centre of the card base at a slight angle.
Layer three:
Cut a piece from the first coloured card measuring 7 cms by 20 cms.
Cut a piece from white card measuring 6.5 cms by 20 cms.
Cut a piece from the second paper measuring 6 cms by 20 cms.
Matt and layer together and attach to the card base across the centre using foam pads, over lapping the last two layers.
Layer four:
Cut a piece from the first coloured card measuring 12 cms by 9 cms.
Cut a piece from white card measuring 11.5 cms by 8.5 cms.
Matt and layer together.
Add the topper using foam pads and attach to layer three on the left.
Layer five:
Cut a piece from the first coloured card measuring 3 cms by 5.5 cms.
Cut a piece from white card measuring 2.5 cms by 5 cms.
Matt and layer together.
Add the sentiment using foam pads and attach to the card base.
Card Three
A5 Card
Here is a tutorial on how I created this card.
You will need :
A5 White Card
The Paper Boutique Floral Daze – Paper Kit
The Paper Boutique Floral Daze – Insert Collection
The Paper Boutique Floral Daze – Embellishment Pad
The Paper Boutique Floral Daze – Coloured Card Collection
White Card
Corner Punch
Wet Glue / Double Sided Tape
Foam Pads
Instructions:
Choose two of the same flower inserts, one coloured card, one paper and one long topper and sentiment from the embellishment pad.
Layer one:
Cut a piece from coloured card measuring 14.5 cms by 20.5 cms.
Cut a piece from the first insert measuring 14 cms by 20 cms.
Matt and layer together and attach to the card base.
Layer two:
Cut a piece from white card measuring 13 cms by 6 cms.
Cut a piece from coloured card measuring 12.5 cms by 5.5 cms.
Cut a piece from the paper measuring 12 cms by 5 cms.
Using a corner punch cut the bottom corners of each.
Matt and layer together and attach to the card base on the left.
Layer three:
Cut a piece from coloured card measuring 8 cms by 16 cms.
Cut a piece from white card measuring 7.5 cms by 15.5 cms.
Using the corner punch cut each of the corners along with the long topper.
Matt and layer together using foam pads.
Attach to the card base slightly over lapping layer two.
Layer four:
Cut a piece from white card measuring 3 cms by 5.5 cms.
Matt and layer with the sentiment using foam pads.
Attach to the card base slightly over lapping layer two and three.
Layer five:
From the second insert cut out a few flowers.
Then attach them to the same image on the card base using double foam pads.
Card Four
7″ By 10″ Card
Here is a tutorial on how I created this card.
You will need :
7″ By 10″ White Card
The Paper Boutique Floral Daze – Insert Collection
The Paper Boutique Floral Daze – Paper Kit
The Paper Boutique Floral Daze – Embellishment Pad
The Paper Boutique Floral Daze – Coloured Card Collection
The Paper Boutique A Whisper Of Autumn – You Are Tree-mendous Die Collection
White Card
Corner Punch
Wet Glue / Double Sided Tape
Foam Pads
Instructions:
Choose two of the same flower insert, three coloured cards, one square topper from the paper kit and a sentiment from the embellishment pad.
Layer one:
Cut a piece from the first coloured card measuring 17.3 cms by 25 cms.
Cut a piece from white card measuring 16.8 cms by 24.5 cms.
Cut a piece from the first insert measuring 16.3 cms by 24 cms.
Matt and layer together and attach to the card base.
Layer two:
Using the die set, cut the matt die from white card.
Cut the decorative die from the second coloured card.
Cut the large square die from white card.
Cut the small square die from the third coloured card.
Matt and layer together.
Add the square topper using foam pads.
Attach to the card base on the right.
Layer three:
Cut a piece from white card measuring 4.5 cms by 7.5 cms.
Round each corner using the corner punch.
Next round off each corner of the sentiment.
Matt and layer together and attach to the card base on the left.
Layer four:
Using the second insert, cut out one of the corner flowers.
Attach to the same image on the card base using double foam pads.
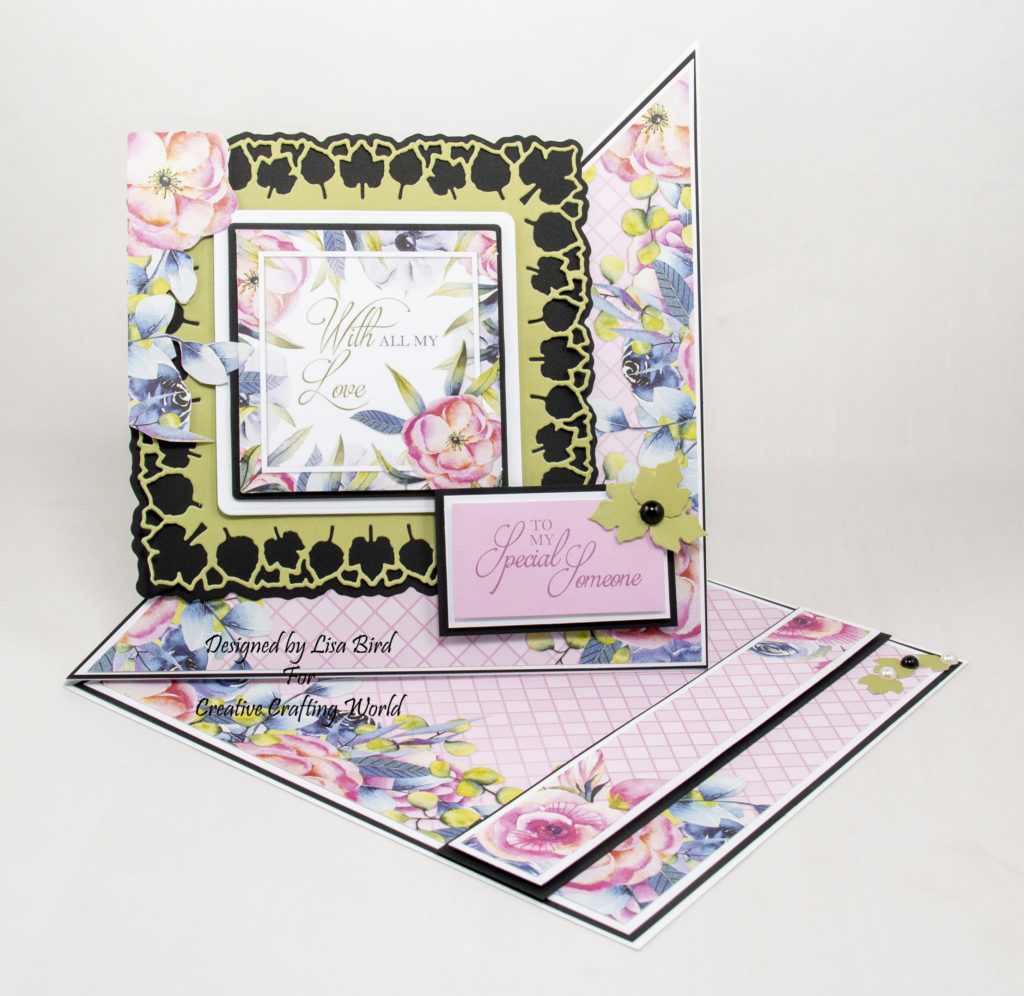
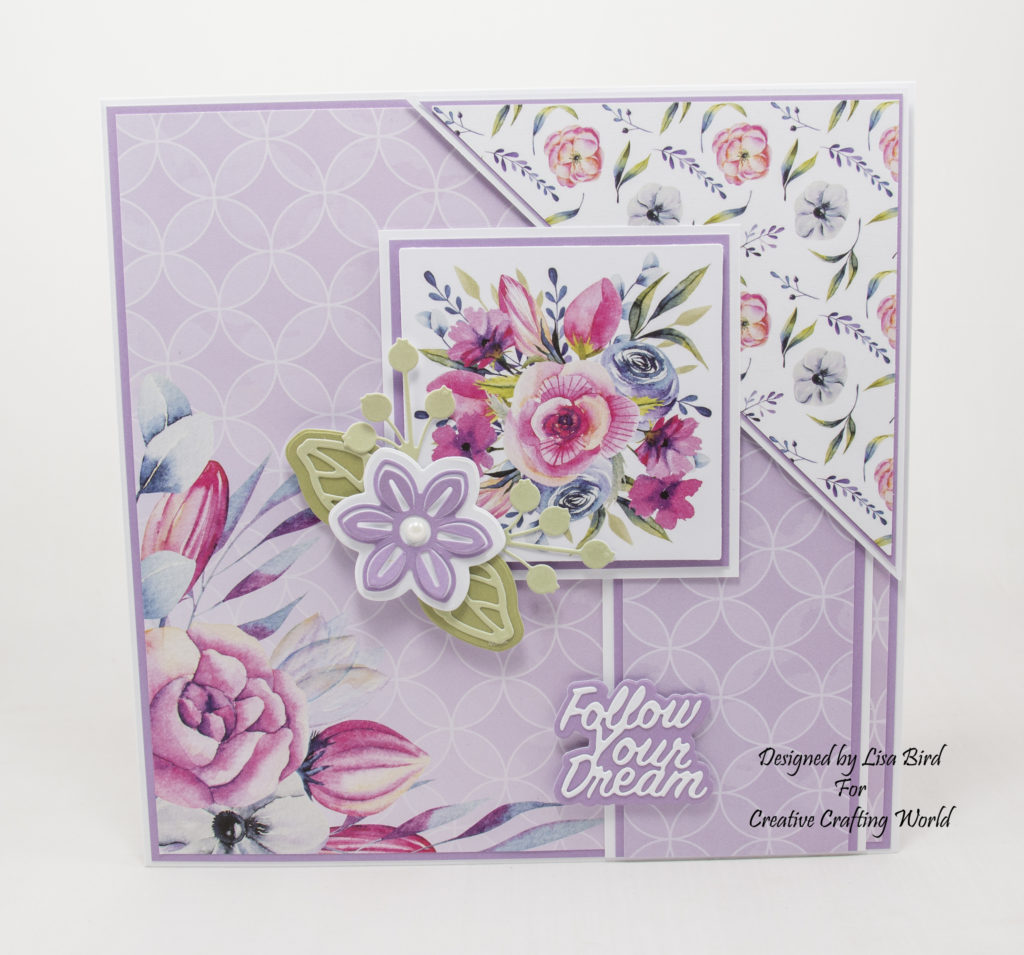
Card Five
8″ By 8″ Corner Easel Card
Here is a tutorial on how I created this card.
You will need :
8″ By 8″ White Card
The Paper Boutique Floral Daze – Insert Collection
The Paper Boutique Floral Daze – Paper Kit
The Paper Boutique Floral Daze – Embellishment Pad
The Paper Boutique Floral Daze – Coloured Card Collection
The Paper Boutique A Whisper Of Autumn – Follow Your Dream Die Collection
White Card
Black Card
Black Pearl Beads
White Pearl Beads
Wet Glue / Double Sided Tape
Foam Pads
Instructions:
Choose two of the same papers, one coloured card, one square topper from the paper kit and a sentiment from the embellishment pad.
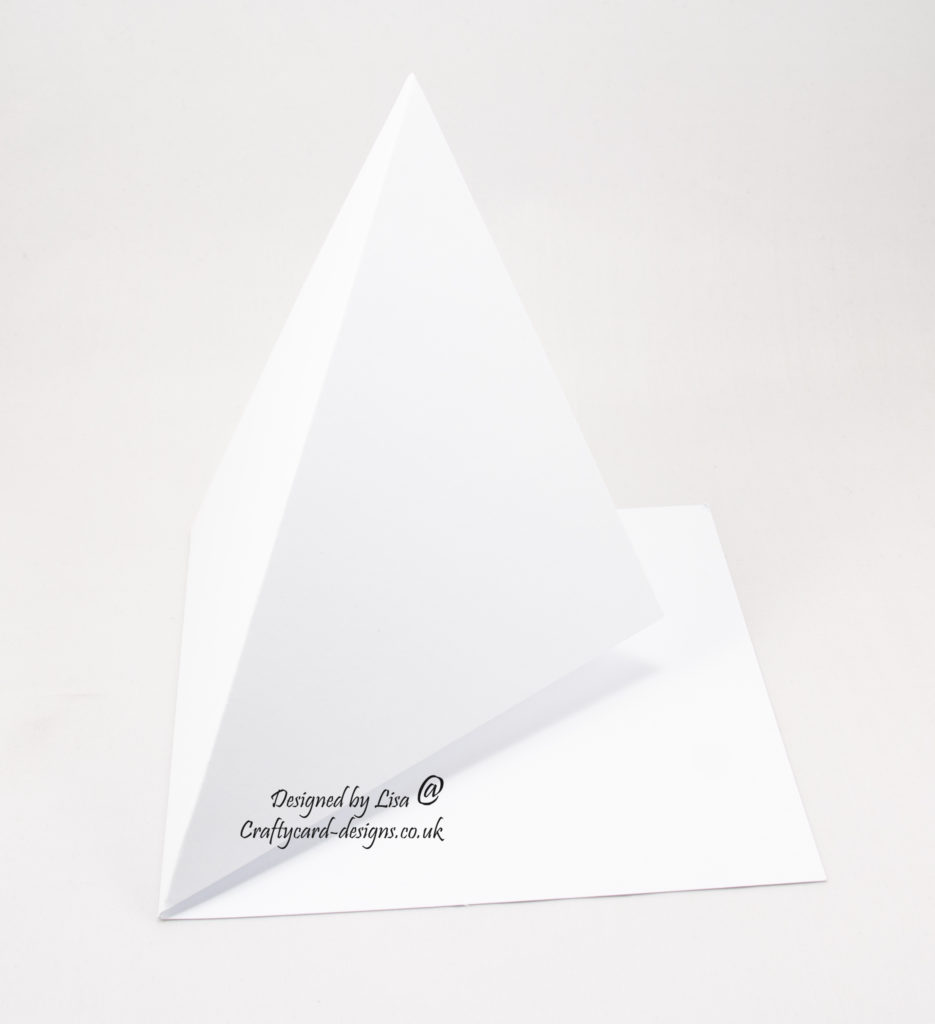
To make the twisted easel card base score the 8″ by 8″ card front from corner to corner and fold inwards.
Layer one:
Cut a square from black card measuring 20 cms by 20 cms.
Cut a square from white card measuring 19.5 cms by 19.5 cms.
Cut a square from the paper measuring 19 cms by 19 cms.
Matt and layer together and attach to the bottom of the card base.
Layer two:
Cut a square from black card measuring 20 cms by 20 cms.
Cut a square from white card measuring 19.5 cms by 19.5 cms.
Cut a square from the paper measuring 19 cms by 19 cms.
Cut each in half from corner to corner.
Matt and layer one half of each together and attach to the front fold of the card base.
Layer three:
Cut a piece black card measuring 20 cms by 5.5 cms.
Cut a piece from white card measuring 19.5 cms by 5 cms.
Cut a piece from the paper measuring 19 cms by 4.5 cms.
Matt and layer together and attach to the bottom of the card base using foam pads.
This will act as a stopper for the front of the card base.
Layer four:
Using the die set, cut the matt die from black card.
Cut the decorative die from coloured card, save the leaves that fall out.
Cut the large square die from white card.
Cut the small square die from black card.
Matt and layer together.
Add the square topper using foam pads.
Attach to the front fold of the card base.
Layer five:
Cut a piece from black card measuring 4.5 cms by 7.5 cms.
Cut a piece from white card measuring 4 cms by 7 cms.
Matt and layer together.
Add the sentiment using foam pads.
Attach to the bottom right on the front fold of the card base.
Layer six:
Using the leaves from the decorative die cut, add three to the corner of the sentiment along with a black pearl bead.
Then add three leaves to the bottom right corner of the card base, along with a black pearl and and two white pearl beads.
To finish cut out a piece of the flower image from the paper and attach to the left corner of the decorative die cut using foam pads.
Card Six
6″ By 6″ Card
Here is a tutorial on how I created this card.
You will need :
6″ By 6″ White Card
The Paper Boutique Floral Daze – Paper Kit
The Paper Boutique Floral Daze – Embellishment Pad
The Paper Boutique Floral Daze – Coloured Card Collection
The Paper Boutique Blissful Butterflies – Butterfly Flurries Border Die Collection
White Card
Silver Gems
Wet Glue / Double Sided Tape
Foam Pads
Instructions:
Choose two papers, two coloured cards, one topper and sentiment from the embellishment pad.
Layer one:
Cut a square from the first coloured card measuring 14.5 cms by 14.5 cms.
Attach to the card base.
Layer two:
Cut a square from each of the papers.
Cut each in half corner to corner.
Matt one of each to the card base.
Layer three:
Cut a square from white card measuring 11 cms by 11 cms.
Matt and layer with the topper.
Attach to the card base using foam pads.
Layer four:
Cut a piece from white card measuring 4 cms by 7 cms.
Matt and layer together with the sentiment.
Attach to the card base using foam pads slightly over lapping the last two layers.
Layer five:
Using the small butterflies from the die collection, cut two from the second coloured card.
Attach to the case base adding a small silver gem to the centres.
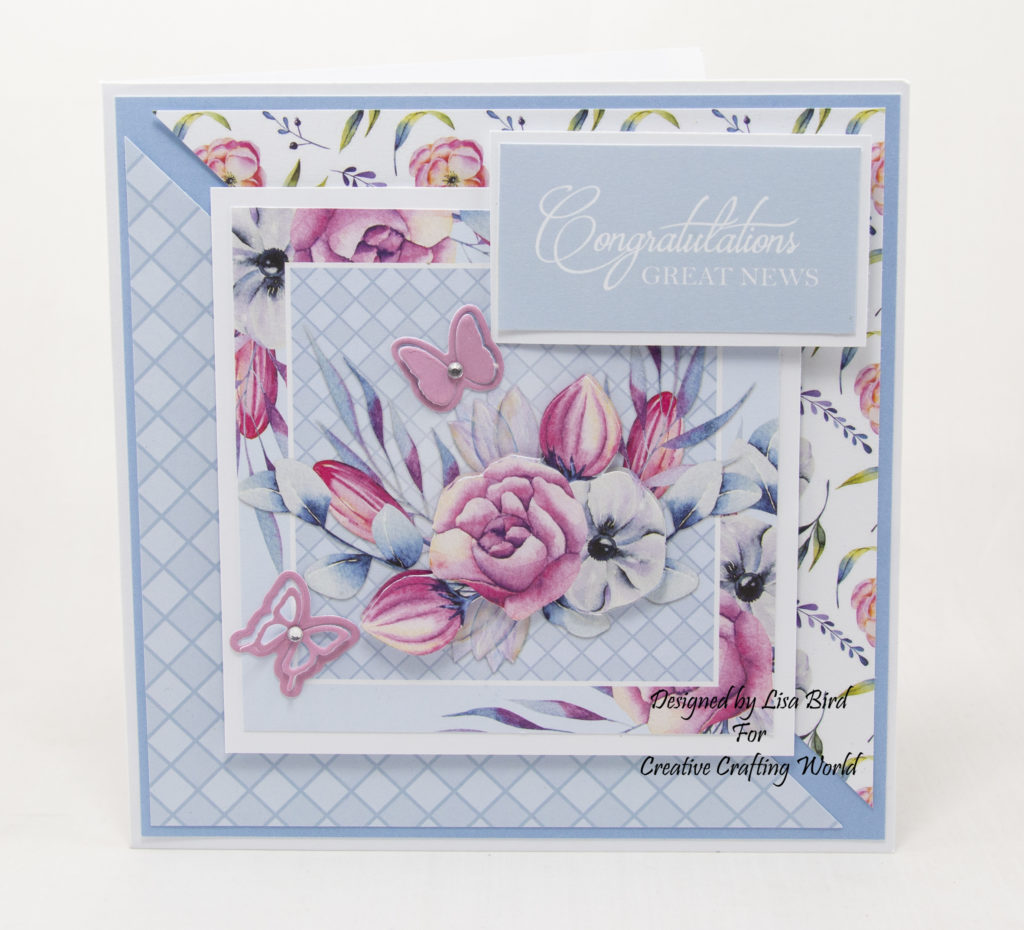
Card Seven
8″ By 8″ Card
Here is a tutorial on how I created this card.
You will need :
8″ By 8″ White Card
The Paper Boutique Floral Daze – Paper Kit
The Paper Boutique Floral Daze – Coloured Card Collection
The Paper Boutique Blissful Butterflies – Butterfly Beautiful Border Die Collection
The Paper Boutique A Whisper Of Autumn – Leaf Your Troubles Behind Die Collection
White Card
Silver Gems
Wet Glue / Double Sided Tape
Foam Pads
Instructions:
Choose four papers, one coloured card and one circle topper.
Layer one:
Cut a square from coloured card measuring 20 cms by 20 cms.
Cut a square from the first paper measuring 19.5 cms by 19.5 cms.
Matt and layer together and attach to the card base.
Layer two:
Cut a piece from white card measuring 18.5 cms by 4.5 cms.
Cut a piece from coloured card measuring 18 cms by 4 cms.
Cut a piece from the first paper measuring 17.5 cms by 3.5 cms.
Matt and layer together and attach to the card base on the left.
Layer three:
Cut a piece from white card measuring 16.5 cms by 13.5 cms.
Cut a piece from coloured card measuring 16 cms by 13 cms.
Cut a piece from the second paper measuring 15.5 cms by 12.5 cms.
Matt and layer together and attach to the card base slightly over lapping the last layer.
Layer four:
Cut a piece from white card measuring 12.5 cms by 7.5 cms.
Cut a piece from coloured card measuring 12 cms by 7 cms.
Cut a piece from the third paper measuring 11.5 cms by 6.5 cms.
Matt and layer together and attach to the card base slightly over lapping layer two and three.
Layer five:
Cut a piece from white card measuring 5.5 cms by 20 cms.
Cut a piece from coloured card measuring 5 cms by 20 cms.
Cut a piece from the second paper measuring 4.5 cms by 20 cms.
Matt and layer together and attach across the centre of the card base using foam pads, slightly over lapping all layers.
Layer six:
Using the circle dies from the whisper of autumn set, cut the large die from white card.
Cut the small die from the first paper.
Matt and layer together and add the circle topper using foam pads.
Attach to layer five on the left.
Layer seven:
Using the blissful Butterfly set, cut the matt die from coloured card.
Cut the butterfly decorative die from white card.
Matt and layer together.
Cut the centre butterfly embellishment die from the first paper.
Attach to the centre butterfly on the main die cut.
Attach to layer five on the right.
To finish add silver gems.
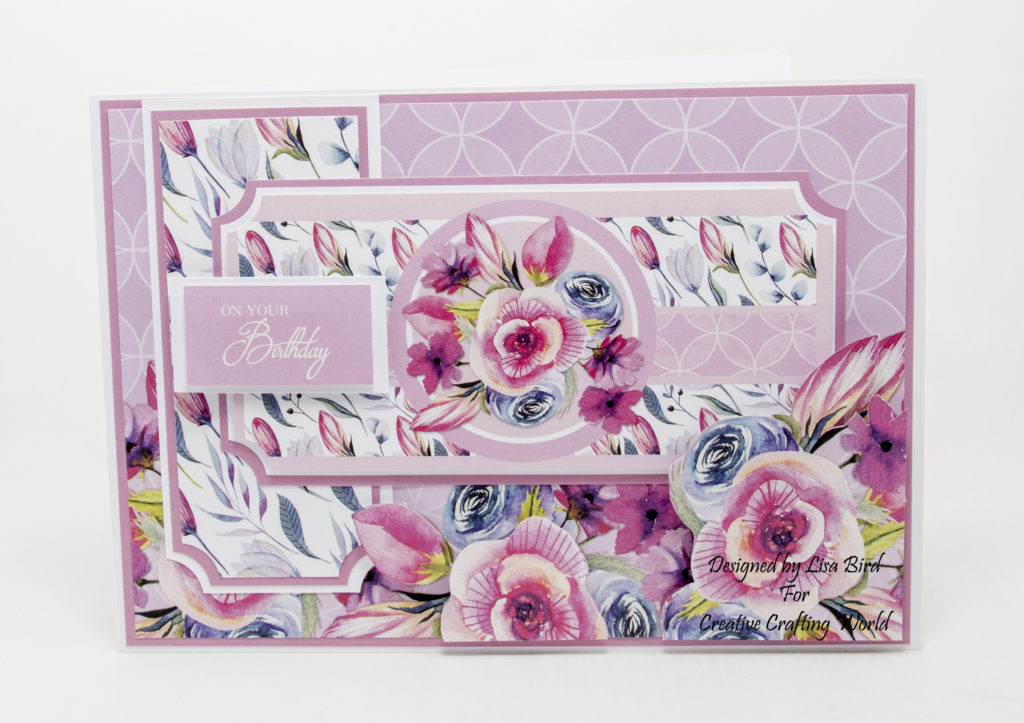
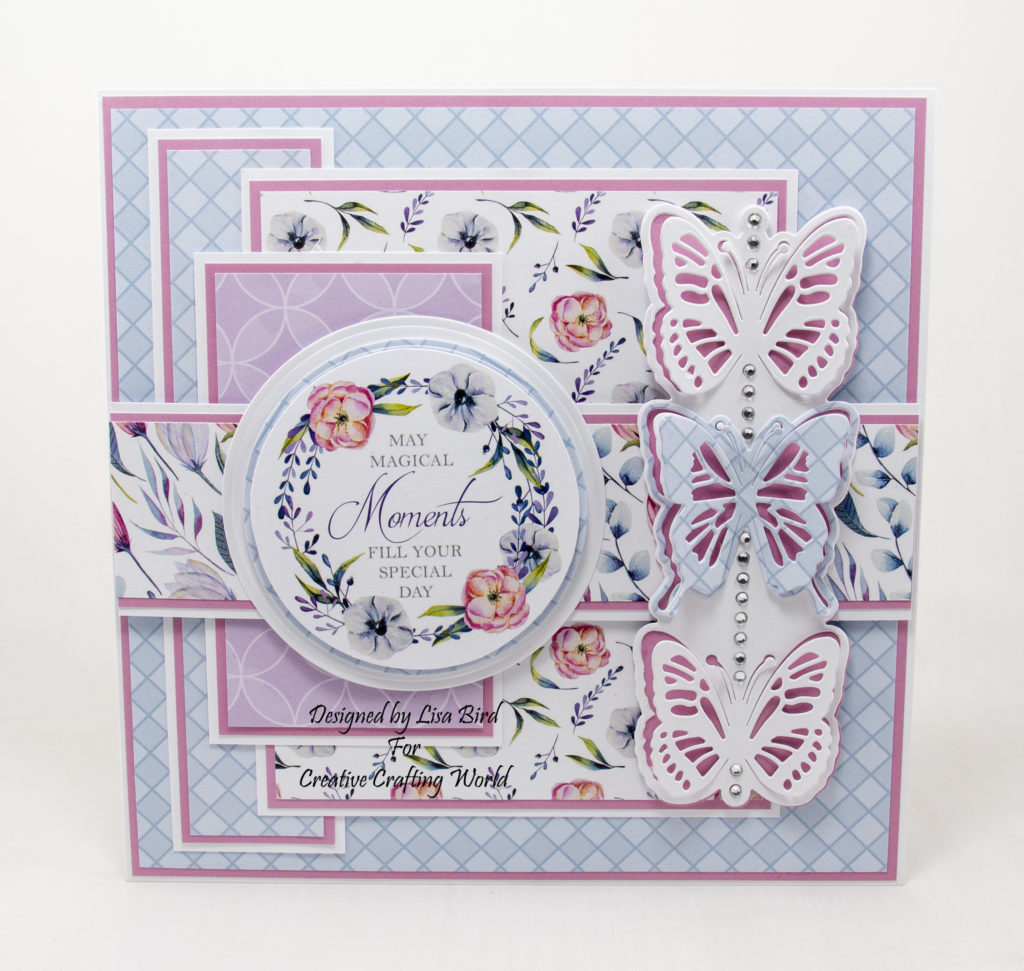
Card Eight
8″ By 8″ Card
Here is a tutorial on how I created this card.
You will need :
8″ By 8″ White Card
The Paper Boutique Floral Daze – Paper Kit
The Paper Boutique Floral Daze – Insert Collection
The Paper Boutique Floral Daze – Coloured Card Collection
The Paper Boutique A Whisper Of Autumn – Embellishment Die Collection
The Paper Boutique A Whisper Of Autumn – Sentiment Volume XIX Die Collection
White Card
White Pearl Bead
Wet Glue / Double Sided Tape
Foam Pads
Instructions:
Choose one insert, three coloured cards, two papers and one square topper.
Layer one:
Cut a square from coloured card measuring 20 cms by 20 cms.
Cut a square from the insert measuring 19.5 cms by 19.5 cms.
Matt and layer together and attach to the card base.
Layer two:
Cut a piece from white card measuring 20 cms by 7 cms.
Cut a piece from coloured card measuring 20 cms by 6.5 cms.
Cut a piece from the first paper measuring 20 cms by 6 cms.
Matt and layer together and attach to the card base on the right.
Layer three:
Cut a square from white card measuring 12.5 cms by 12.5 cms.
Cut a square from coloured card measuring 12 cms by 12 cms.
Cut a square from the second paper measuring 11.5 cms by 11.5 cms.
Cut each in half corner to corner.
Matt and layer one of each together and attach to the card base using foam pads on the top right.
Layer four:
Cut a square from white card measuring 9 cms by 9 cms.
Cut a square from coloured card measuring 8.5 cms by 8.5 cms.
Matt and layer together and add the square topper using foam pads.
Attach to the card base slightly over lapping all layers.
Layer five:
From the embellishment die set, cut the small leaf matt die from the second coloured card.
Cut the leaf die from the third coloured card.
Matt and layer together and attach to bottom left corner of the topper.
Then cut the berry die from the third coloured card.
Attach to leaf die cuts.
Next using the small flower die set, cut the matt die from white card.
Cut the flower die from the first coloured card.
Matt and layer together and attach to the leaf die cuts.
Add a pearl bead to the centre of the flower.
Layer six:
Using a sentiment die, cut the matt die from the first coloured card.
Cut the sentiment from white card.
Matt and layer together and attach to the card base using foam pads.
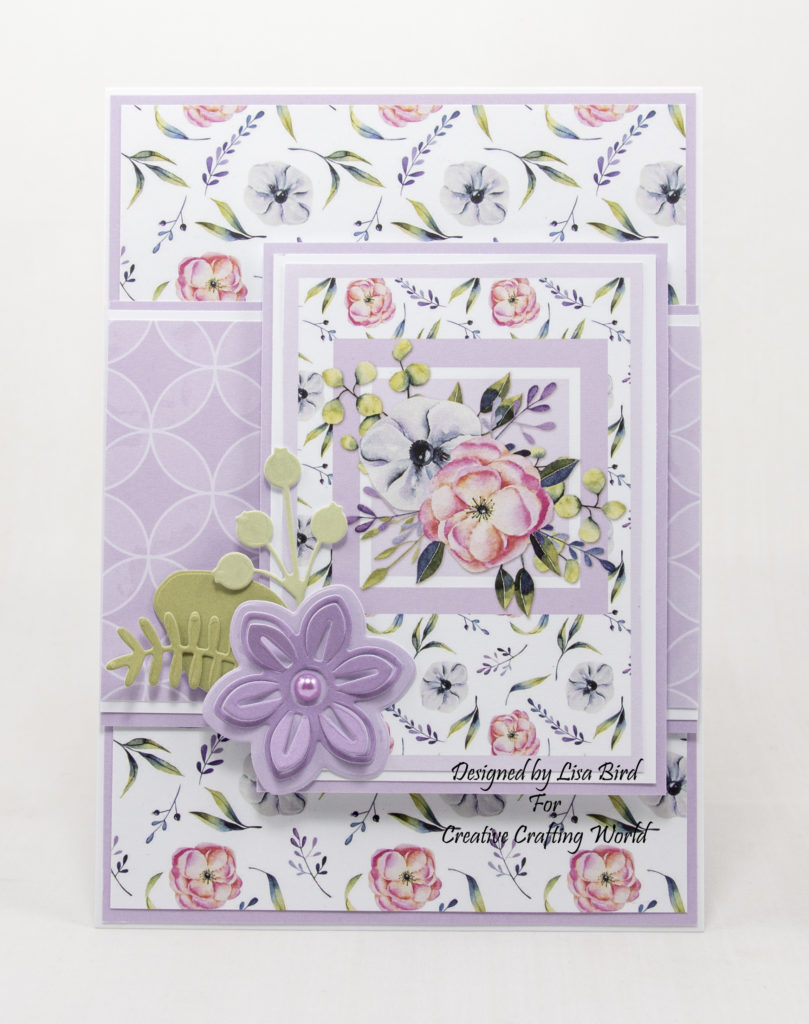
Card Nine
5″ By 7″ Card
Here is a tutorial on how I created this card.
You will need :
7″ By 5″ White Card
The Paper Boutique Floral Daze – Paper Kit
The Paper Boutique Floral Daze – Embellishment Pad
The Paper Boutique Floral Daze – Coloured Card Collection
The Paper Boutique A Whisper Of Autumn – Embellishment Die Collection
White Card
Lilac Pearl Bead
Wet Glue / Double Sided Tape
Foam Pads
Instructions:
Choose two coloured cards, two papers and one rectangle topper from the embellishment pad.
Layer one:
Cut a piece from the first coloured card measuring 17.5 cms by 12.5 cms.
Cut a piece from the first paper measuring 17 cms by 12 cms.
Matt and layer together and attach to the card base.
Layer two:
Cut a piece from the first coloured card measuring 9 cms by 12.5 cms.
Cut a piece from white card measuring 8.5 cms by 12.5 cms.
Cut a piece from the second paper measuring 8 cms by 12.5 cms.
Matt and layer together and attach across the centre of the card base.
Layer three:
Cut a piece from the first coloured card measuring 11.5 cms by 8.5 cms.
Cut a piece from white card measuring 11 cms by 8 cms.
Matt and layer together along with the rectangle topper.
Attach to the card base on the right.
Layer four:
From the embellishment die set, cut the small leaf matt die from the second coloured card.
Cut the fern die from the second coloured card.
Cut the berry die from the third coloured card.
Attach all the the bottom left corner of the topper.
Next using the small flower die set, cut the matt die from the first coloured card card.
Cut the flower die from the four coloured card.
Matt and layer together and attach to the leaf die cuts.
Add a pearl bead to the centre of the flower.
Card Ten
6″ By 6″ Card
Here is a tutorial on how I created this card.
You will need :
6″ By 6″ White Card
The Paper Boutique Floral Daze – Paper Kit
The Paper Boutique Floral Daze – Coloured Card Collection
The Paper Boutique Blissful Butterflies – Butterfly Flurries Border Die
Collection
The Paper Boutique A Whisper Of Autumn – Leaf Your Troubles Behind Die Collection
White Card
Silver Gems
Wet Glue / Double Sided Tape
Foam Pads
Instructions:
Choose one coloured card, three papers and one circle topper.
Layer one:
Cut a piece from coloured card measuring 14.5 cms by 14.5 cms.
Cut a piece from the first paper measuring 14 cms by 14 cms.
Using the main butterfly die, cut into the first paper.
Matt and layer together and attach to the card base.
Layer two:
Cut a piece from coloured card measuring 13 cms by 8 cms.
Cut a piece from the first paper measuring 12.5 cms by 7.5 cms.
Matt and layer together and attach to the card base on the right.
Layer three:
Cut a piece from coloured card measuring 4 cms by 14.5 cms.
Cut a piece from the second paper measuring 3.5 cms by 14.5 cms.
Matt and layer together and attach across the centre of the card base using foam pads.
Layer four:
Using a circle die from the whisper of autumn set, cut the small die from coloured card.
Matt and layer with the circle topper.
Attach to the card base on the right.
Layer five:
Using the butterfly embellishments dies, cut two out from white card.
Attach to the card base and add silver gems to the center of the butterflies.
Layer six:
Cut out the corner flower image from the insert.
Attach to the top corner of the 6″ by 6″ card using foam pads.
………………………………………………………………………….
Thank you for visiting my blog and please feel free to follow and make any of my handmade card tutorials.
It would be great if you left a comment to let me know you’ve visited.
If you would like to see other cards using Creative Crafting World products please have a look here:
A Garden In Provence – It’s Time For Celebration
Festival Of Flowers – Love Always
The Walled Garden – Get Well Soon
Flower Ladybug Love – Happy Anniversary
Morning Whispers – 7″ by 10″ Card Designs
Wow! a wonderful selection today Ginny
My Blog As I do Rodos
Beautiful cards – I love the different designs,
hugz Tinz
These are all beautiful, Lisa. You are very talented xx