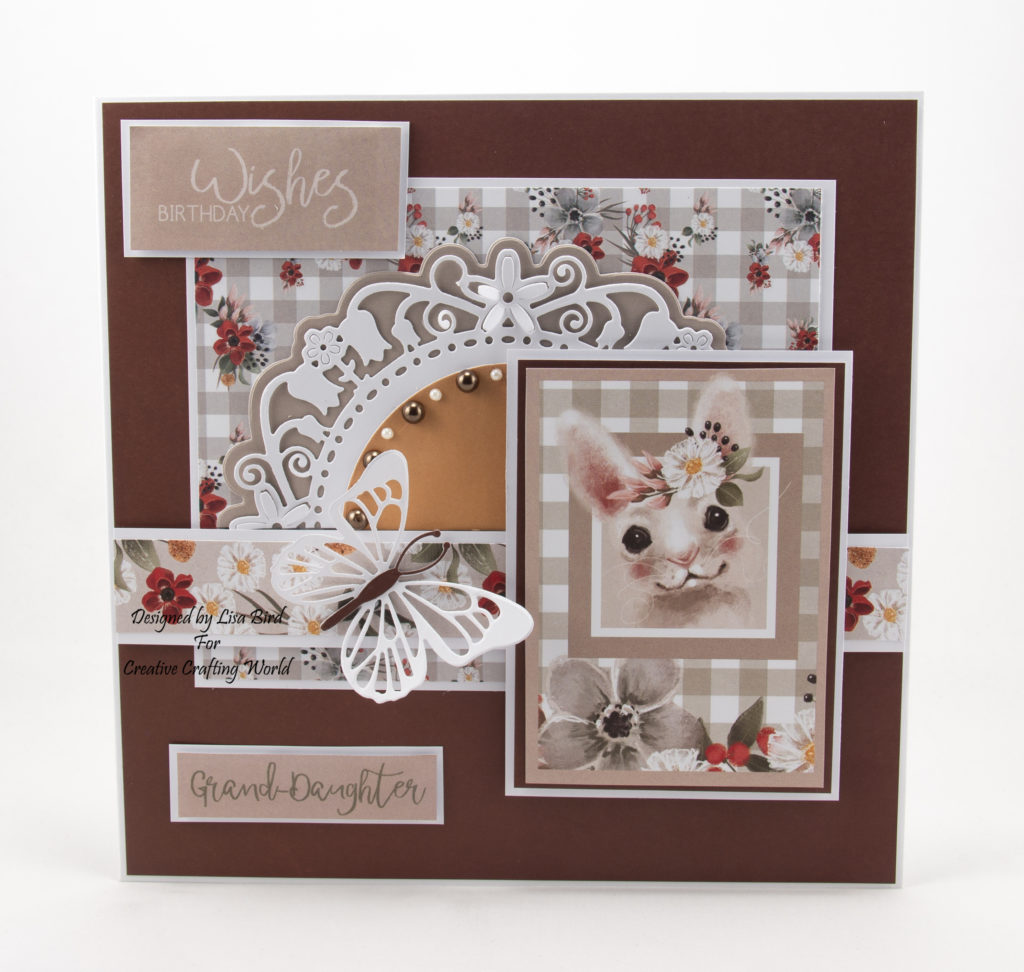
This handmade card has been created using a new paper collection called ‘Happy Days’.
This paper collection is from The Paper Boutique range from Creative Crafting World.
This will be showing on Create and Craft on the 25th of April.
Here is a tutorial on how I created this card.
You will need :
8″ by 8″ White Card
The Paper Boutique Happy Days Paper Kit
The Paper Boutique Happy Days Coloured Card Collection
The Paper Boutique Happy Days Embellishment Pad
The Paper Boutique Springtime Blooms – Little Words Of Love Die Collection
The Paper Boutique Butterfly Ballet – Butterfly Die Collection
White Card
Brown Pearl Beads
Small White Pearl Beads
Wet Glue / Double Sided Tape
Foam Pads
Instructions:
Choose a card from the coloured card collection and cut a square measuring 20 cms by 20 cms.
Attach to the card base.
Cut a piece from white card measuring 16 cms by 13 cms.
Choose a paper from the paper kit and cut a piece measuring 15.5 cms by 12.5 cms.
Matt and layer together.
Attach to the centre of the card base leaving a small border at the top and a larger border at the bottom.
Next using the little words of love die collection, cut the matt layer out in coloured card.
Cut the doily die out in white card.
Then cut the centre circle die out in a different coloured card.
Matt and layer together and cut in half.
Attach half to the last matt and layer.
Cut a piece from white card measuring 20 cms by 3 cms.
Choose a border from the embellishment pad and cut the length to 20 cms.
Matt and layer together.
Attach to the card base using foam pads slightly over lapping the doily die cut.
Choose a topper from the embellishment pad.
Cut a matt layer using coloured card measuring 11 cms by 8 cms.
Cut a matt layer using white card measuring 11.5 cms by 8.5 cms.
Matt and layer together using foam pads.
Attach to the right of the card base using foam pads slightly over lapping all matts and layers.
Make a matching butterfly using a butterfly from the butterfly die collection.
Attach to the left of the card base.
Choose a couple of sentiments from the embellishment pad.
Make matt layers for each sentiment using white card.
Attach each sentiment to the card base.
To finish add some pearl beads to the doily die cut.
Thank you for visiting my blog and please feel free to make any of my card designs.
Please leave a comment and let me know you’ve visited.
If you would like to see other cards using Creative Crafting World products please have a look here:
The Magical Forest – Warmest Wishes
Tropical Dreams – Someone Special
Steampunk Romance – Love And Romance
Perfect Partners Collection, Beyond Alphabet Die Collection-A5 Card Designs
Wonderful card Ginny
My Blog As I do Rodos