Today’s handmade card has been created for the new challenge at I Love Promarkers Blog Challenge #431 that starts today.
We could use any digital image we had in our own crafty stash for this challenge.
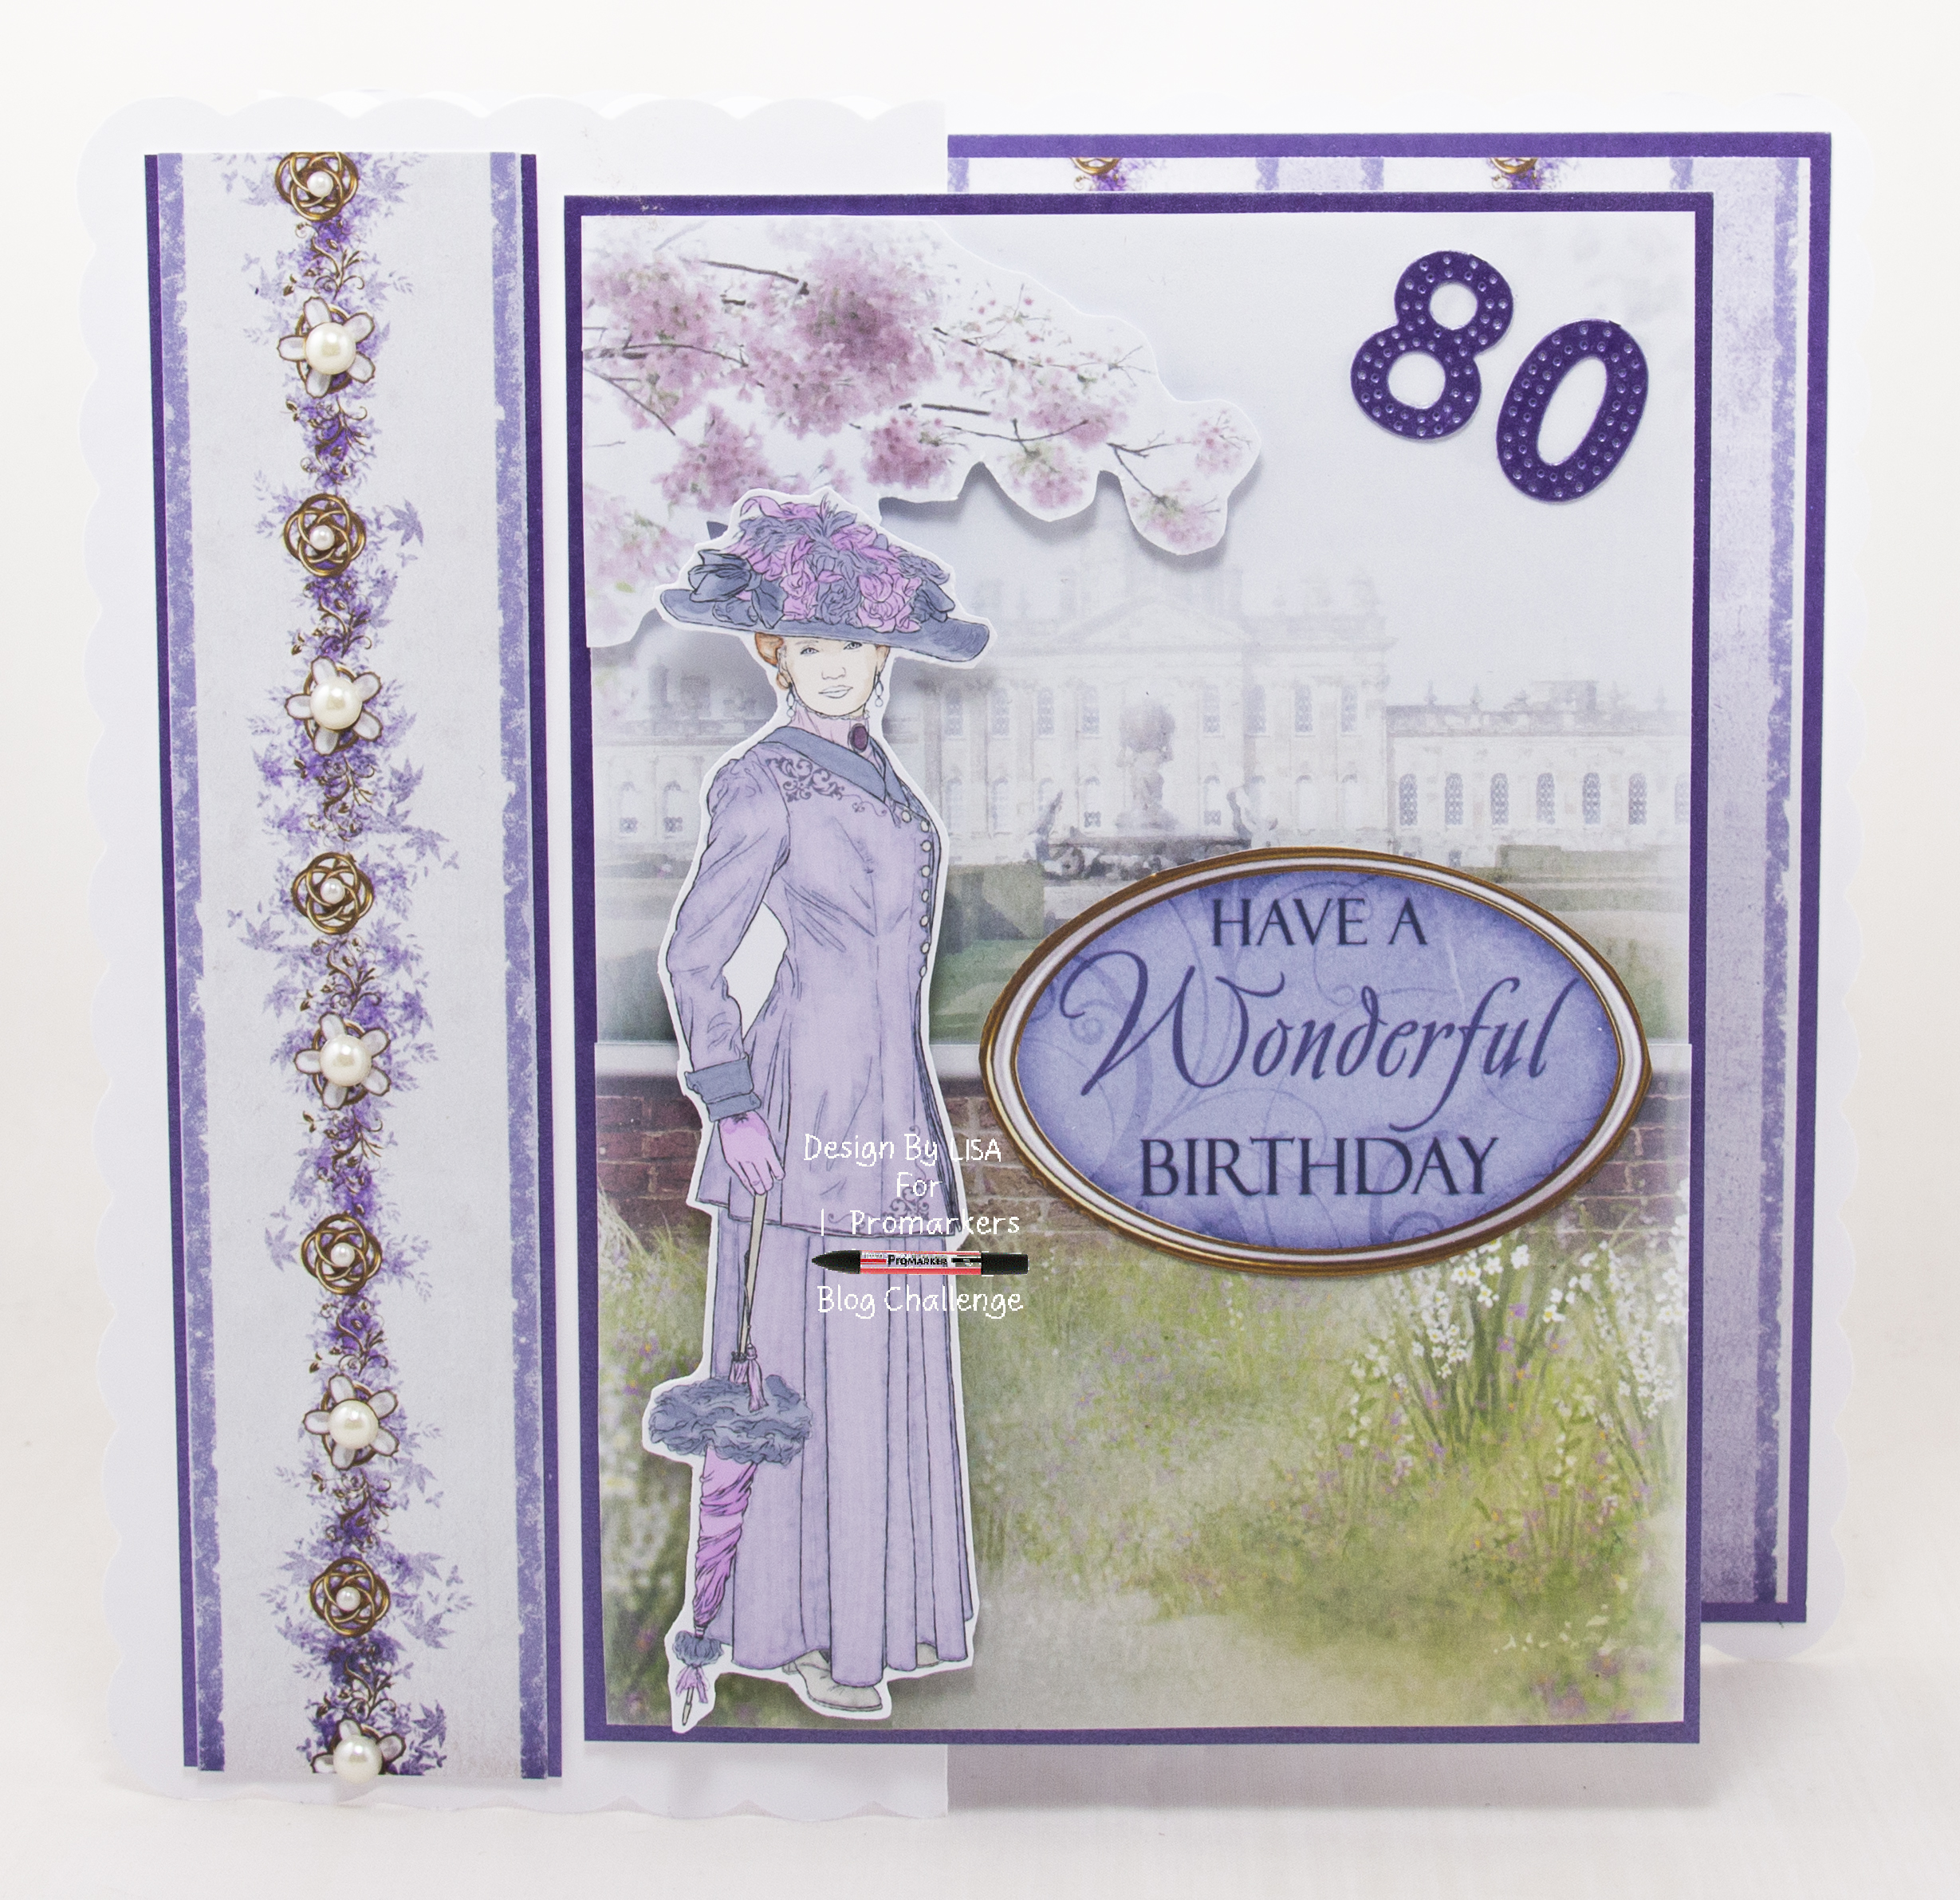
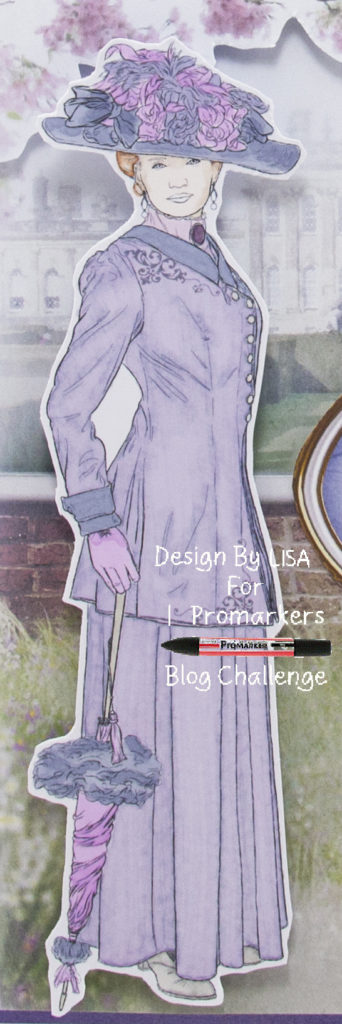
I decided to use a digital image from Debbi Moore Designs – One Fine Lady II Cd-rom.
The theme for this challenge is Anything Goes with the option of Add A Number.
You must use either promarkers, flexmarkers, aquamarkers or trias on your work.
Here is a tutorial on how I created this card.
You will need :
8″ By 8″ White Card
Promarkers
Debbi Moore Designs – One Fine Lady II Cd-Rom
Number Dies
Purple Card
White Card
Medium Pearl Beads
Small Pearl Beads
Glue / Double Sided Tape
Foam Pads
Instructions:
Choose a digital image from the cd-rom, one scene paper ( printed at 60% – twice ), one sentiment sheet and one patterned paper.
Score and fold the front of the card base in half to make a z-fold card base.
Layer one:
Cut a square from purple card measuring 19 cm by 19 cms.
Cut a square from patterned paper measuring 18.5 cms by 18.5 cms.
Matt and layer together and attach to the inside of the card base.
Layer two:
Cut a piece from purple card measuring 19 cm by 4.5 cms.
Cut a piece from patterned paper measuring 19 cms by 4 cms.
Matt and layer together and attach to the front of the card base.
Layer three:
Colour in the digital image, I used promarkers.
Clothes : Bluebell, lilac, lavender
Hat / Gloves / Parasol : Bluebell, lilac, fuchsia, warm grey 3
Shoes : Cool grey 2, coll grey 4
Skin / Hair : Dusky pink, blush, cocoa
Cut a piece from purple card measuring 18 cms by 13 cms.
Cut both scene papers to measure 17.5 cms by 12.5 cms.
Matt and layer one scene paper to the purple card.
From the other scene paper cut out the wall and garden and blossom branch.
Attach to the main scene image using foam pads.
Next attach the digital image using foam pads along with a sentiment.
Attach to the front of the card base.
Layer four:
Cut a piece from purple card measuring 12 cms by 10 cms.
Cut a piece from white card measuring 11.5 cms by 9.5 cms.
Matt and layer together and attach to the inside of the card base.
This is where you can write a message.
Layer five:
To finish add pearl beads to the front of the card base.
Then add numbers using number dies and purple card.
………………………………………………………………………….
Thank you for visiting my blog and please feel free to follow and make any of my handmade card tutorials.
If you would like to see other cards using promarkers please have a look here:
Dachshund – When The Day Is Ruff Paws For Hugs
Christmas Morning – Festive Wishes
……………………………………………………….
Challenges I would like to enter are:
Unicorn Challenge #63 – Make It Feminine
CD Sunday Plus Challenge #56 – Anything Goes Must Include Something From A Cd, Usb, Digital Download
Through The Craft Room Door Challenge 16th March – Anything Goes
Lemon Shortbread Challenge #141 – Anything Goes
Digi Choosday Challenge Wk 11 – Anything Goes
A Bit More Time To Craft Challenge #136 – Anything Goes
As always Lisa a stunning card. I love the colours and the addition of the pearls in the centre of the flower border.
Fantastic card Ginny
My Blog As I do Rodos
This is a stunning card Lisa, your colouring is amazing.
So glad you shared your beautiful card with us.
Jo
CD Sunday Plus DT
Lovely card. Pretty details and colours. Thank you for joining us at Through the Craft Room Door this month. Hope to see you back here again soon. Judy Dt
Lovely colour choice and great colouring. Thank you for sharing your lovely design with us.
Jocelyn x
CD Sunday Plus DT
A great scene and such pretty colours.
Thank you for joining us.
Lovely card, love the colours and your design perfect for an 80 year old
Thank you for joining us
Margaret
CD Sunday plus DT
So pretty. Great project. Thanks for entering Digichoosday at Polkadoodles. Madison