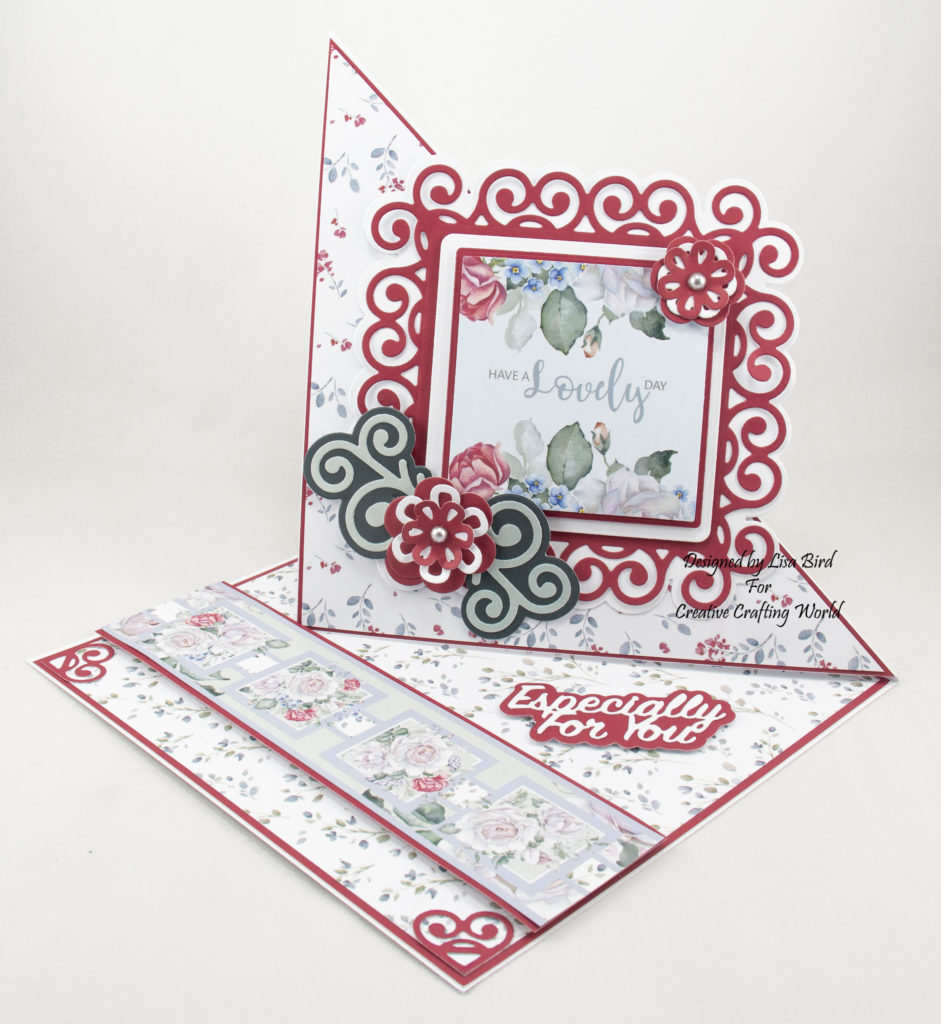
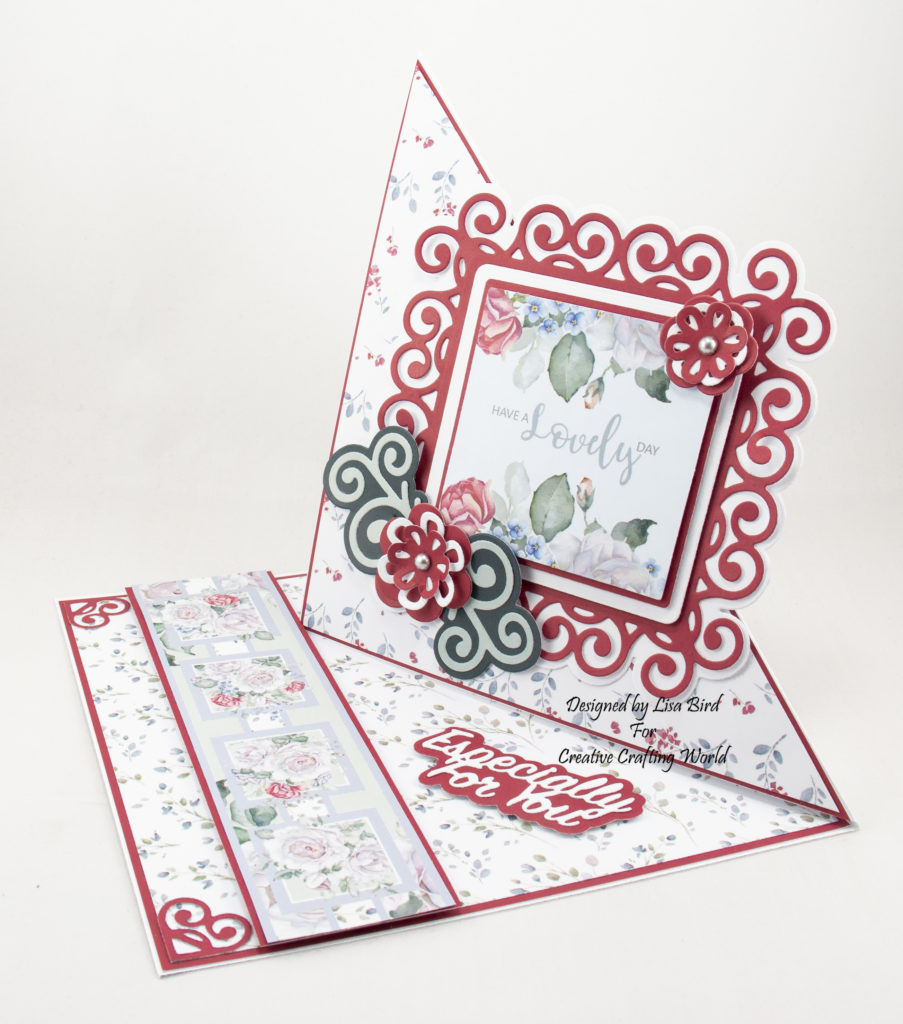
This handmade twisted easel card has been created using The Walled Garden paper collection and Filigree Fancies die collection.
These new collections are from The Paper Boutique range from Creative Crafting World
Here is a tutorial on how I created this card.
You will need :
8″ by 8″ White Card
The Paper Boutique The Walled Garden – Paper Pad With Toppers
The Paper Boutique The Walled Garden – Coloured Card Collection
The Paper Boutique The Walled Garden – Embellishment Pad
The Paper Boutique Filigree Fancy – Especially For You Doily Die Collection
The Paper Boutique Filigree Fancy – Flourish Embellishments
White Card
Silver Pearl Beads
Wet Glue / Double Sided Tape
Foam Pads
Instructions:
Choose three coloured cards, two backing papers, the long topper from the embellishment pad and one square topper.
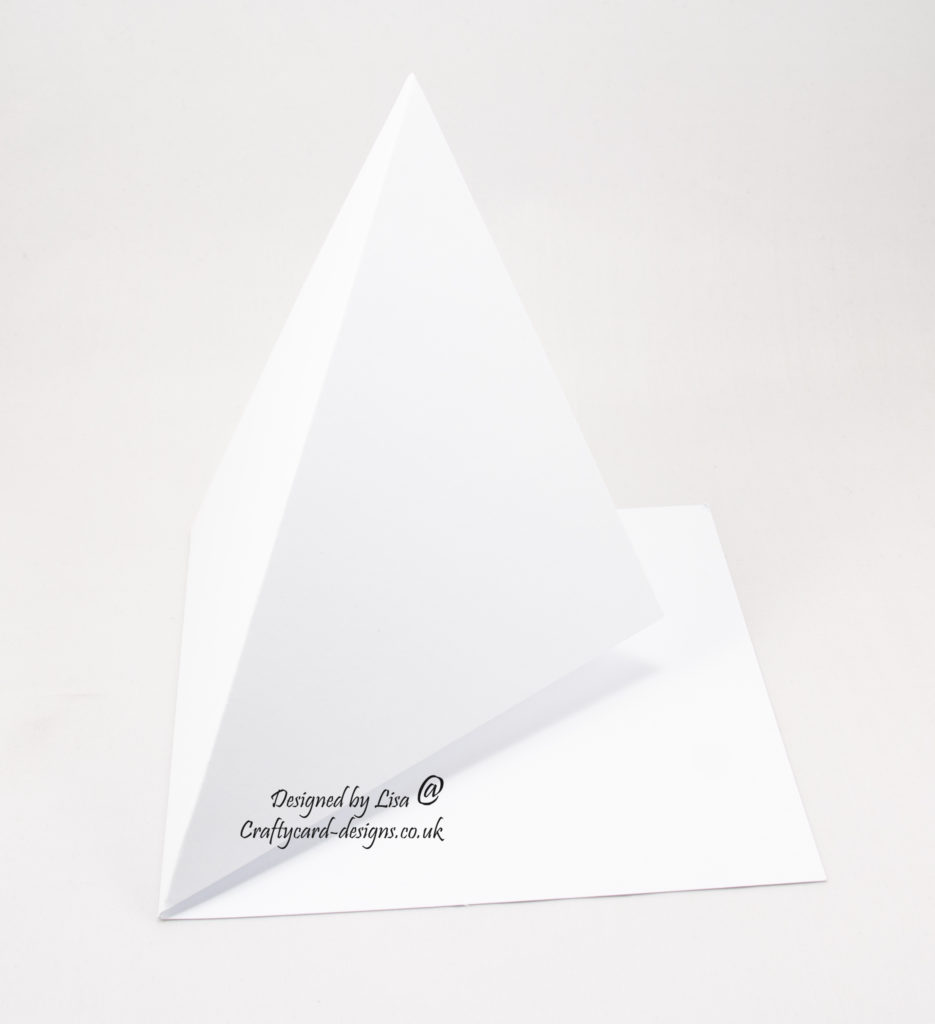
To make the twisted easel card base score the 8″ by 8″ card front from corner to corner and fold inwards.
Layer one:
Cut a square from one of the coloured cards measuring 20 cms by 20 cms.
Cut a square from one of the backing papers measuring 19.5 cms by 19.5 cms.
Matt and layer together and attach to the bottom of the card base.
Layer two:
Cut a square from the same coloured card measuring 20 cms by 20 cms.
Cut a square from the second backing paper measuring 19.5 cms by 19.5 cms.
Cut both in half from corner to corner.
Matt and layer one half of each together and attach to the front fold of the card base.
Layer three:
Cut a piece from the same coloured card measuring 20 cms by 5.5 cms.
Cut the long embellishment topper to measure 20 cms.
Matt and layer together and attach to the bottom of the card base using foam pads.
This will act as a stopper for the front of the card base.
Layer four:
Using the doily die collection, cut the matt die out from white card.
Cut the decorative die out from coloured card.
Next cut the larger square die out from white card and the smaller square die from coloured card.
Matt and layer together and add the square topper using foam pads.
Then attach to the front fold of the card base.
Layer five:
Make up two flowers using the smallest flower from the embellishment die collection, coloured card and white card.
Next using one of the leaf dies make up two leaves using coloured card.
Attach the leaves and one of the flowers to the bottom corner doily die and one flower to the top corner.
Add a pearl bead to the centre of the flowers.
Layer six:
Using the sentiment die, cut the matt die out from coloured card.
Cut the sentiment out from white card.
Matt and layer together and attach to the bottom of the card base using foam pads.
Then using the two embellishments from the doily die collection, cut two out from coloured card and attach to the bottom two corners of the card base.
………………………………………………………………………….
Thank you for visiting my blog and please feel free to follow any of my handmade card tutorials.
Please leave a comment and let me know you’ve visited.
If you would like to see other cards using Creative Crafting World products please have a look here:
A Summer Garden – For Someone Very Special
Ocean Breeze – Every Day Is A New Journey
Fabulous card Ginny
My Blog As I do Rodos
A beautiful card sweetie, hugs Aly xx
This is gorgeous,
Hugz Tinz