Today’s handmade card was created for my mum to give my little niece for her 1st birthday.
I have used Treasured Teddies Dvd-Rom with images from Kevin Woods and papers from The Paper Boutique.

Here is a tutorial on how I created this card.
You will need :
2 x 8″ By 8″ White Cards
Creative Crafting World – Treasured Teddies Dvd-Rom
The Paper Boutique Perfect Partners – Dusky Pink Paper Pad
The Paper Boutique – Female Relations Die Collection
The Paper Boutique Square Die Collection – Sentiment Collection
M & C Boutique – 10 Piece Birthday Number Cutting Dies
Black Card
White Card
Glue / Double Sided Tape
Foam Pads
Instructions:
Score the front of both 8″ by 8″ card bases in half to make z-fold card shapes.
From one of the card bases cut a 5 cms strip.
Choose three papers from the paper pad.
Layer one:
Cut a square from black card measuring 20 cms by 20 cms.
Cut a square from white card measuring 19.5 cms by 19.5 cms.
Cut a square from the first paper measuring 19 cms by 19 cms.
Matt and layer together and attach to the inside of the card base.
Layer two:
Cut a piece from black card measuring 20 cms by 9.5 cms.
Cut a piece from white card measuring 19.5 cms by 9 cms.
Cut a piece from the second paper measuring 19 cms by 8.5 cms.
Matt and layer together and attach to the card base.
Layer three:
Cut a piece from black card measuring 4.5 cms by 20 cms.
Cut a piece from white card measuring 4 cms by 19.5 cms.
Cut a piece from the third paper measuring 3.5 cms by 19 cms.
Matt and layer together.
Next cut two pieces from black card measuring 4.5 cms by 9.5 cms.
Cut two pieces from white card measuring 4 cms by 9 cms.
Cut two pieces from the third paper measuring 3.5 cms by 8.5 cms.
Matt and layer together.
Attach each layer to the 5 cm card strip.
Then attach the card strip to the card base across the centre, the smallest piece attaches to the inside and the longest piece to the front of the card base.
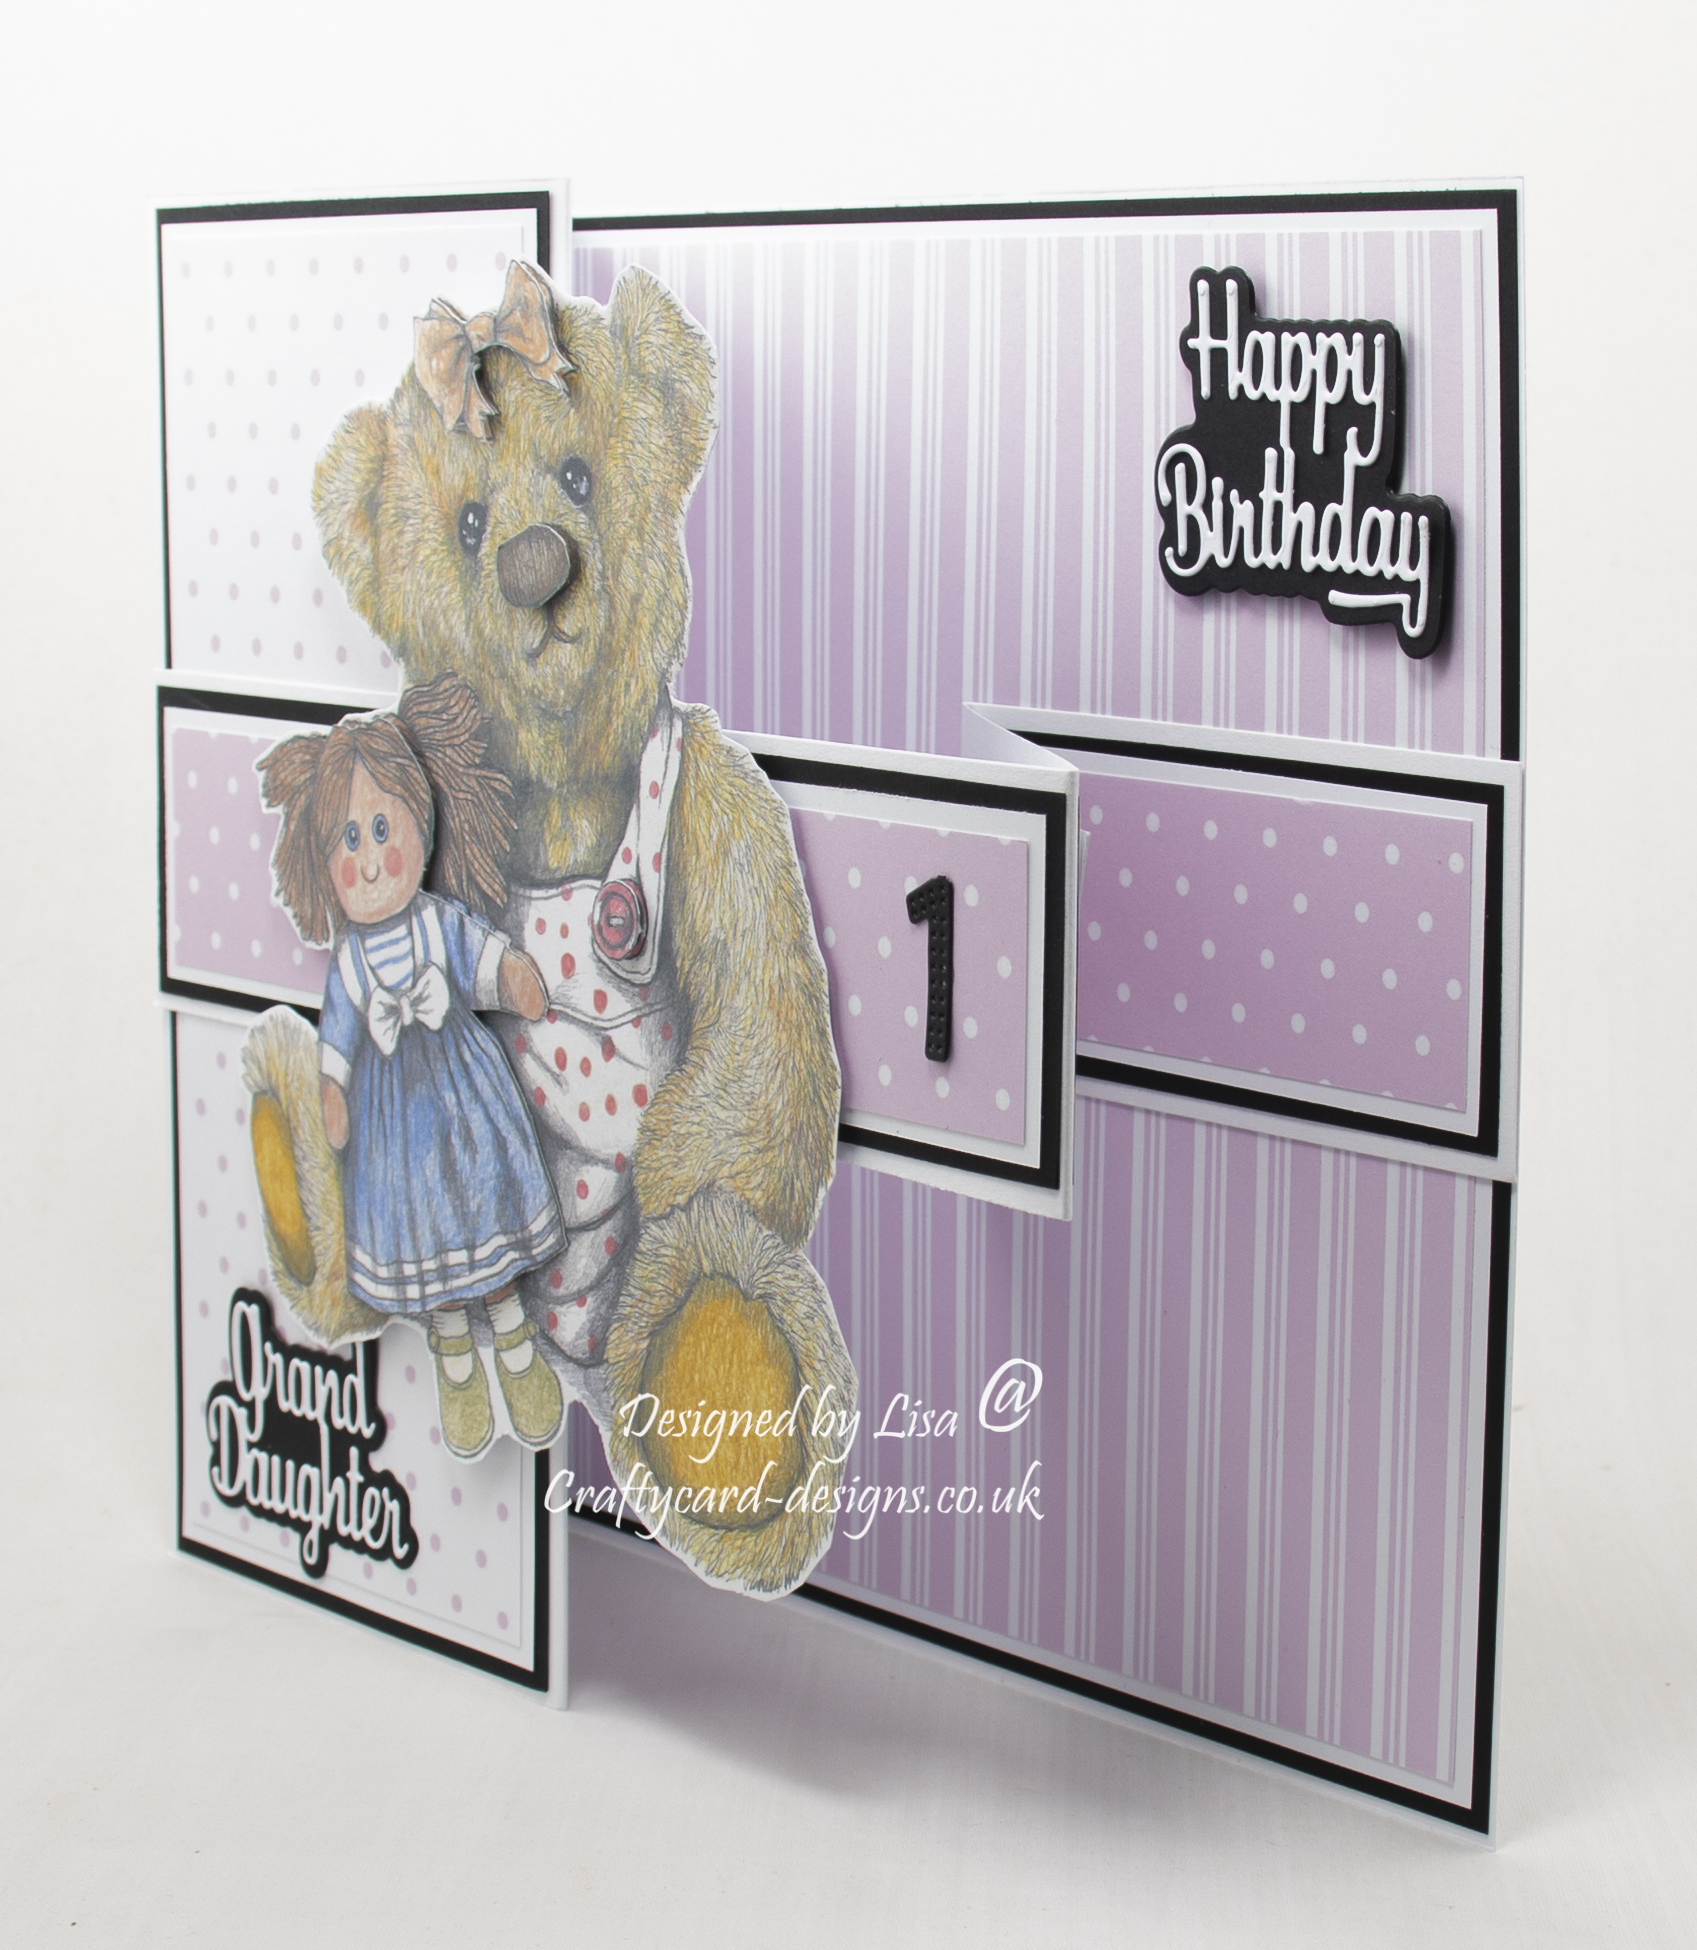
Layer four:
From the Treasured Teddies dvd-rom print off the large image sheet with two teddies on.
Cut out one of the teddy images.
Then cut out the doll image, the teddy button, bow and nose from the second teddy image.
Attach these to the first image using foam pads.
Then attach the image to the front of layer three using foam pads.
Layer five:
Using a sentiment from the female relations die set, cut the matt die from black card.
Cut the sentiment from white card.
Matt and layer together and attach to the front of the card base.
Next using a sentiment from the sentiment die set, cut the matt die from black card.
Cut the sentiment from white card.
Matt and layer together and attach to the inside of the card base.
Layer six:
Using the number dies, cut out from black card.
Attach to layer three.
Layer seven:
Cut a square from black card measuring 17 cms by 17 cms.
Cut a square from white card measuring 16.5 cms by 16.5 cms.
Matt and layer together and attach to the back of the card base.
……………………………………………………………………….
Thank you for visiting my blog and please feel free to follow and make any of my handmade card tutorials.
If you would like to see other cards I have made please have a look here:
Unicorn Digi Stamp – Birthday Wishes
The Amazing World Of Oz – If You’ve Got It Haunt It
Digi Stamped Owls – Just For You
Garden Visitors : Sending You Birthday Wishes
Wonderful ard Ginny x
My Blog As I do Rodos