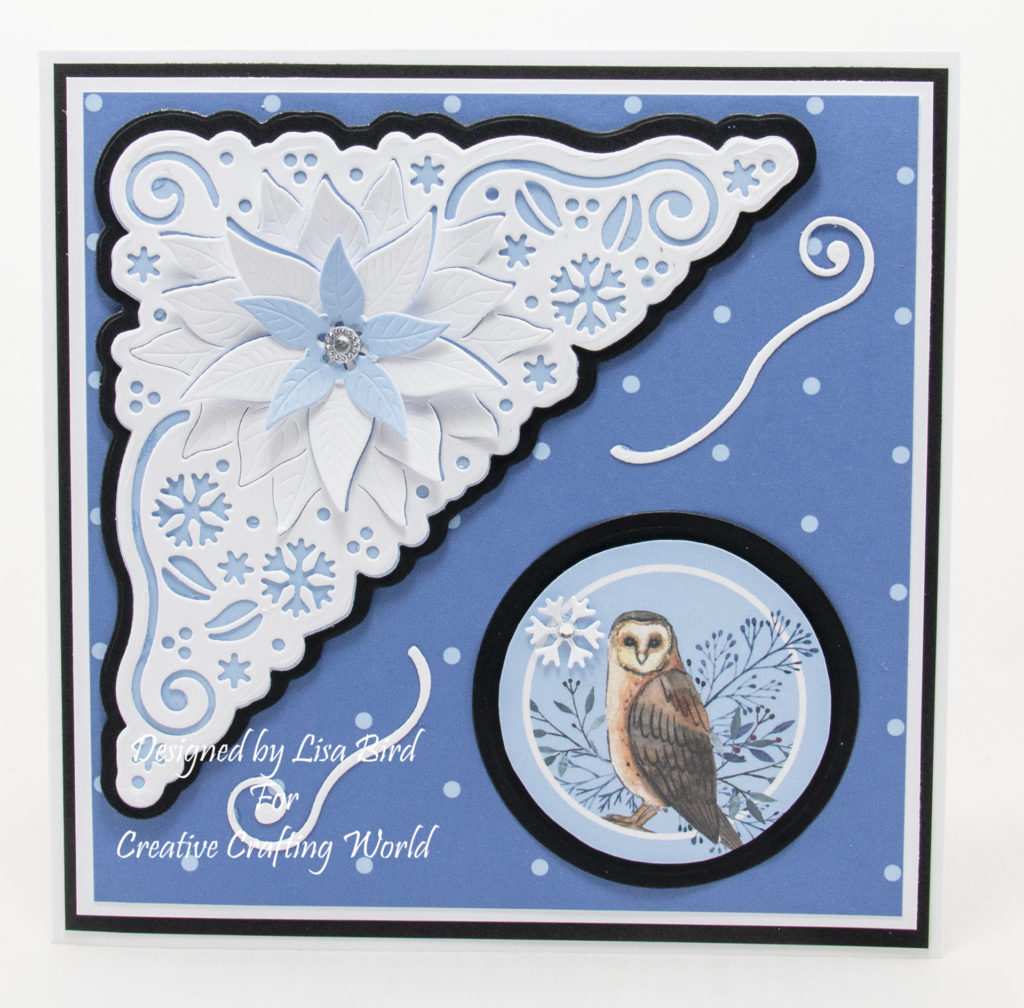
Today’s handmade card has been created using a Paper Boutique paper collection and beyond corner die collection from Creative Crafting World called Winter Wonder.

Here is a tutorial on how I created this card.
You will need :
6″ By 6″ White Card
The Paper Boutique Winter Wonder – Season’s Greetings Beyond Corner Die Collection
The Paper Boutique Winter Wonder – Embellishment Pad
The Paper Boutique Winter Wonder – Paper Kit
The Paper Boutique Winter Wonder – Coloured Card Collection
Circle Dies
White Card
Black Card
Silver Gems
Glue / Double Sided Tape
Foam Pads
Instructions:
You will need one paper, one coloured card and one topper from the embellishment pad.
Layer one:
Cut a square from black card measuring 14.5 cms by 14.5 cm.
Cut a square from white card measuring 14 cms by 14 cms
Cut a square from the paper measuring 13.5 cms by 13.5 cms
Matt and layer together and attach to the card base.
Layer two:
Using the die set, cut the first matt die from black card.
Cut the second matt die from coloured card.
Then cut the decorative die from white card using the second matt die and the decorative die. Save all the pieces that fall from the die cut.
Matt and layer together and attach to the card base on the top left corner.
Cut a small flower from coloured card using the flower matt die and flower die together.
Attach to the centre flower of the main die cut adding a gem to the centre.
Layer three:
Cut a circle from black card.
Cut the circle topper out.
Matt and layer together using foam pads and attach to the card base on the bottom right corner.
To finish add a few of the die cuts that fell out from the main decorative die.
………………………………………………………………………….
Thank you for visiting my blog and please feel free to follow and make any of my handmade card tutorials.
If you would like to see other cards using Creative Crafting World products please have a look here:
Pollyanna Pickering – Winter Day’s – Birthday
Floral Daze – You Are The Reason I Smile
Sketch Book Collection VII Best Of Breeds
Another super stylish and elegant card,
Hugz Tinz