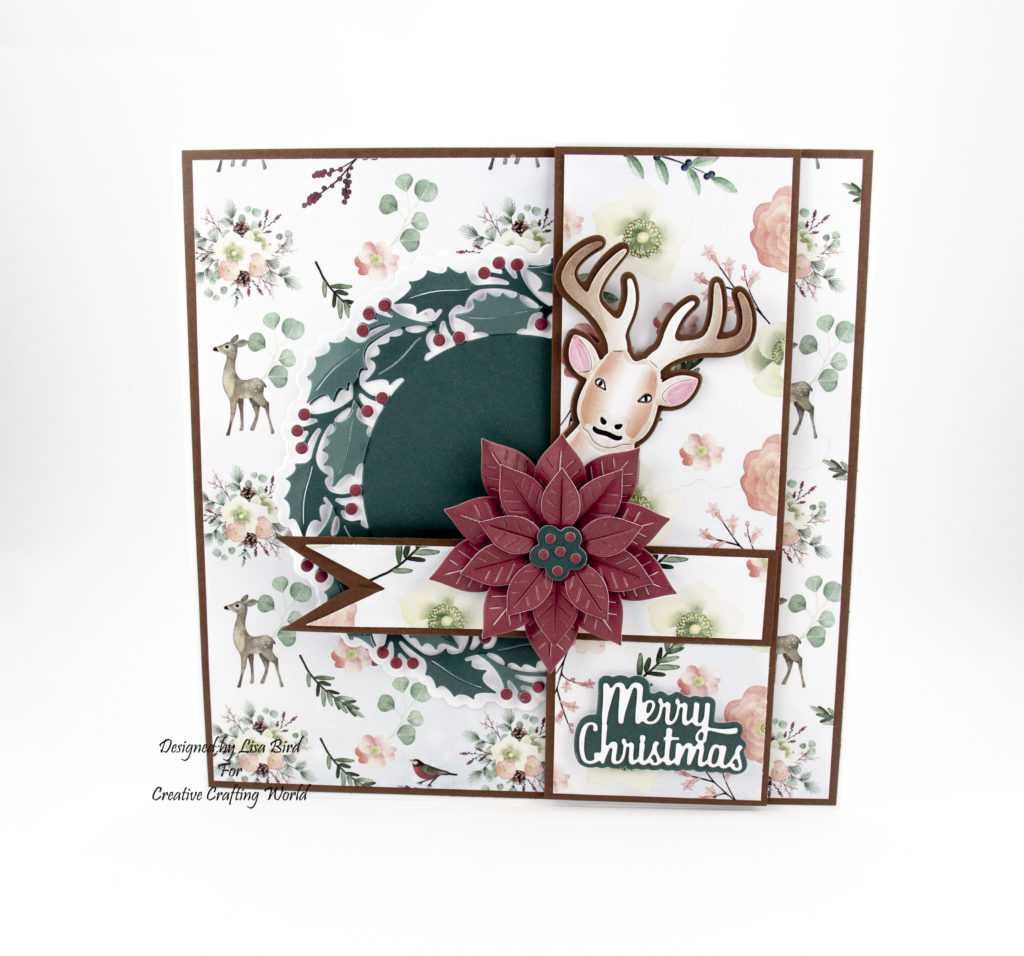
This card has been made using the new Christmas Dies and Paper Collection from Creative Crafting World.
Lynda is showing this on Create and Craft starting at 7pm on the 12th July.

I have really enjoyed making this card and I just love the stag head.
You will need:
8″ by 8″ White Card Base
A4 Chocolate Card
A4 White Card
The Paper Boutique The Essence of Christmas Paper Pad
The Paper Boutique The Essence of Christmas Holly Die Set
The Paper Boutique The Essence of Christmas Stag Die
The Paper Boutique The Essence of Christmas Poinsettia Die Set
The Paper Boutique The Essence of Christmas Merry Christmas Sentiment
The Paper Boutique The Essence of Christmas Coloured Card Collection
Wet Glue
Foam Pads
Instructions:
Using the chocolate card cut out the matt layer of the stag’s head then using white card cut out the stag’s head and colour this in. I used Chameleon pens for this, BR5 for the antlers, BR2 for the stags head and PK3 for the ears.
Then add a small piece of black card underneath the stag’s mouth and nose and a small piece of white card under the eyes. Using a fine liner draw on the eyes.
Cut out three poinsettia petals using the deep red card and layer these up.
Then cut out the centre die in the dark green card and add deep red spots for stamens.
The die set comes with four poinsettia dies, I only used three in this design and you also get a centre die for the poinsettia that comes in two parts.
Next cut the holly die out using the dark green card.
This die also comes with a berry die.
Using the deep red card cut out enough berries to add to the holly die cut.
The using the dark green card cut out the sentiments matt layer and the words in white card.
Next cut all the matts and layers out using the below measurements.
Matt and layer measurements:
- 1st Layer : Chocolate card 20 cms by 20 cms, paper 19.5 cms by 19.5 cms
- 2nd Layer : Chocolate card 6 cms by 20 cms, paper 5.5 cms by 19.5 cms
- 3rd Layer : Chocolate card 3 cms by 13 cms, paper 2.5 cms by 12.5 cms
With layer 3 cut one end of the card and paper to a swallow tail shape before matt and layering together.
Matt and layer all these together using wet glue.
To make the card up attach layer 1 first, using wet glue.
Then attach the holly die cut in the center of the card base.
Using foam pads attach layer 2 and then layer 3. Only place the foam pads on layer 3 where needed and wet glue on the other half that over lays layer 2.
Next attach the poinsettia that you have made and then attach the stag’s head slightly underneath the poinsettia.
To finish off add the sentiment.
Please remember to look at the main picture for reference if you need to.
Thank you for visiting and please feel free to make this card.
………………………………………………………….
Challenges I would like to enter are:
The Holly and Ivy Christmas Challenge 32 : Anything Christmas Goes
Crafter’s Castle Challenge 7 : Anything Goes with an option of Christmas in July
Crafty Hazelnuts Christmas Challenge 393 : Anything Goes As Long As It’s Christmas with an option of using Twine or Ribbon
Crafty Hazelnuts Patterned Paper Challenge : Always Use Patterned Paper
Through The Craft Room Door Challenge : Anything Goes
OOOOOw totally scrumptious card! I must look out for those papers on CnC. I love a “nature filled Christmas” 😀 Thanl you for sharing at Craftyhazelnut’s Patterned Paper Challenge XXX
Great project! Fabulous that you have shared this with us here at The Holly & The Ivy. Good luck hun and do come back again!
Jackie DT @ TH&TI
A beautiful card Lisa, this is a gorgeous collection.
Pauline – Crafting with Cotnob
x
Hi Lisa,
your card is a beauty! That paper is wonderful. Thanks for joining us at CHNC.
What a beautiful Christmas card! Love the layout of paper choice. Thank you for sharing it with us at Through the Craft Room Door.
Cara, owner
lovely card. great pattern papers. thank you for sharing with us at TTCRD and good luck, Theresa xx