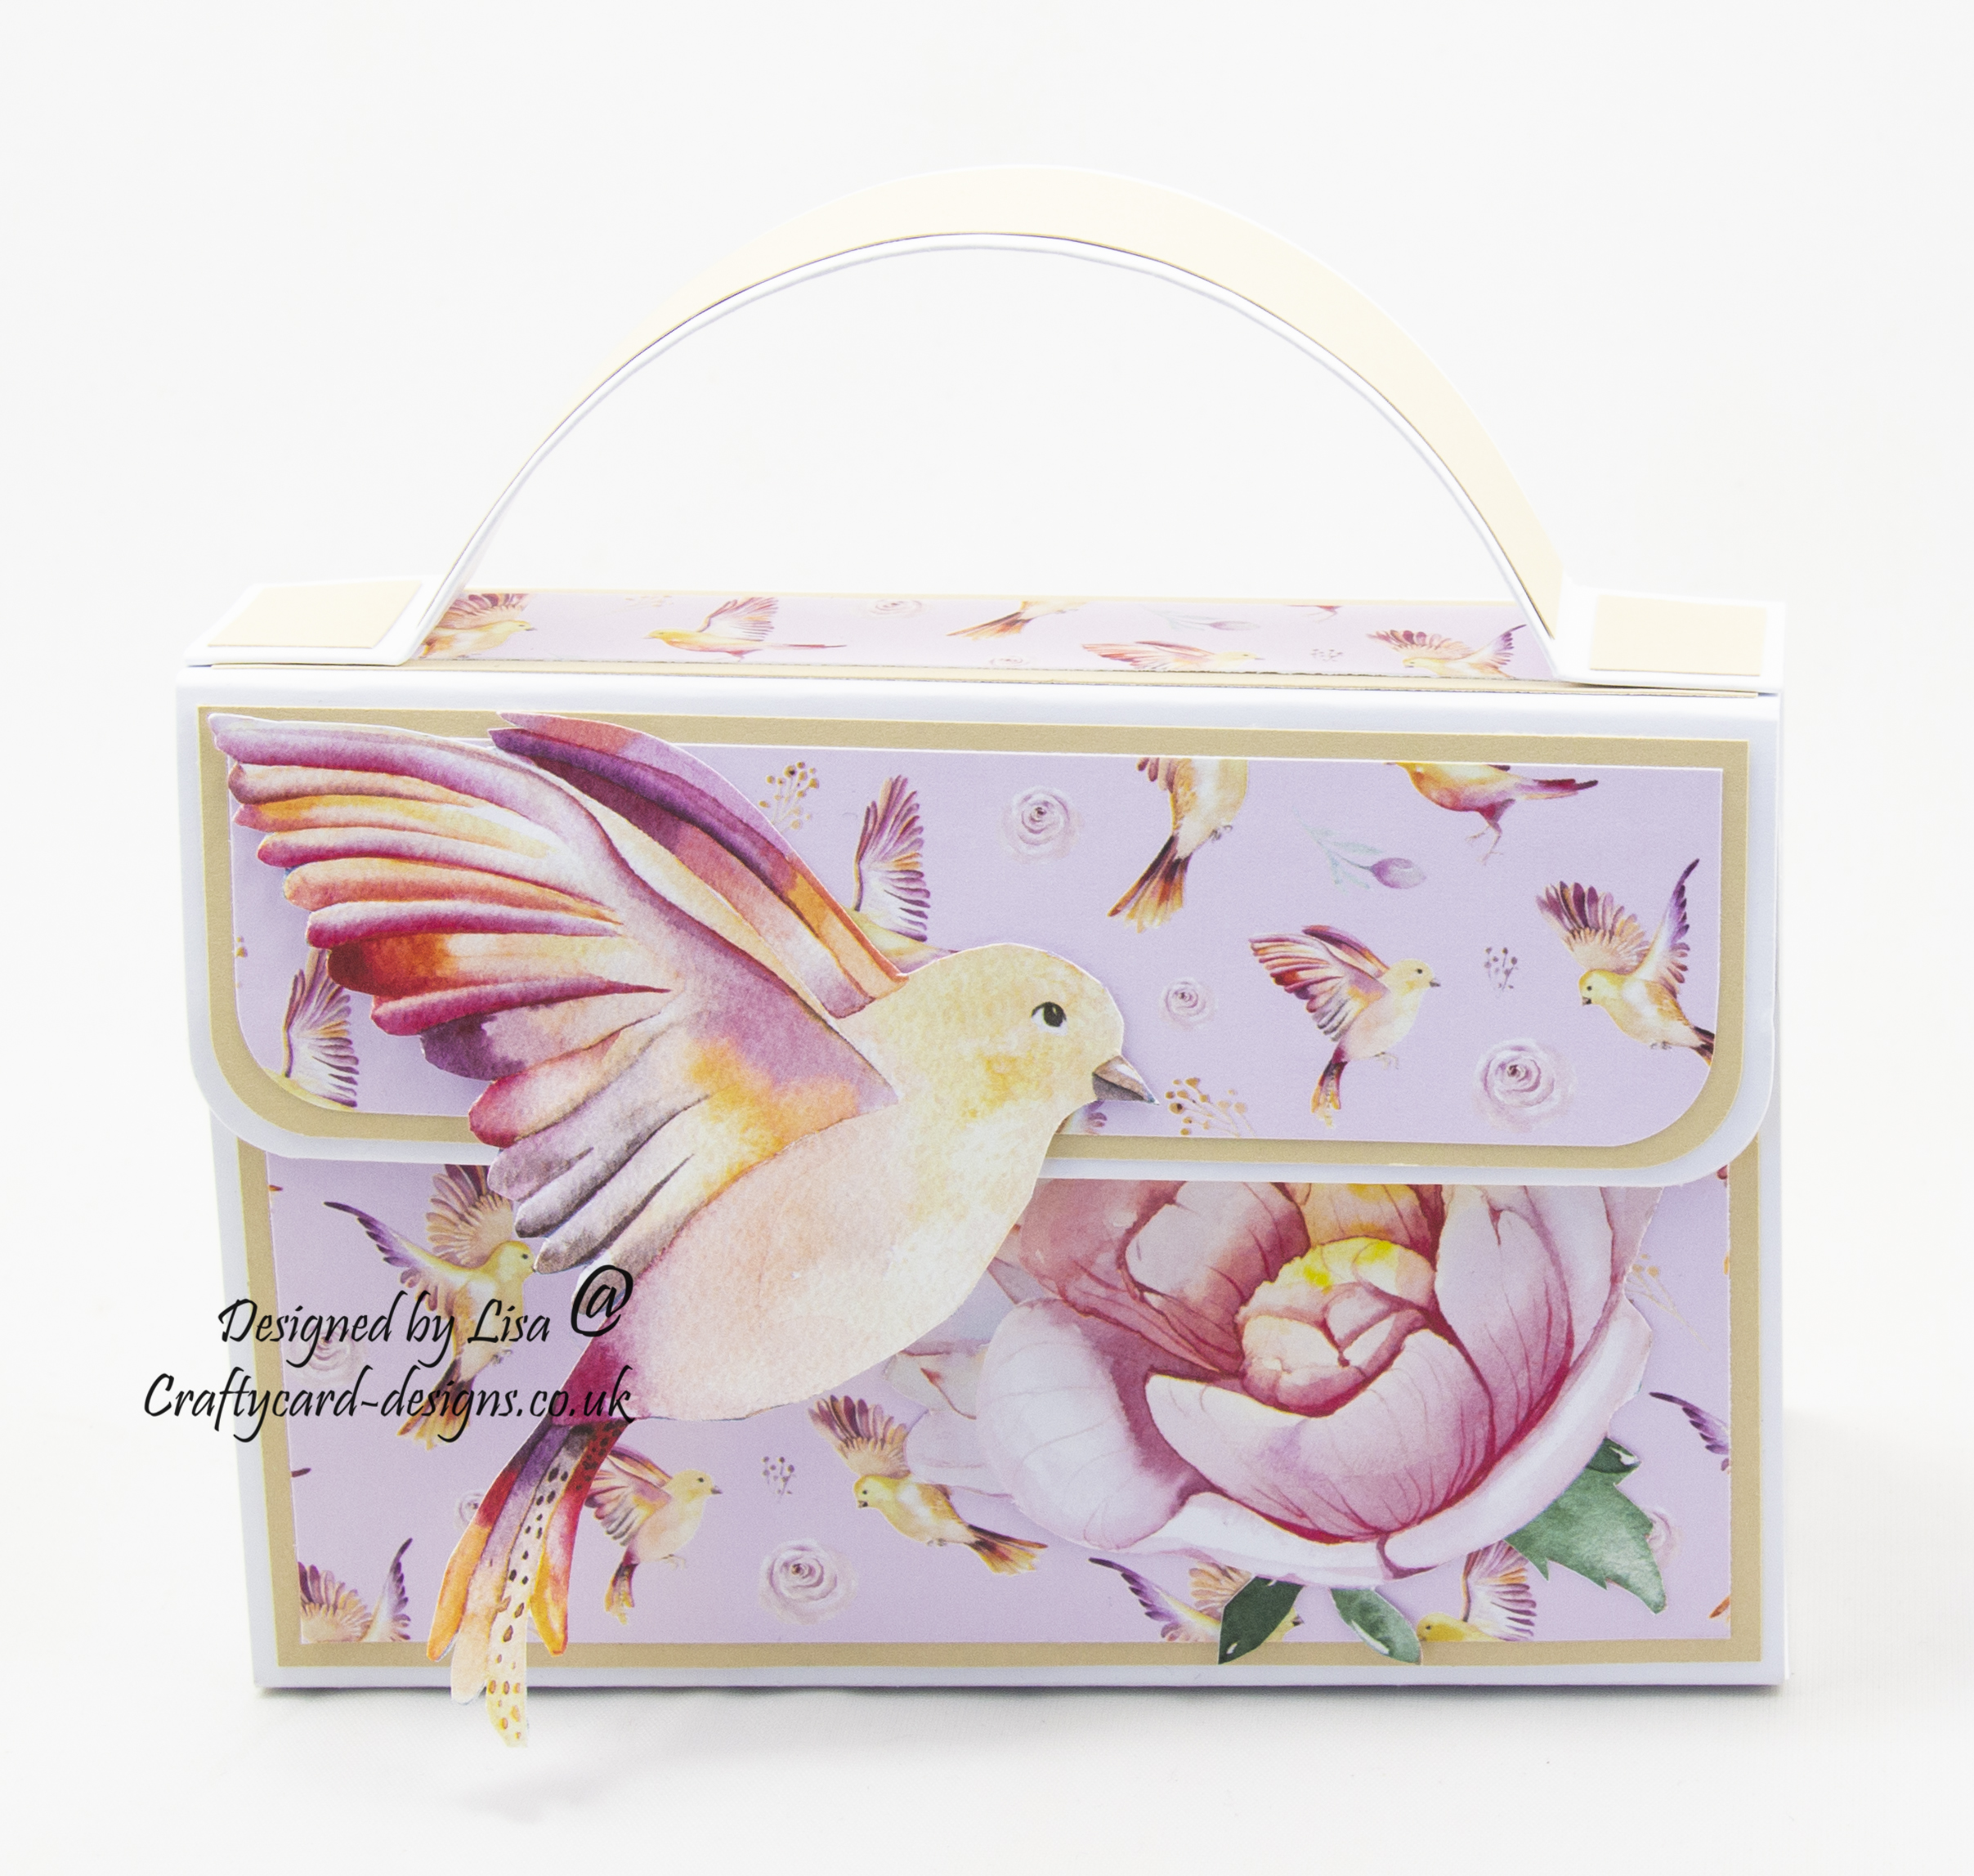
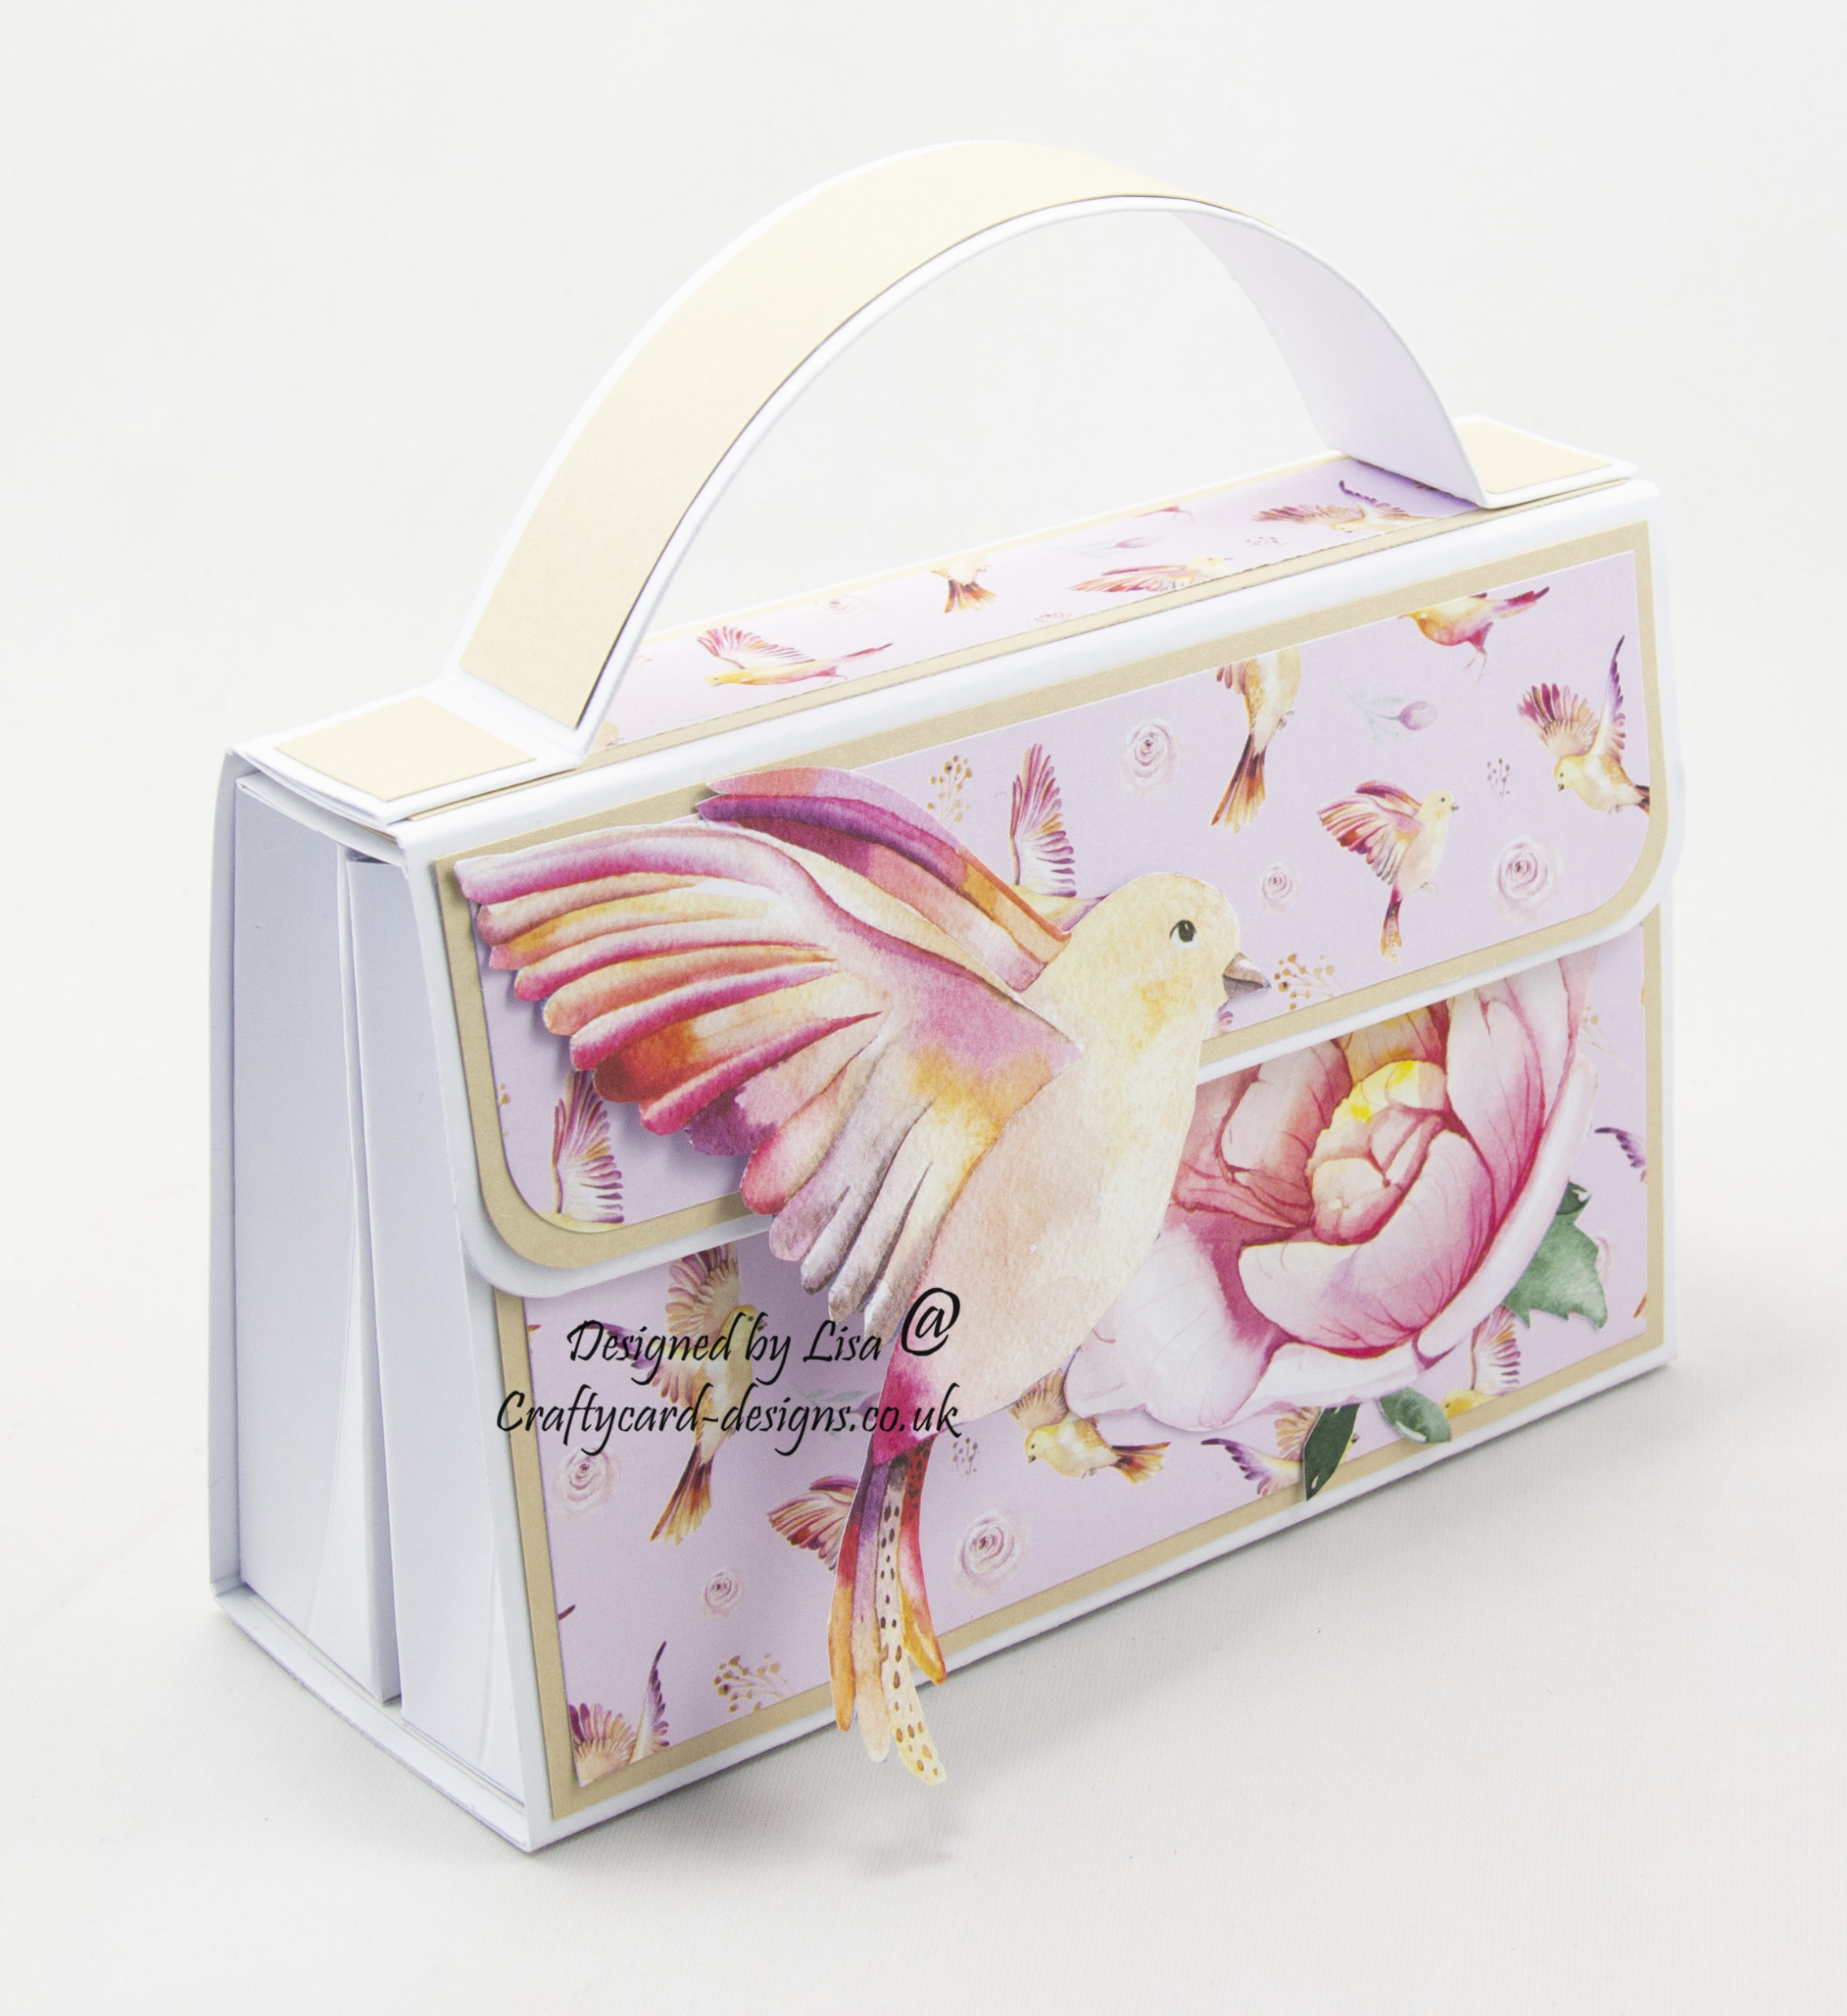
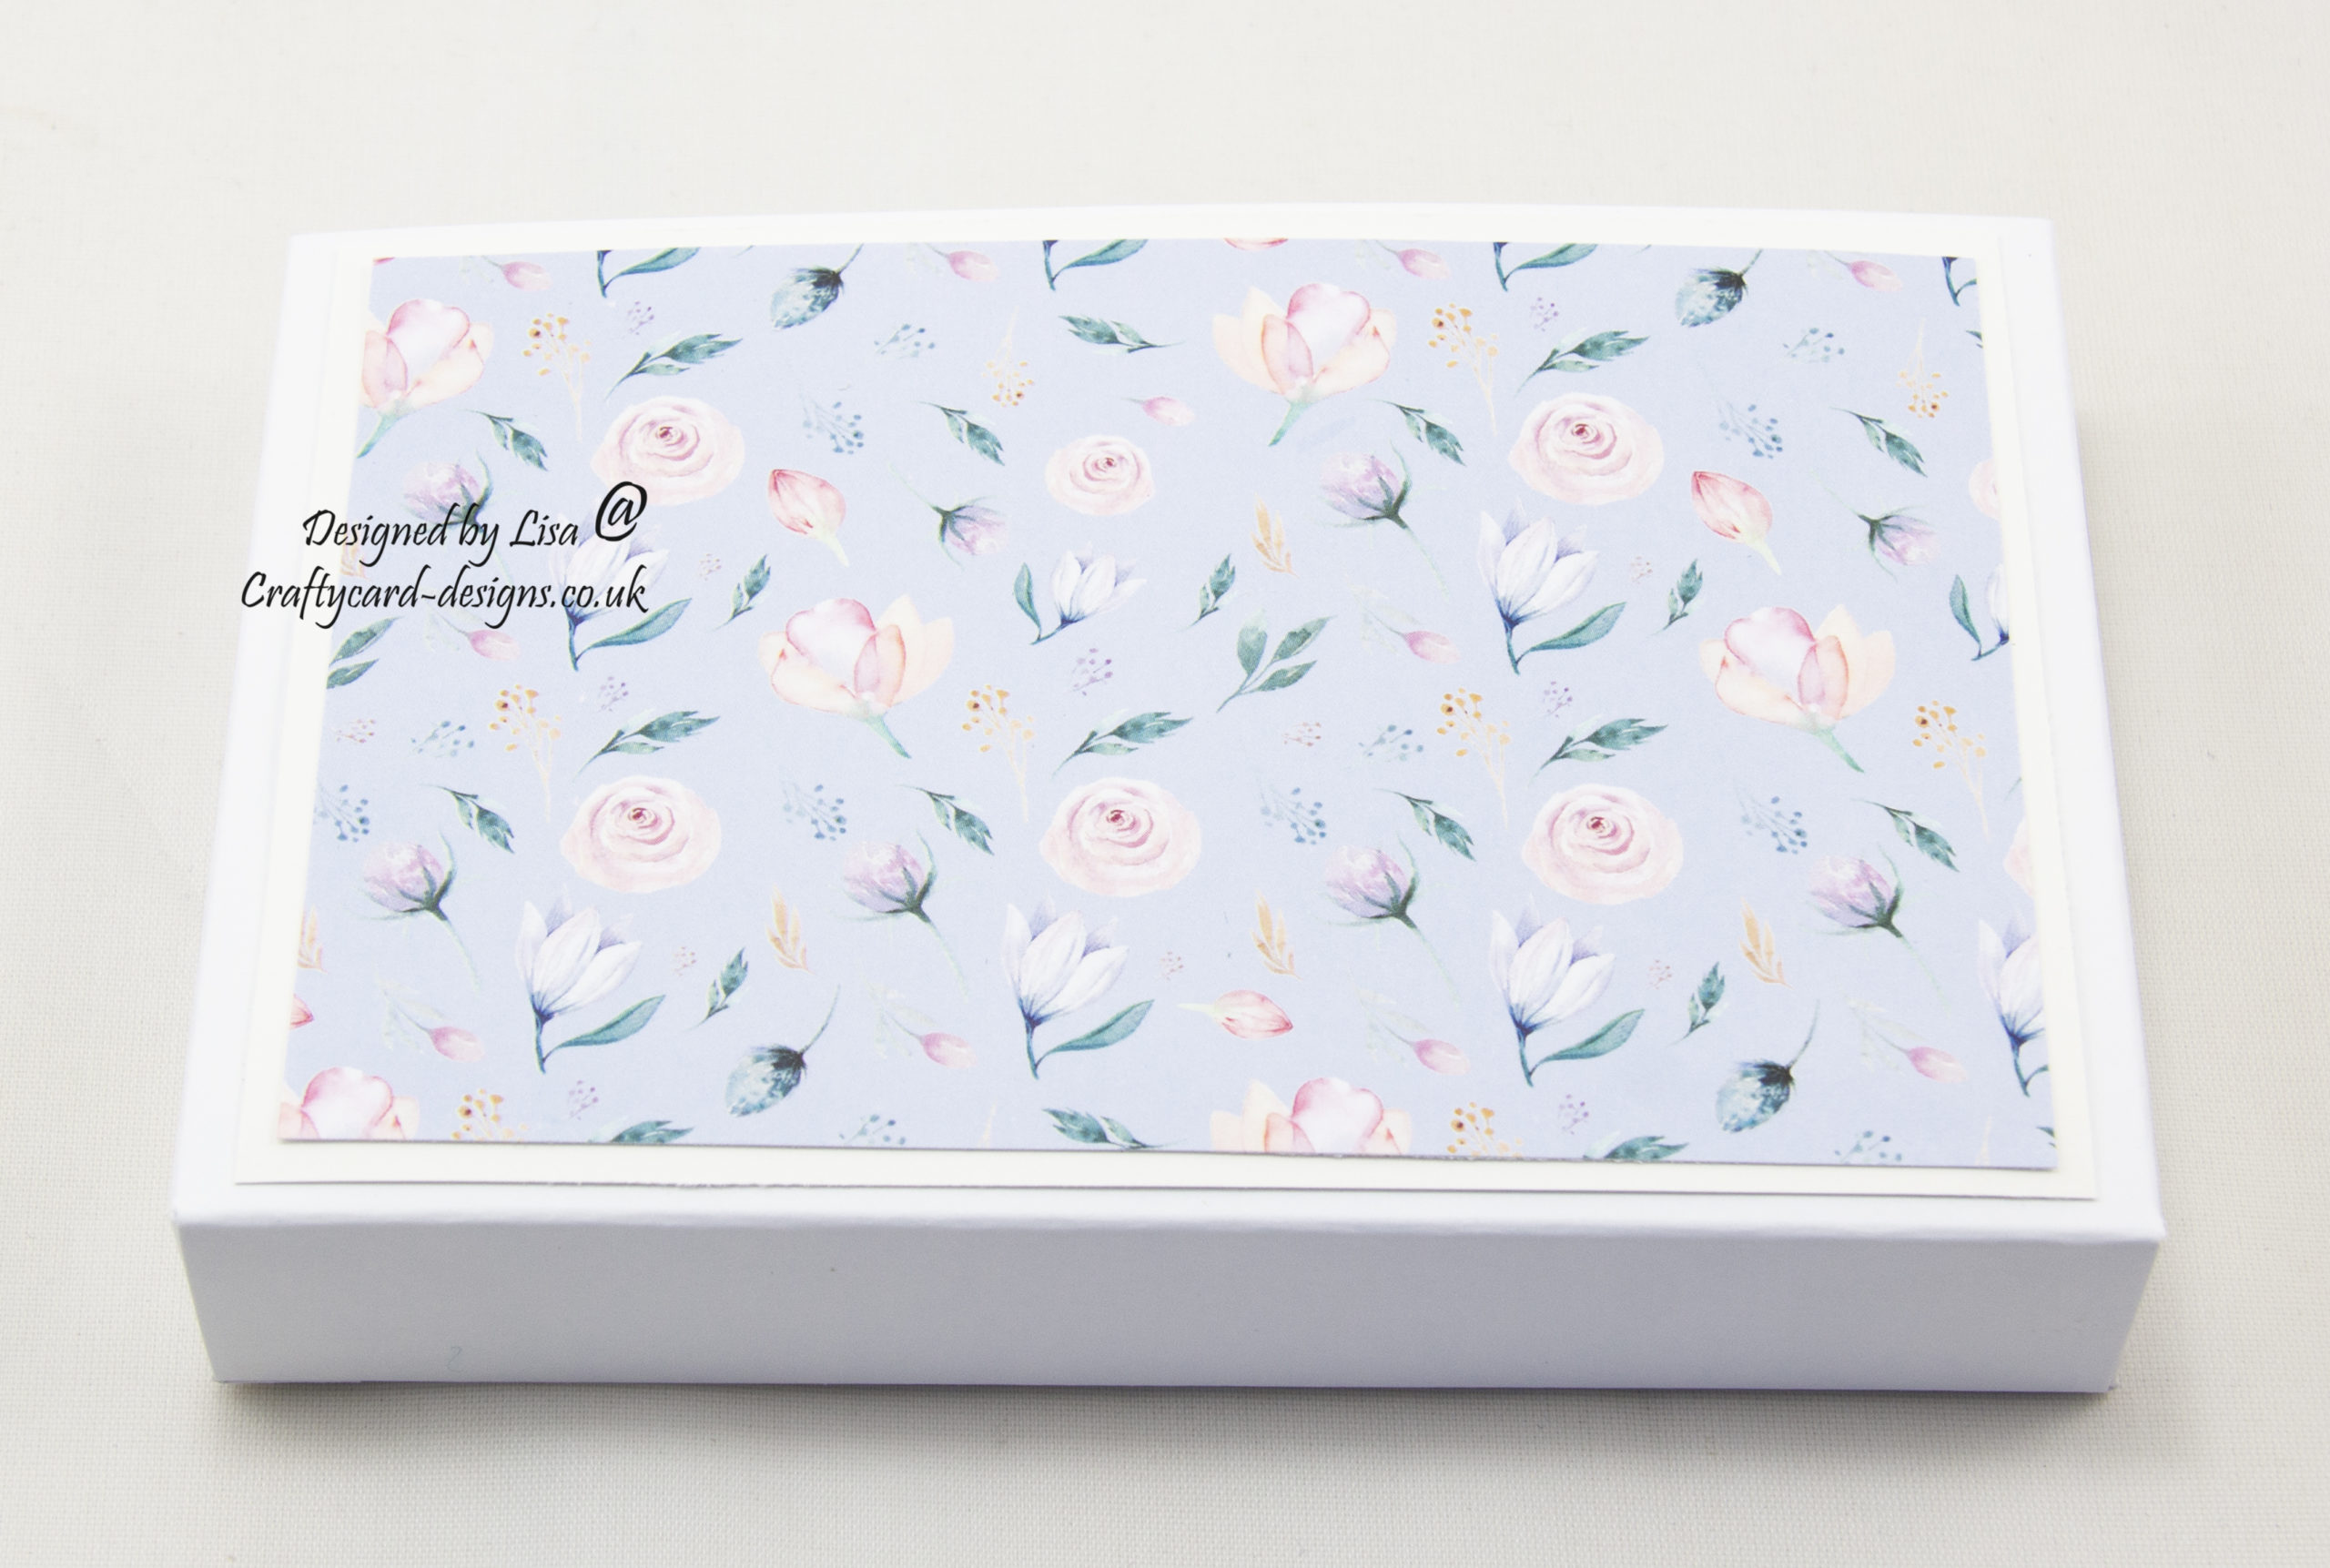
Today’s tutorial is for a cute little handbag design using a paper pad called spring celebration by Creative Crafting World.
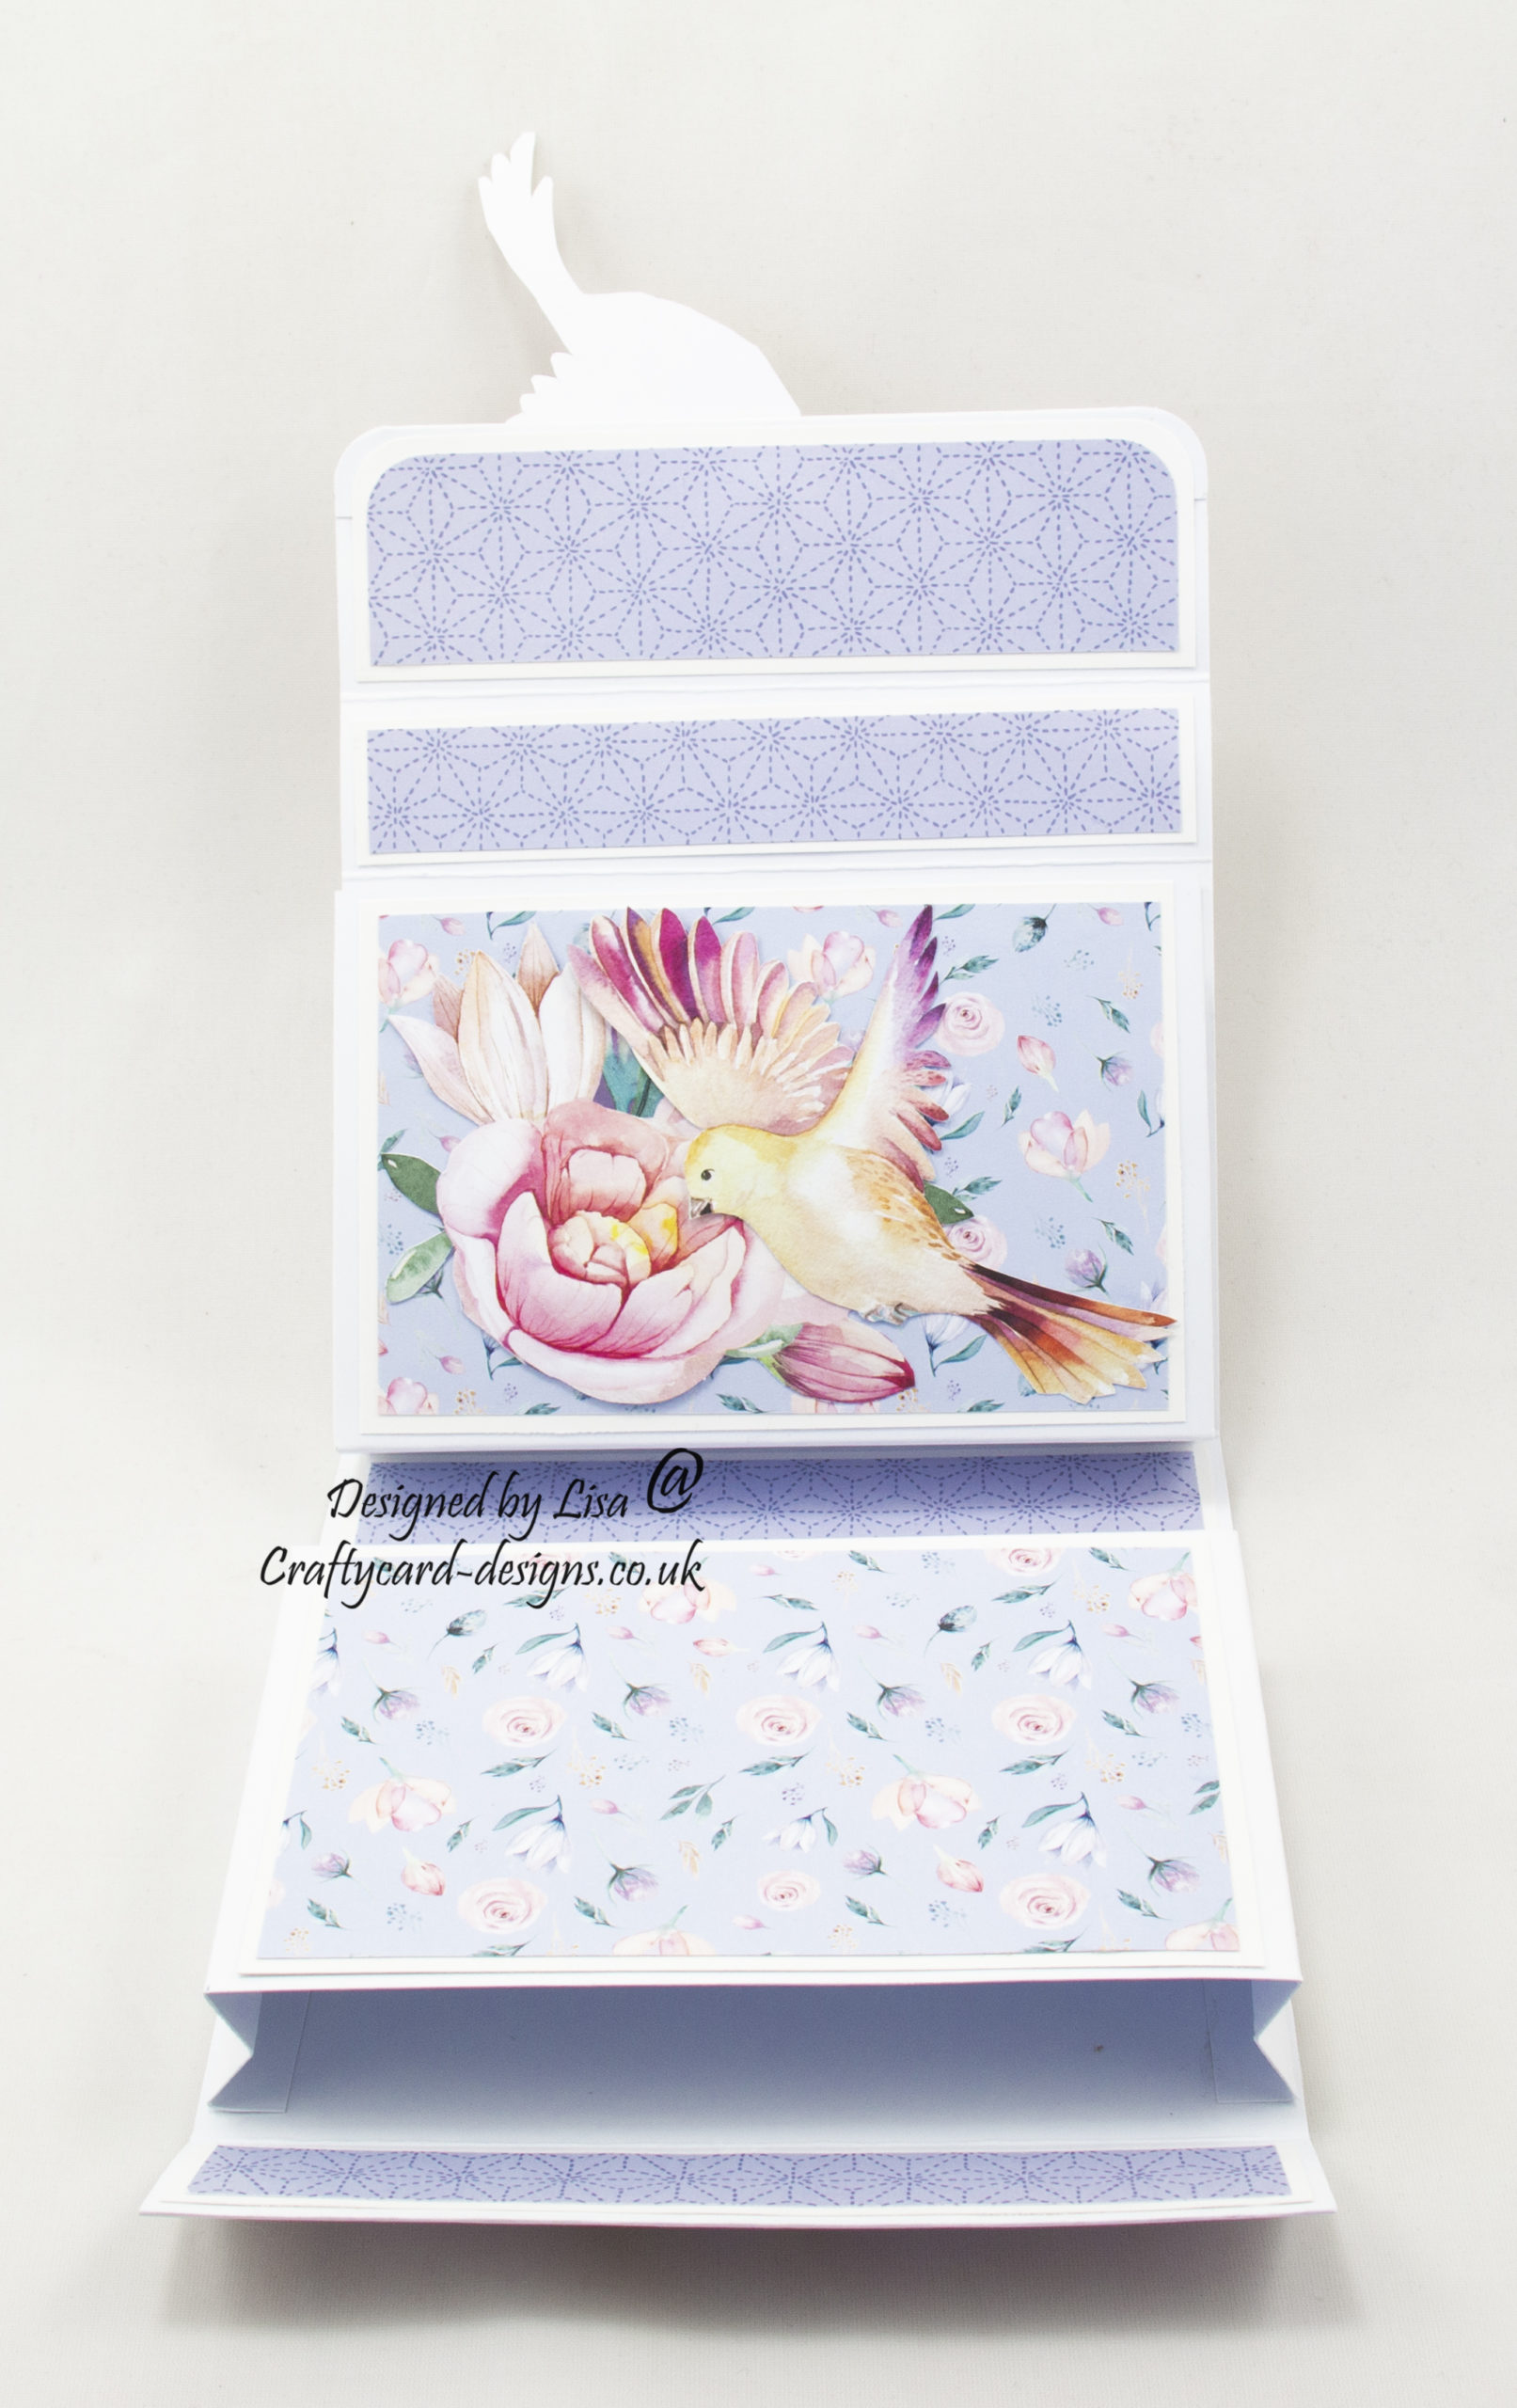
The inside of the handbag has sections where notelets or a little gift can be added.
You will need :
A4 White Card
The Paper Boutique Spring Celebration – Decorative Paper Pad
Creative Crafting World Woodstock Card
Small Magnets
Glue / Double Sided Tape
Foam Pads
Instructions:
Choose two different coloured cards from the woodstock card, three patterned papers and four toppers.
Handbag Construction:
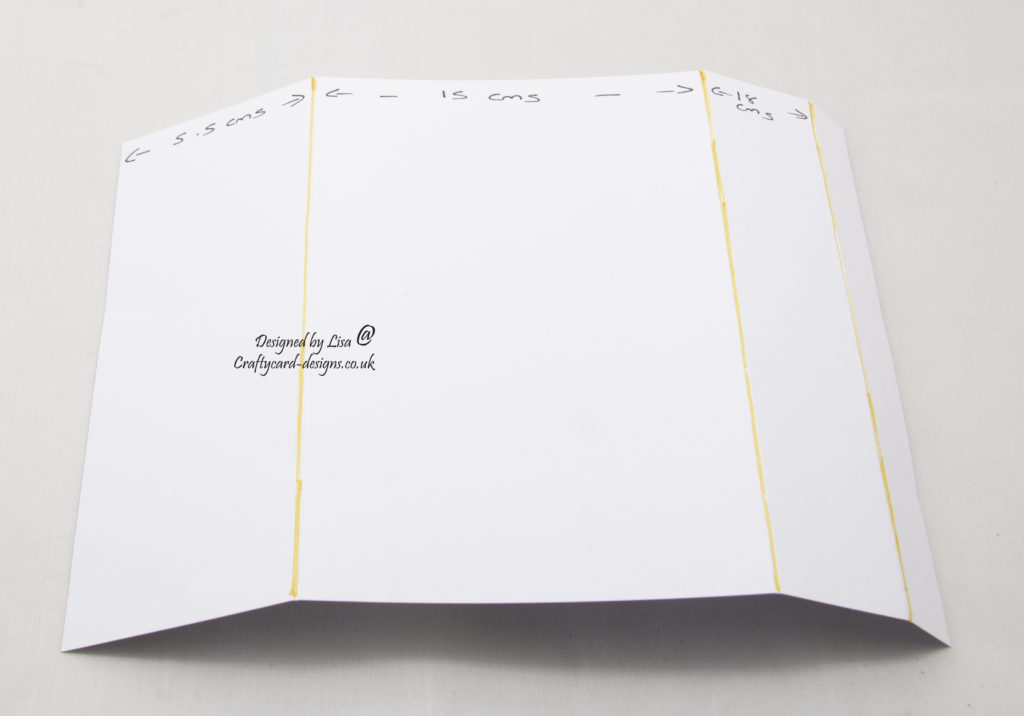
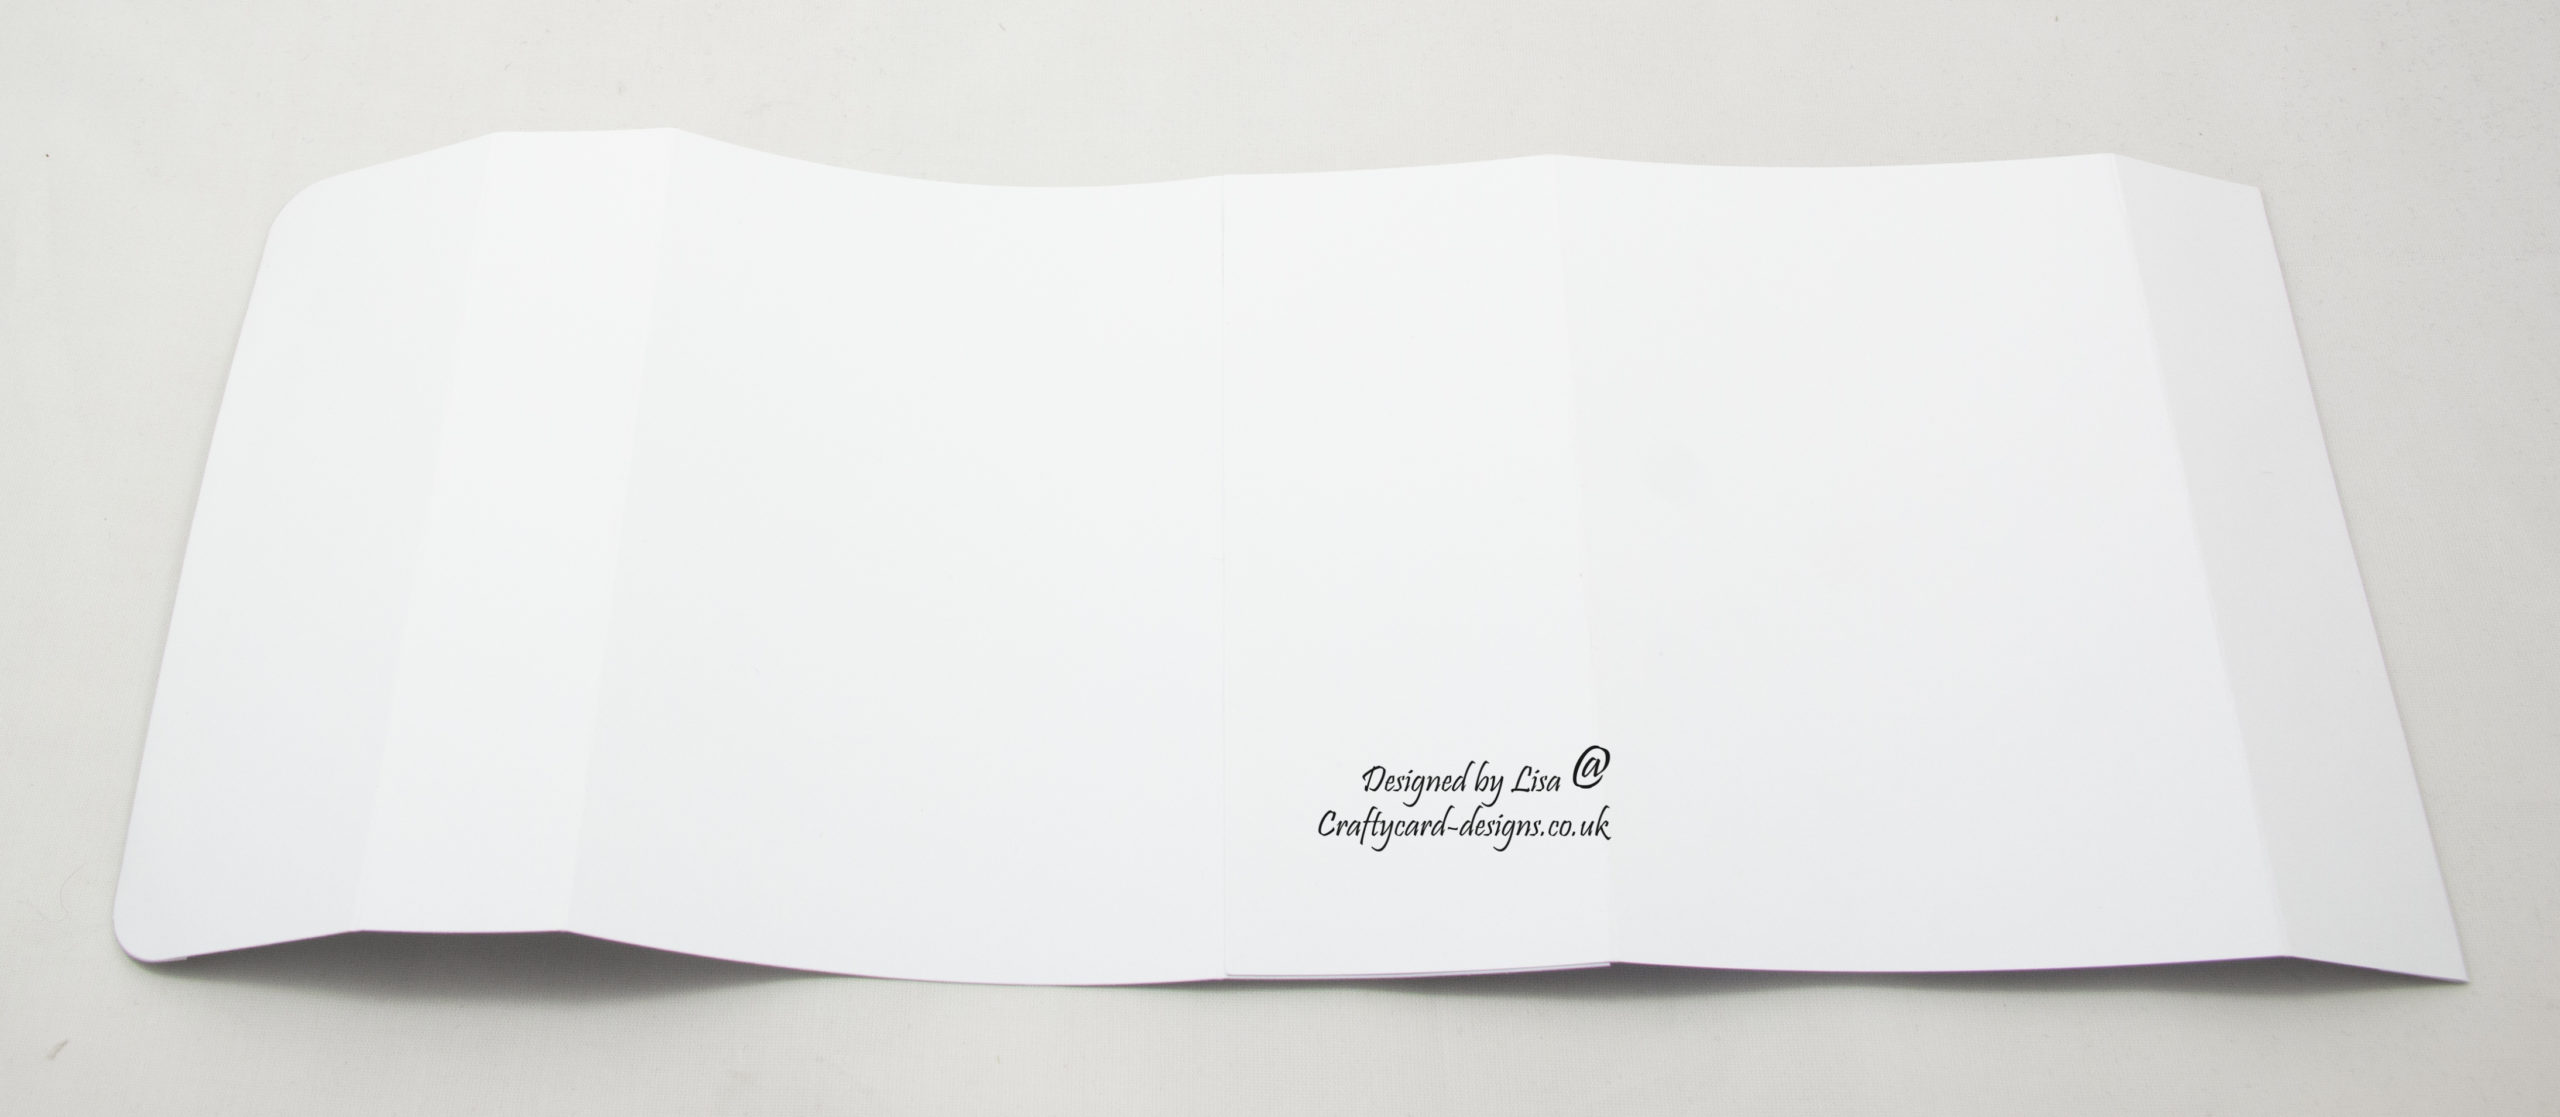
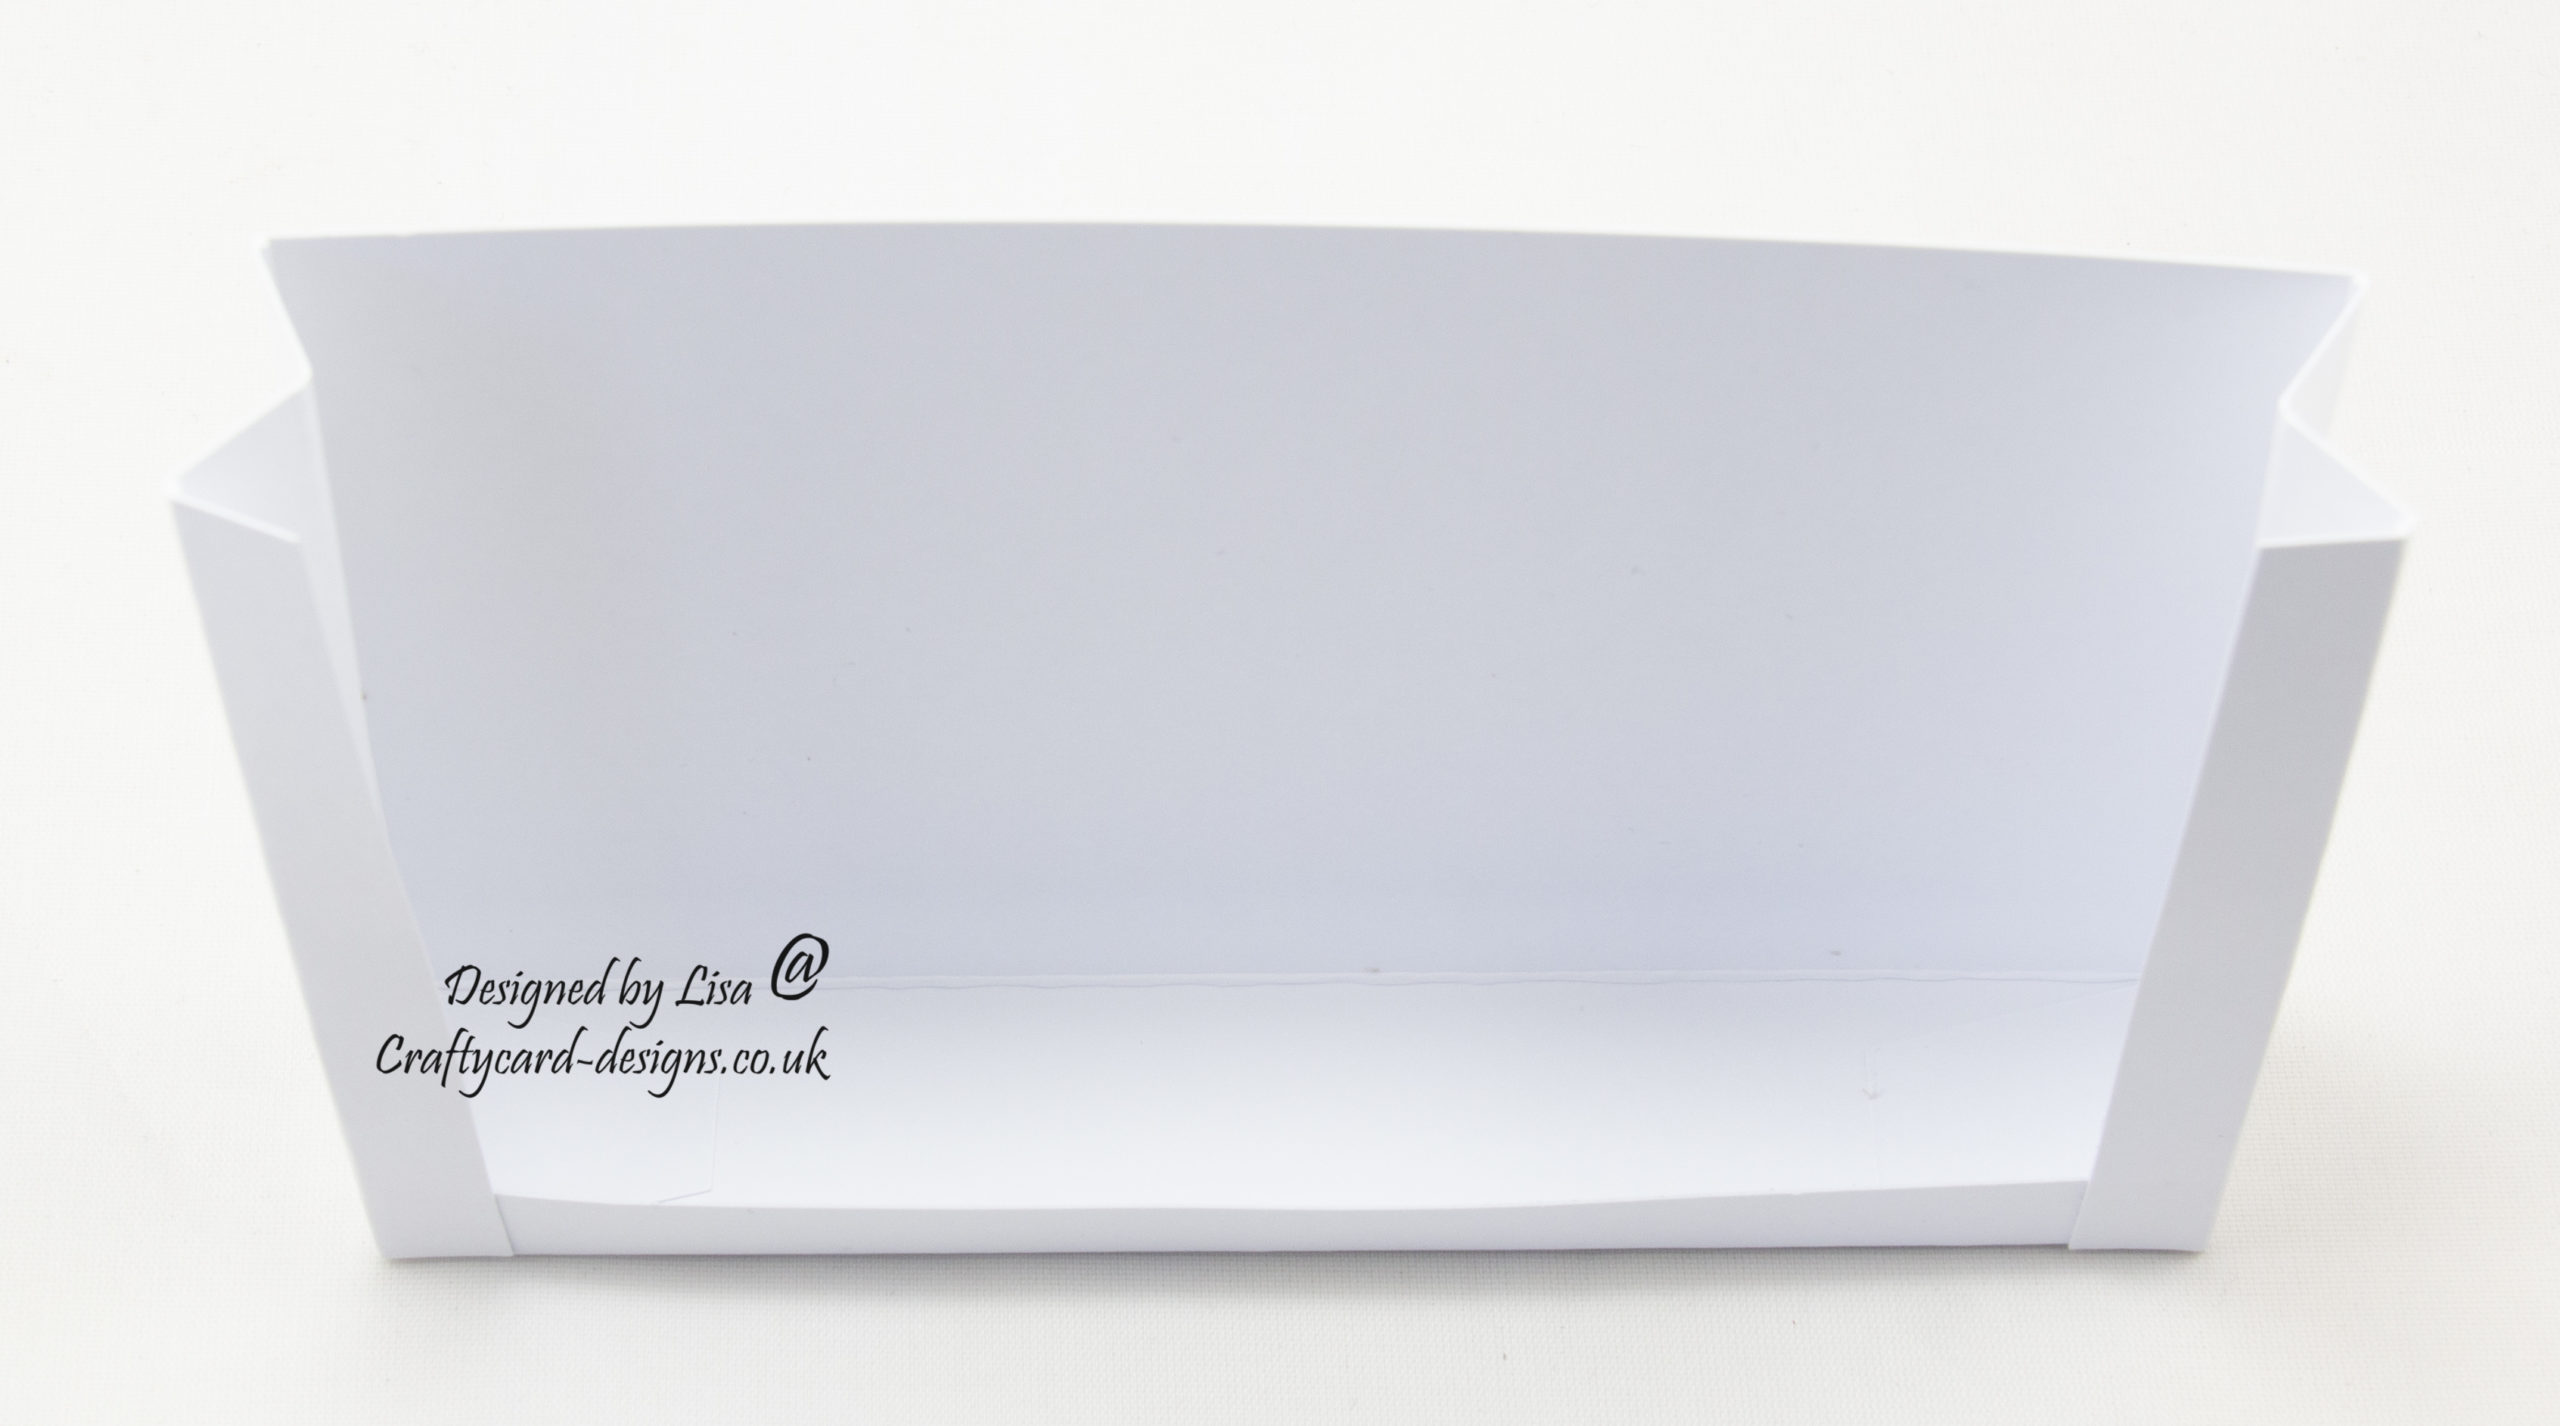
Cut a piece of white card measuring 19.5 cms by 14.5 cms.
On the longest side score and fold at 5.5, 15 and 18 cms.
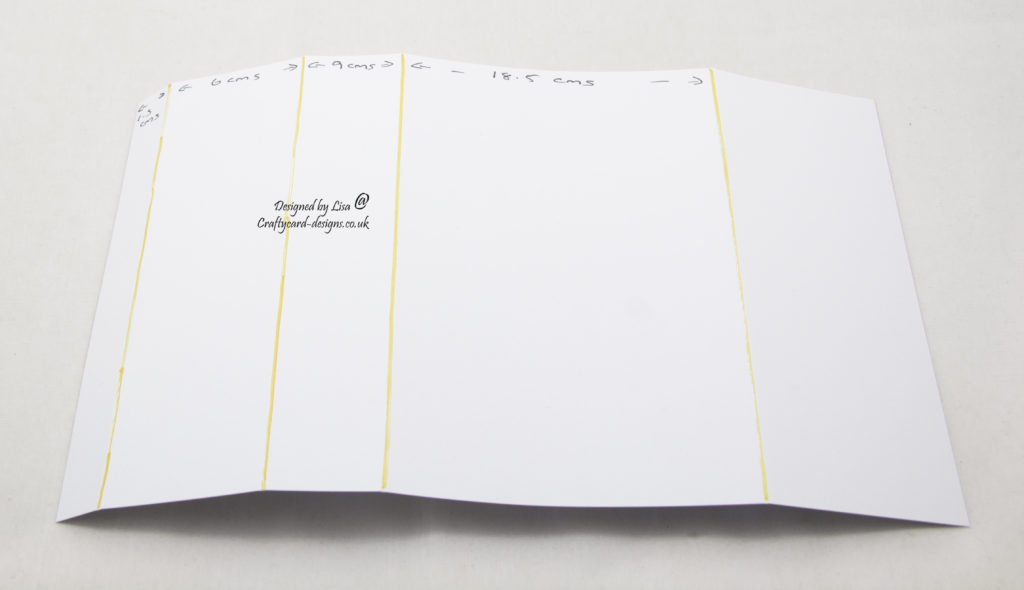
Cut a piece of white card measuring 24 cms by 14.5 cms.
On the longest side score and fold at 1.5, 6, 9 and 18.5 cms.
Next attach the largest edge of layer one to the largest edge on layer two.
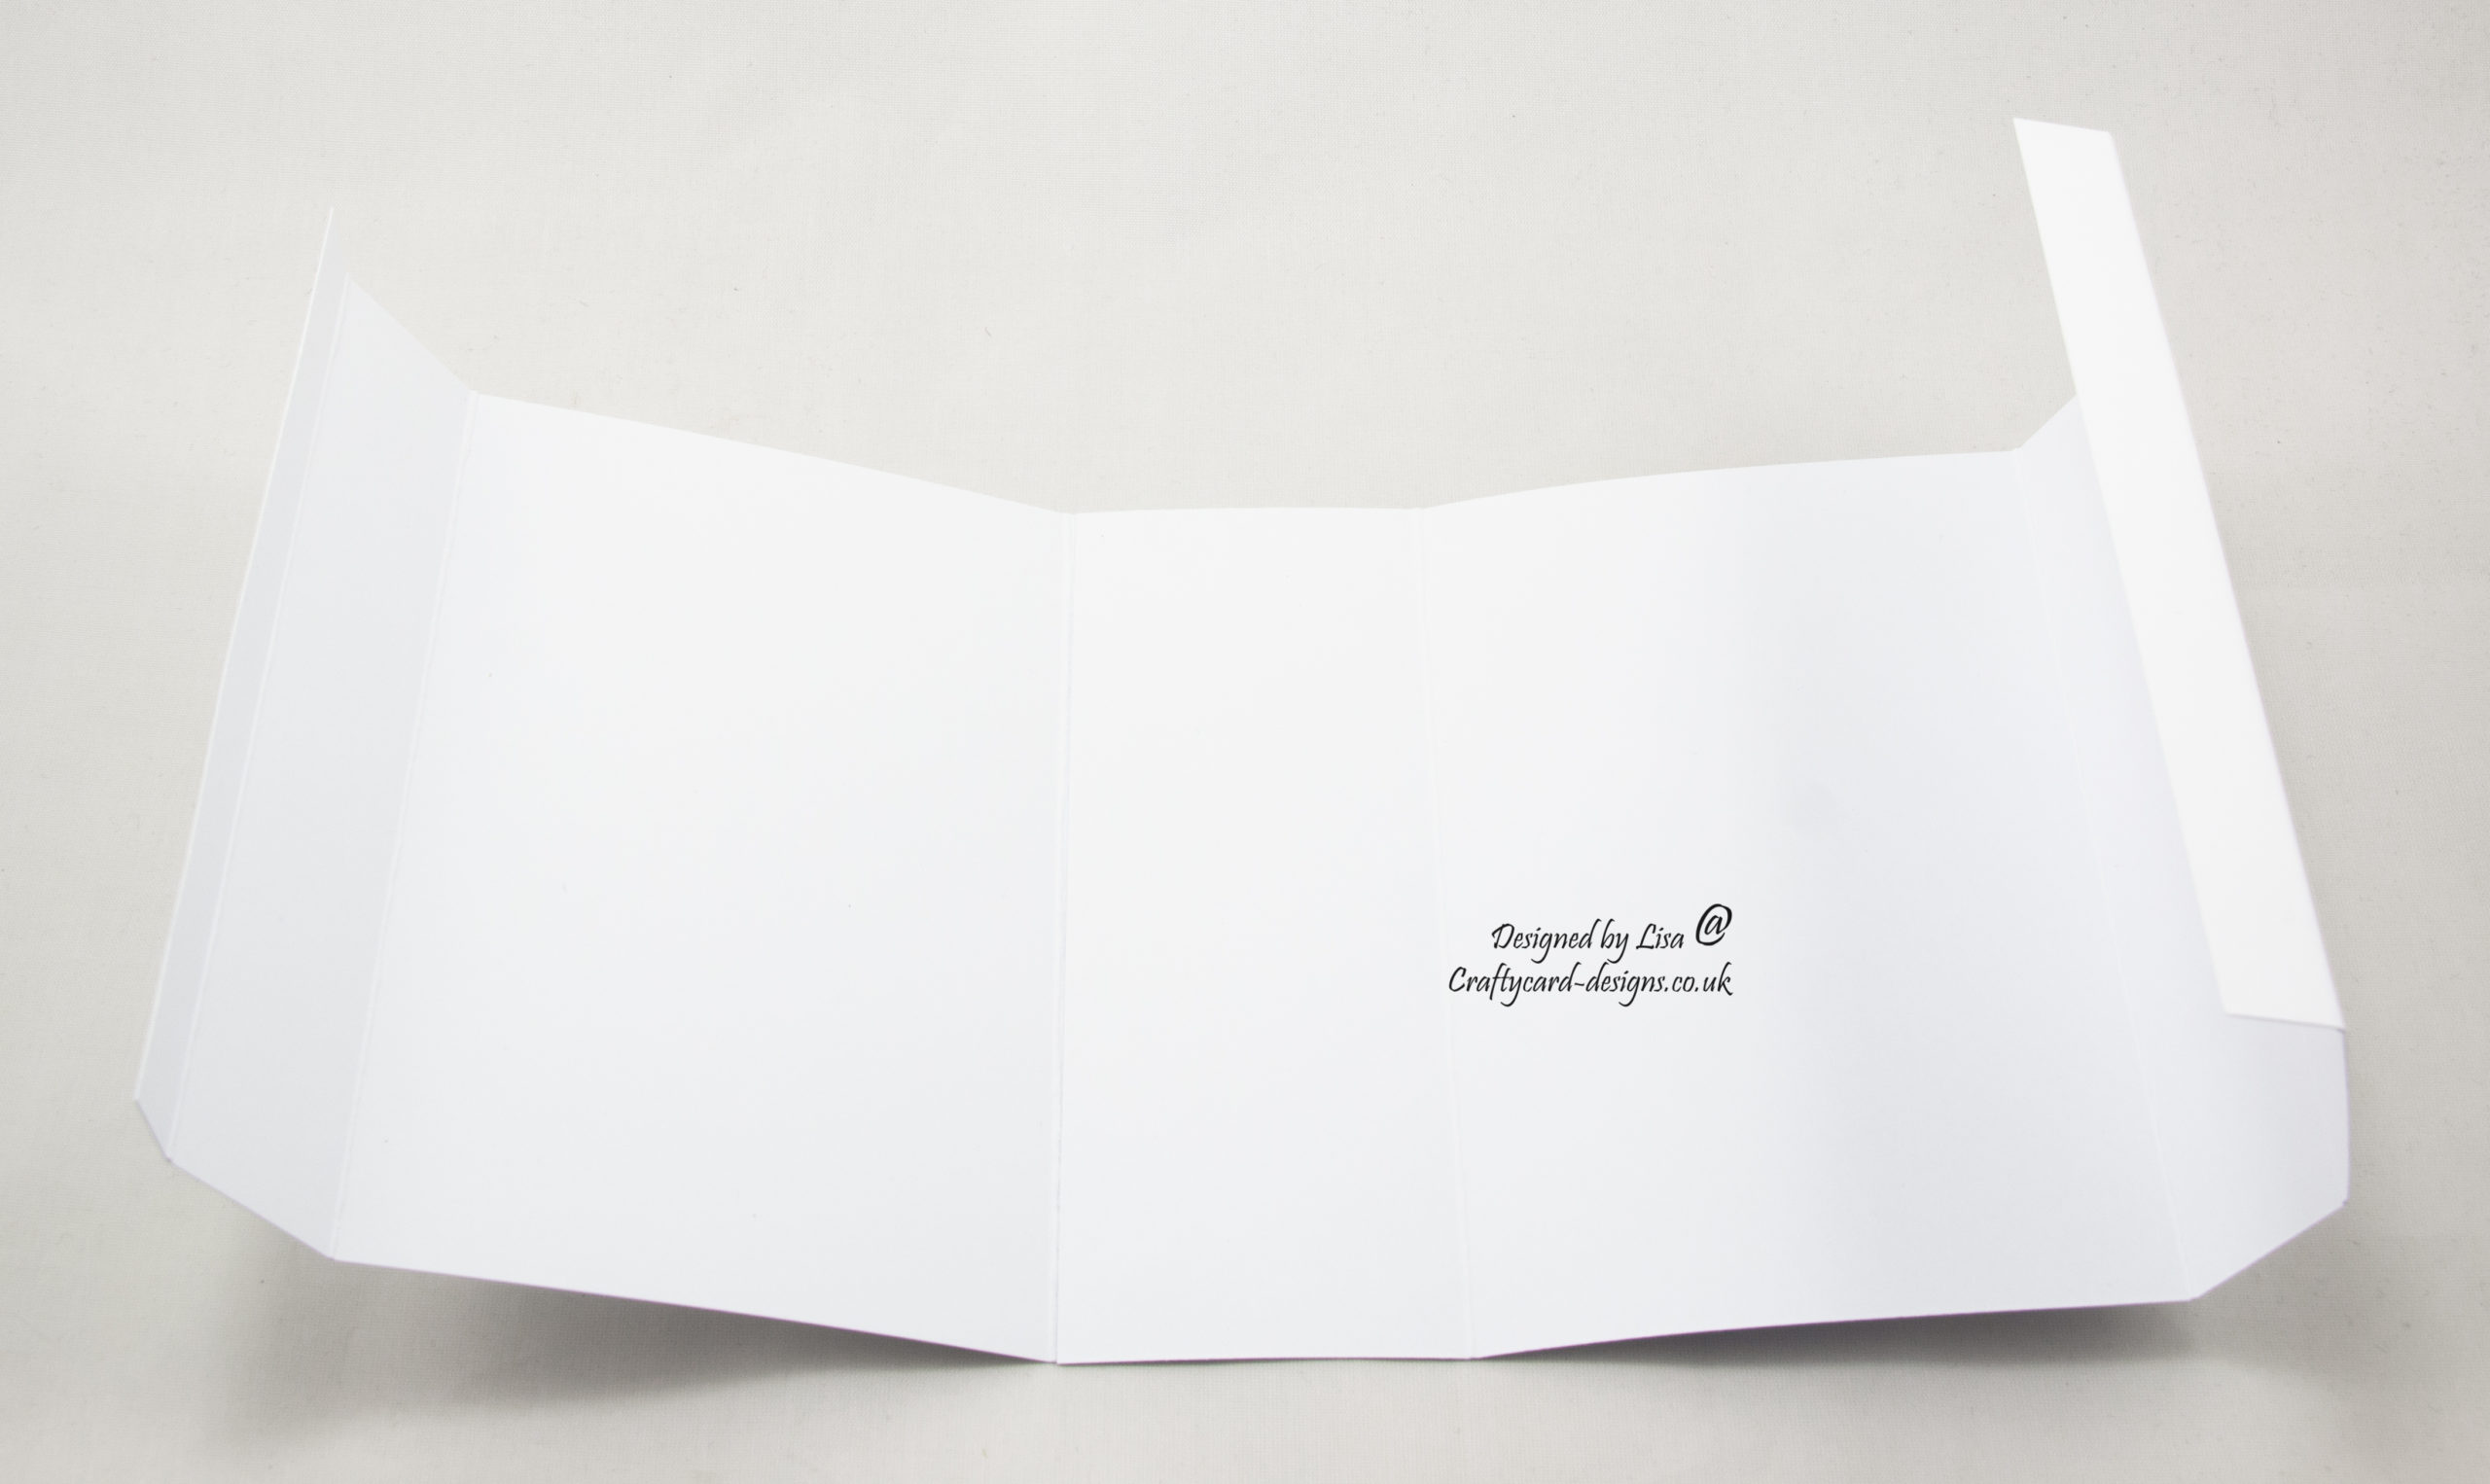
Attach the two 1.5 cms edge strips down, this give the design a little more strength when opening the handbag.

Using a corner punch, round off the corners of the largest edge. This is the front flap of the handbag.
On the inside of the same edge, add the first part of the magnet.
To keep the magnet in place add a little tape over the top.
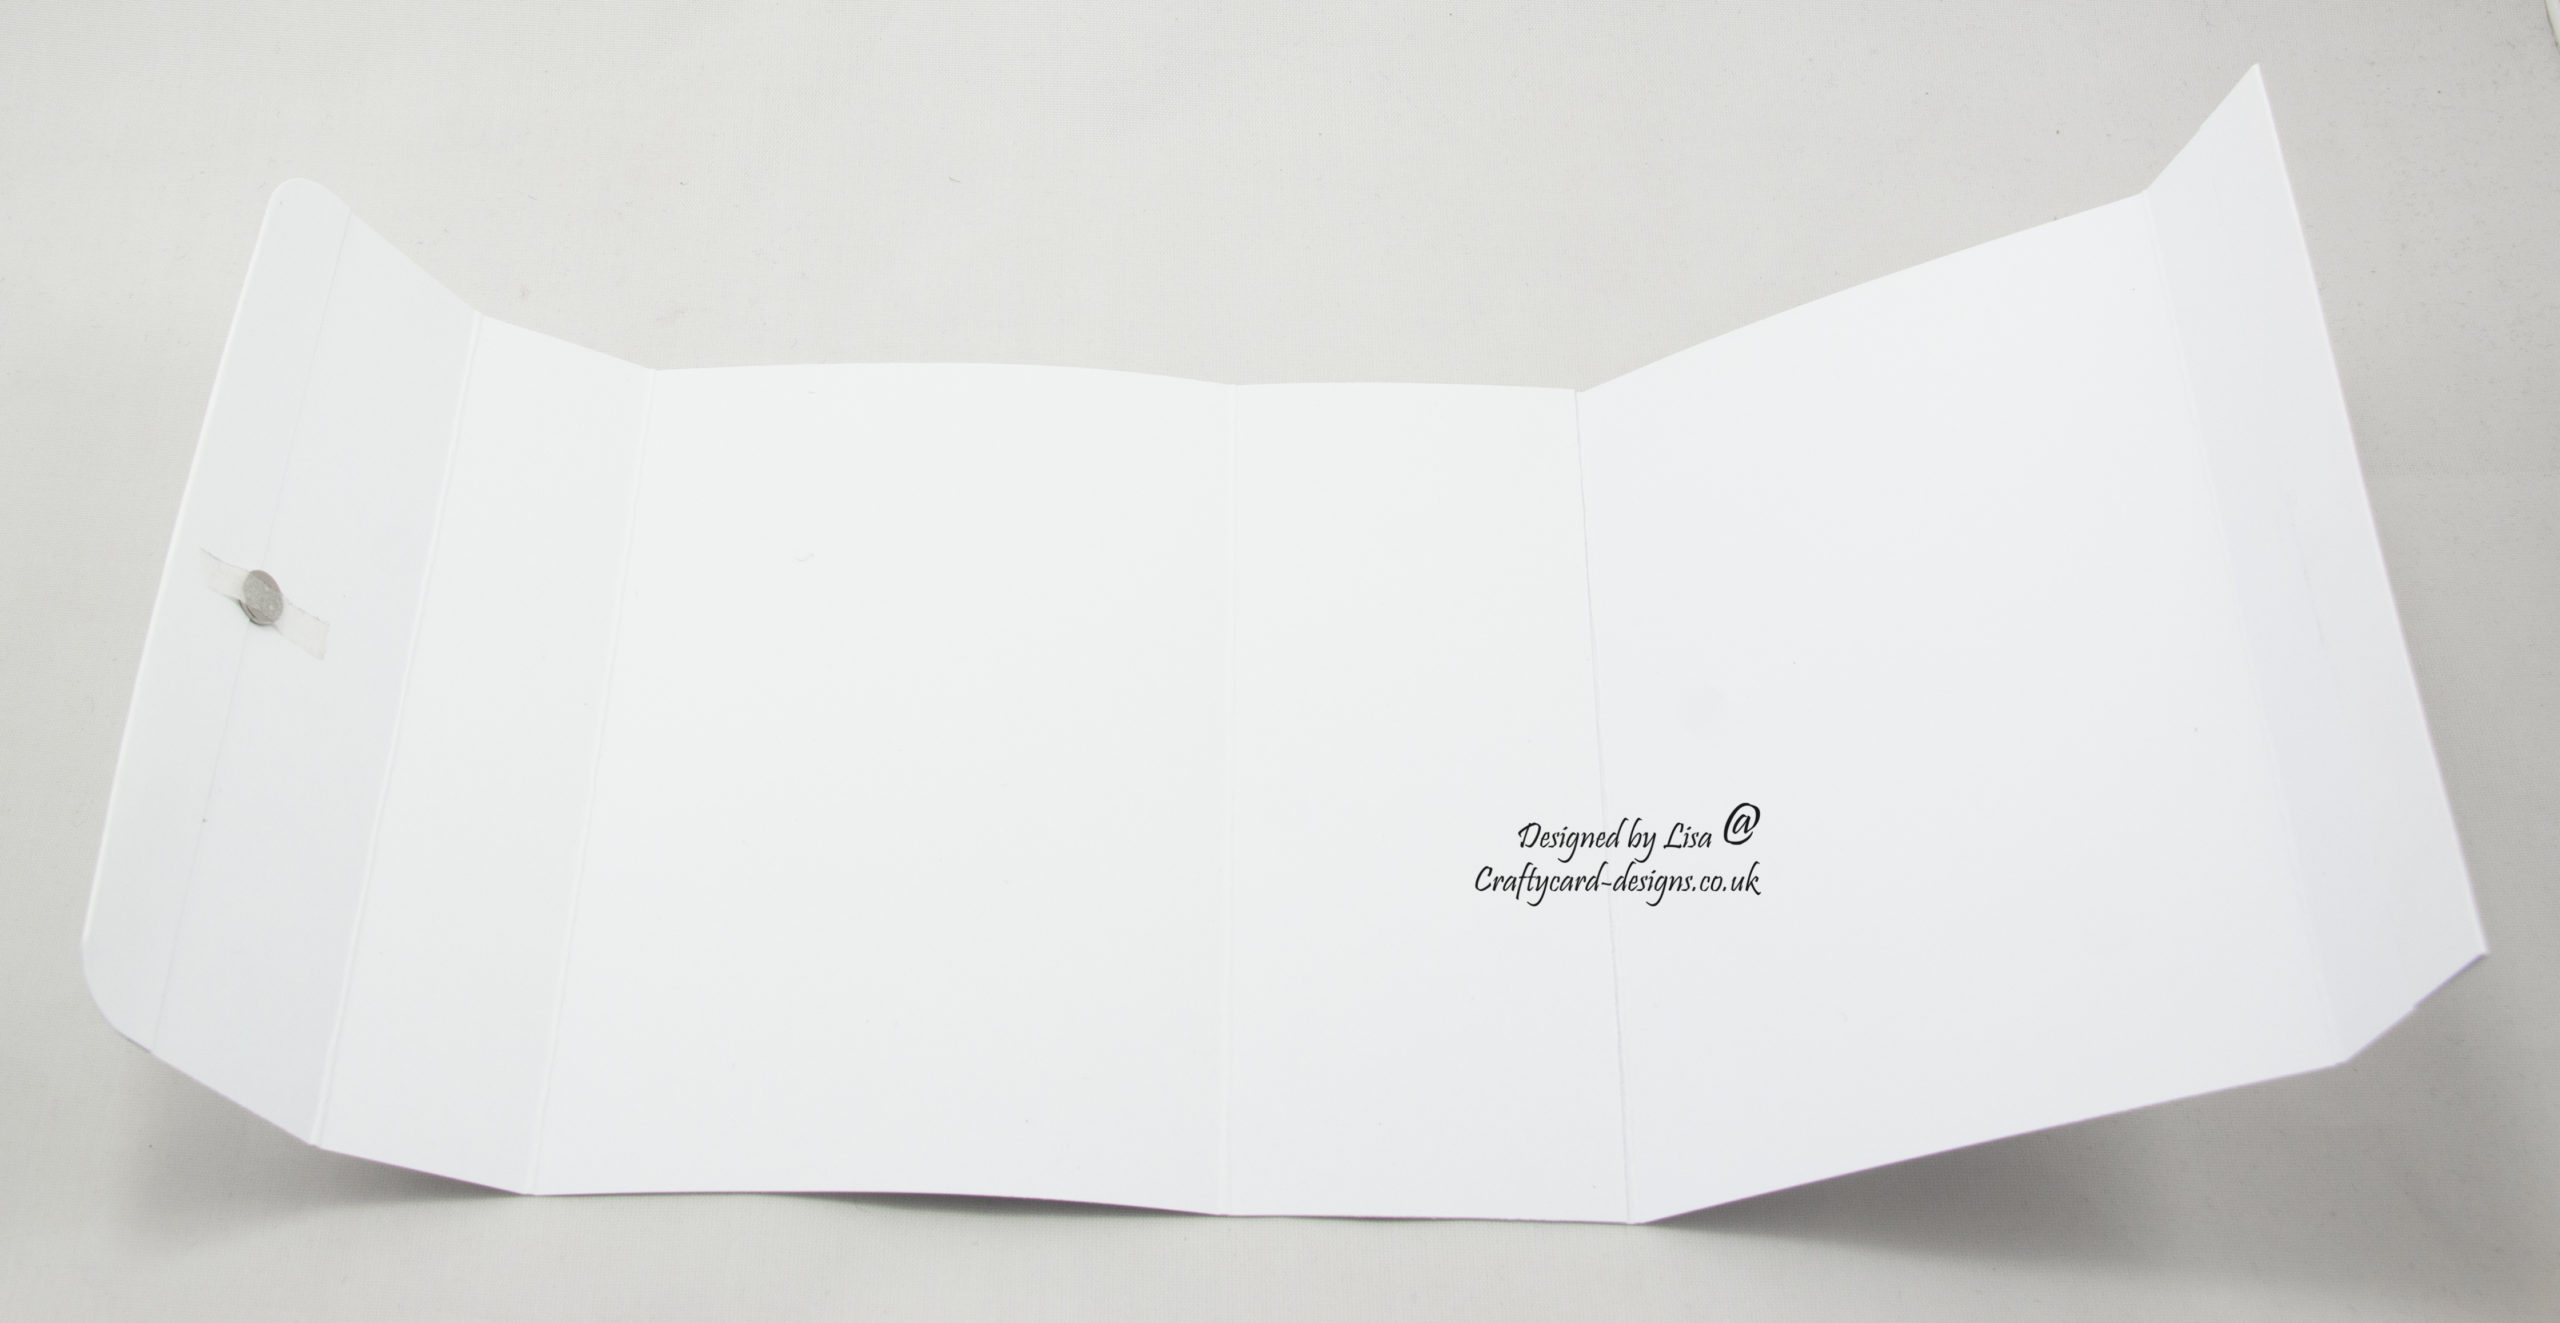
Then add the second part of the magnet to the outside of the largest section on the opposite side, adding a little tape over the top.
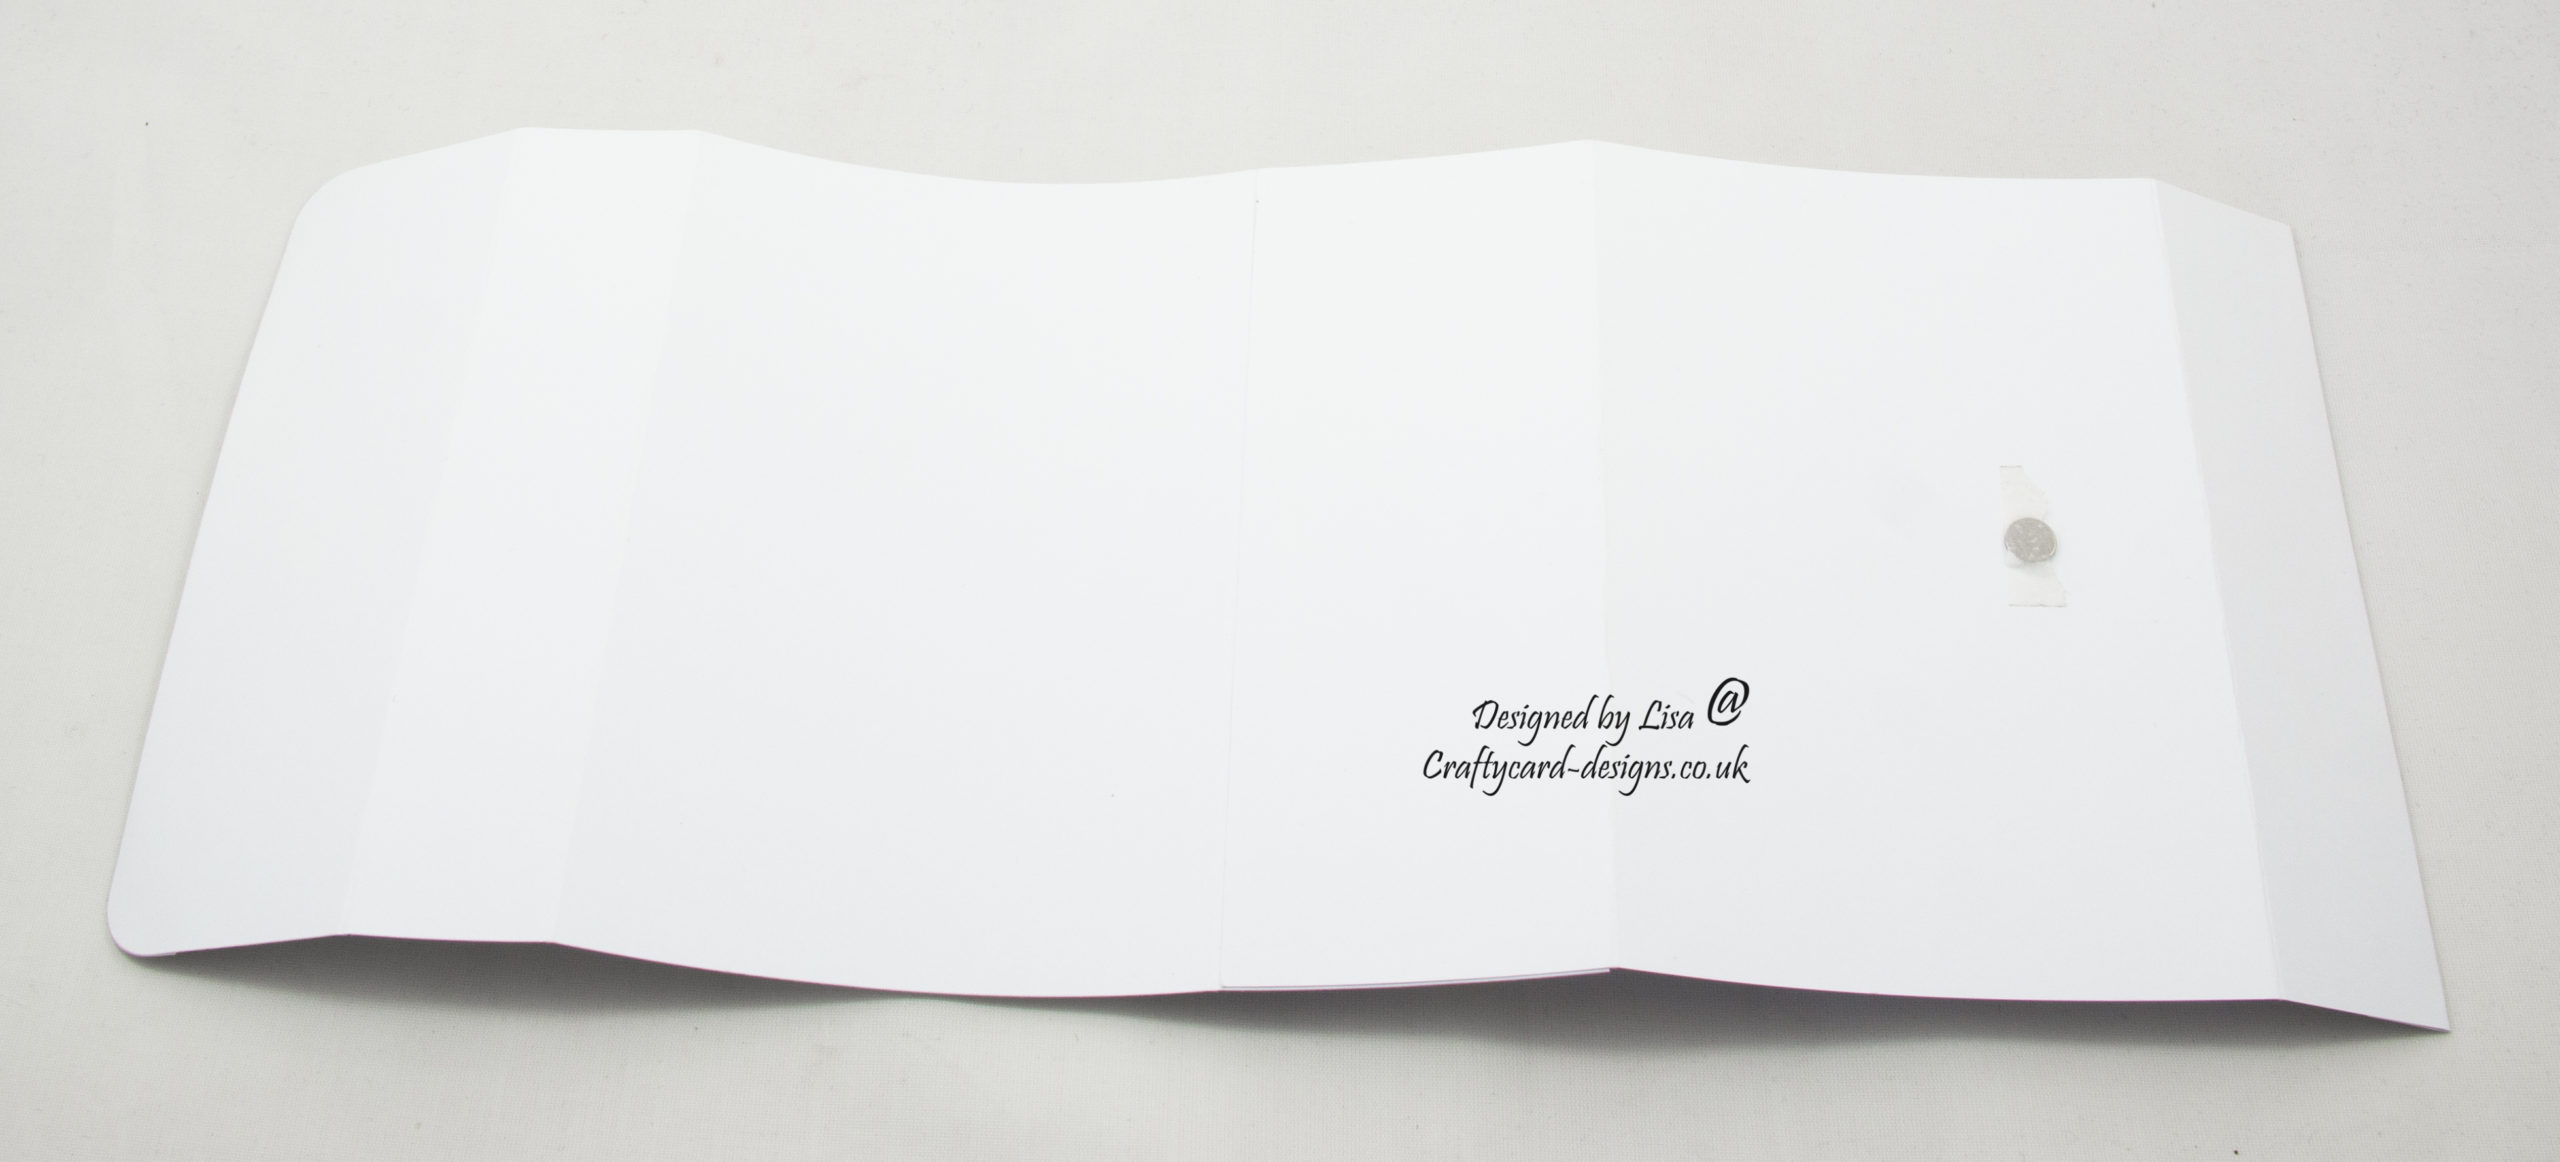
Double check that the magnets are in the correct place before matting and layering the decorative papers.

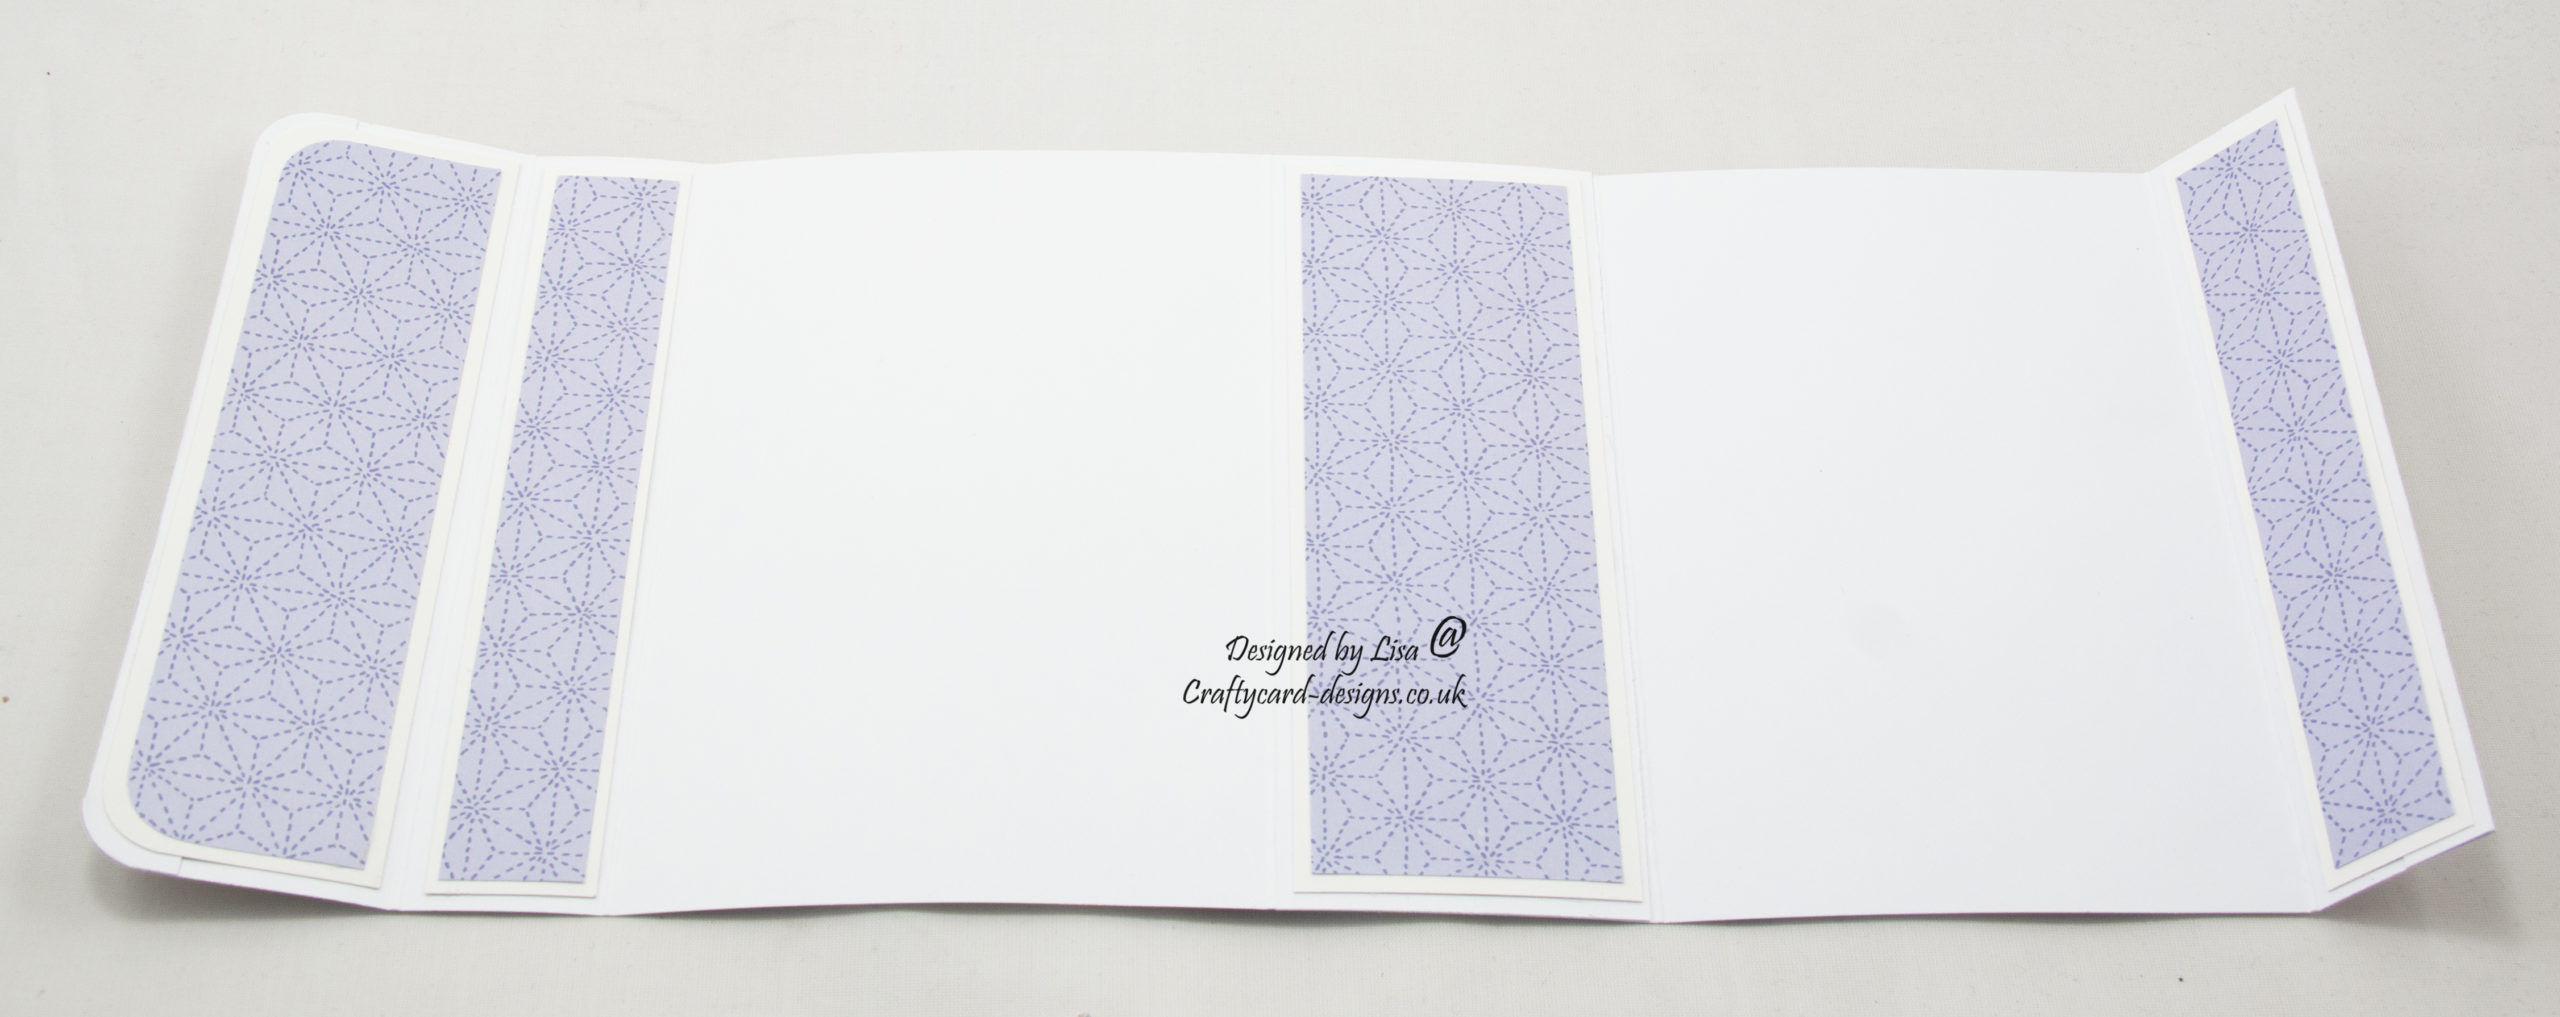
Layer one:
Cut a piece from the first coloured card measuring 4 cms by 14 cms.
Using a corner punch, round two of the edges.
Cut a piece from the first paper measuring 3.5 cms by 13.5 cms.
Using a corner punch, round two of the edges.
Matt and layer together.
Cut two pieces from the first coloured card measuring 2.5 cms by 14 cms.
Cut two pieces from the first paper measuring 2 cms by 13.5 cms.
Matt and layer together.
Cut a piece from the first coloured card measuring 5 cms by 14 cms.
Cut a piece from the first paper measuring 4.5 cms by 13.5 cms.
Matt and layer together.
Attach each of these matts and layers to the inside of the handbag.
Layer two:
Cut a piece from the second coloured card measuring 4 cms by 14 cms.
Using a corner punch, round two of the edges.
Cut a piece from the second paper measuring 3.5 cms by 13.5 cms.
Using a corner punch, round two of the edges.
Matt and layer together.
Cut two pieces from the second coloured card measuring 2.5 cms by 14 cms.
Cut two pieces from the second paper measuring 2 cms by 13.5 cms.
Matt and layer together.
Cut two pieces from the second coloured card measuring 9 cms by 14 cms.
Cut two pieces from the second paper measuring 8.5 cms by 13.5 cms.
Matt and layer together.
Attach each of these matts and layers to the outside of the handbag.

Layer three:
Cut a piece of white card measuring 5 cms by 18 cms.
Score down the centre, fold and attach together to make the width of the handle 2.5 cms.
Score and fold each end at 2 cms.
Cut a piece from the first coloured card measuring 2 cms by 13.5 cms.
Cut two pieces from the first coloured card measuring 2 cms by 1.5 cms.
Attach each to the handle.
Next mold the centre of the handle into a curve.
Attach each end to the top of the handbag.
Layer four:
Using two of the toppers, cut around the images and attach to the front of the handbag.
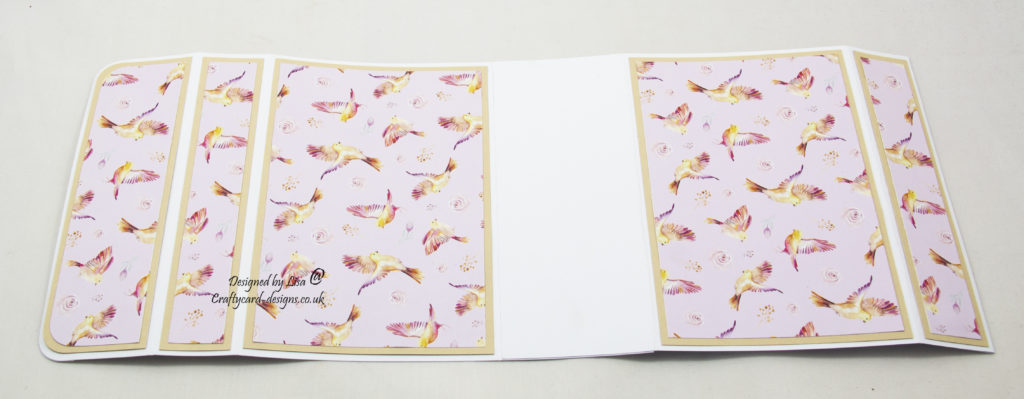
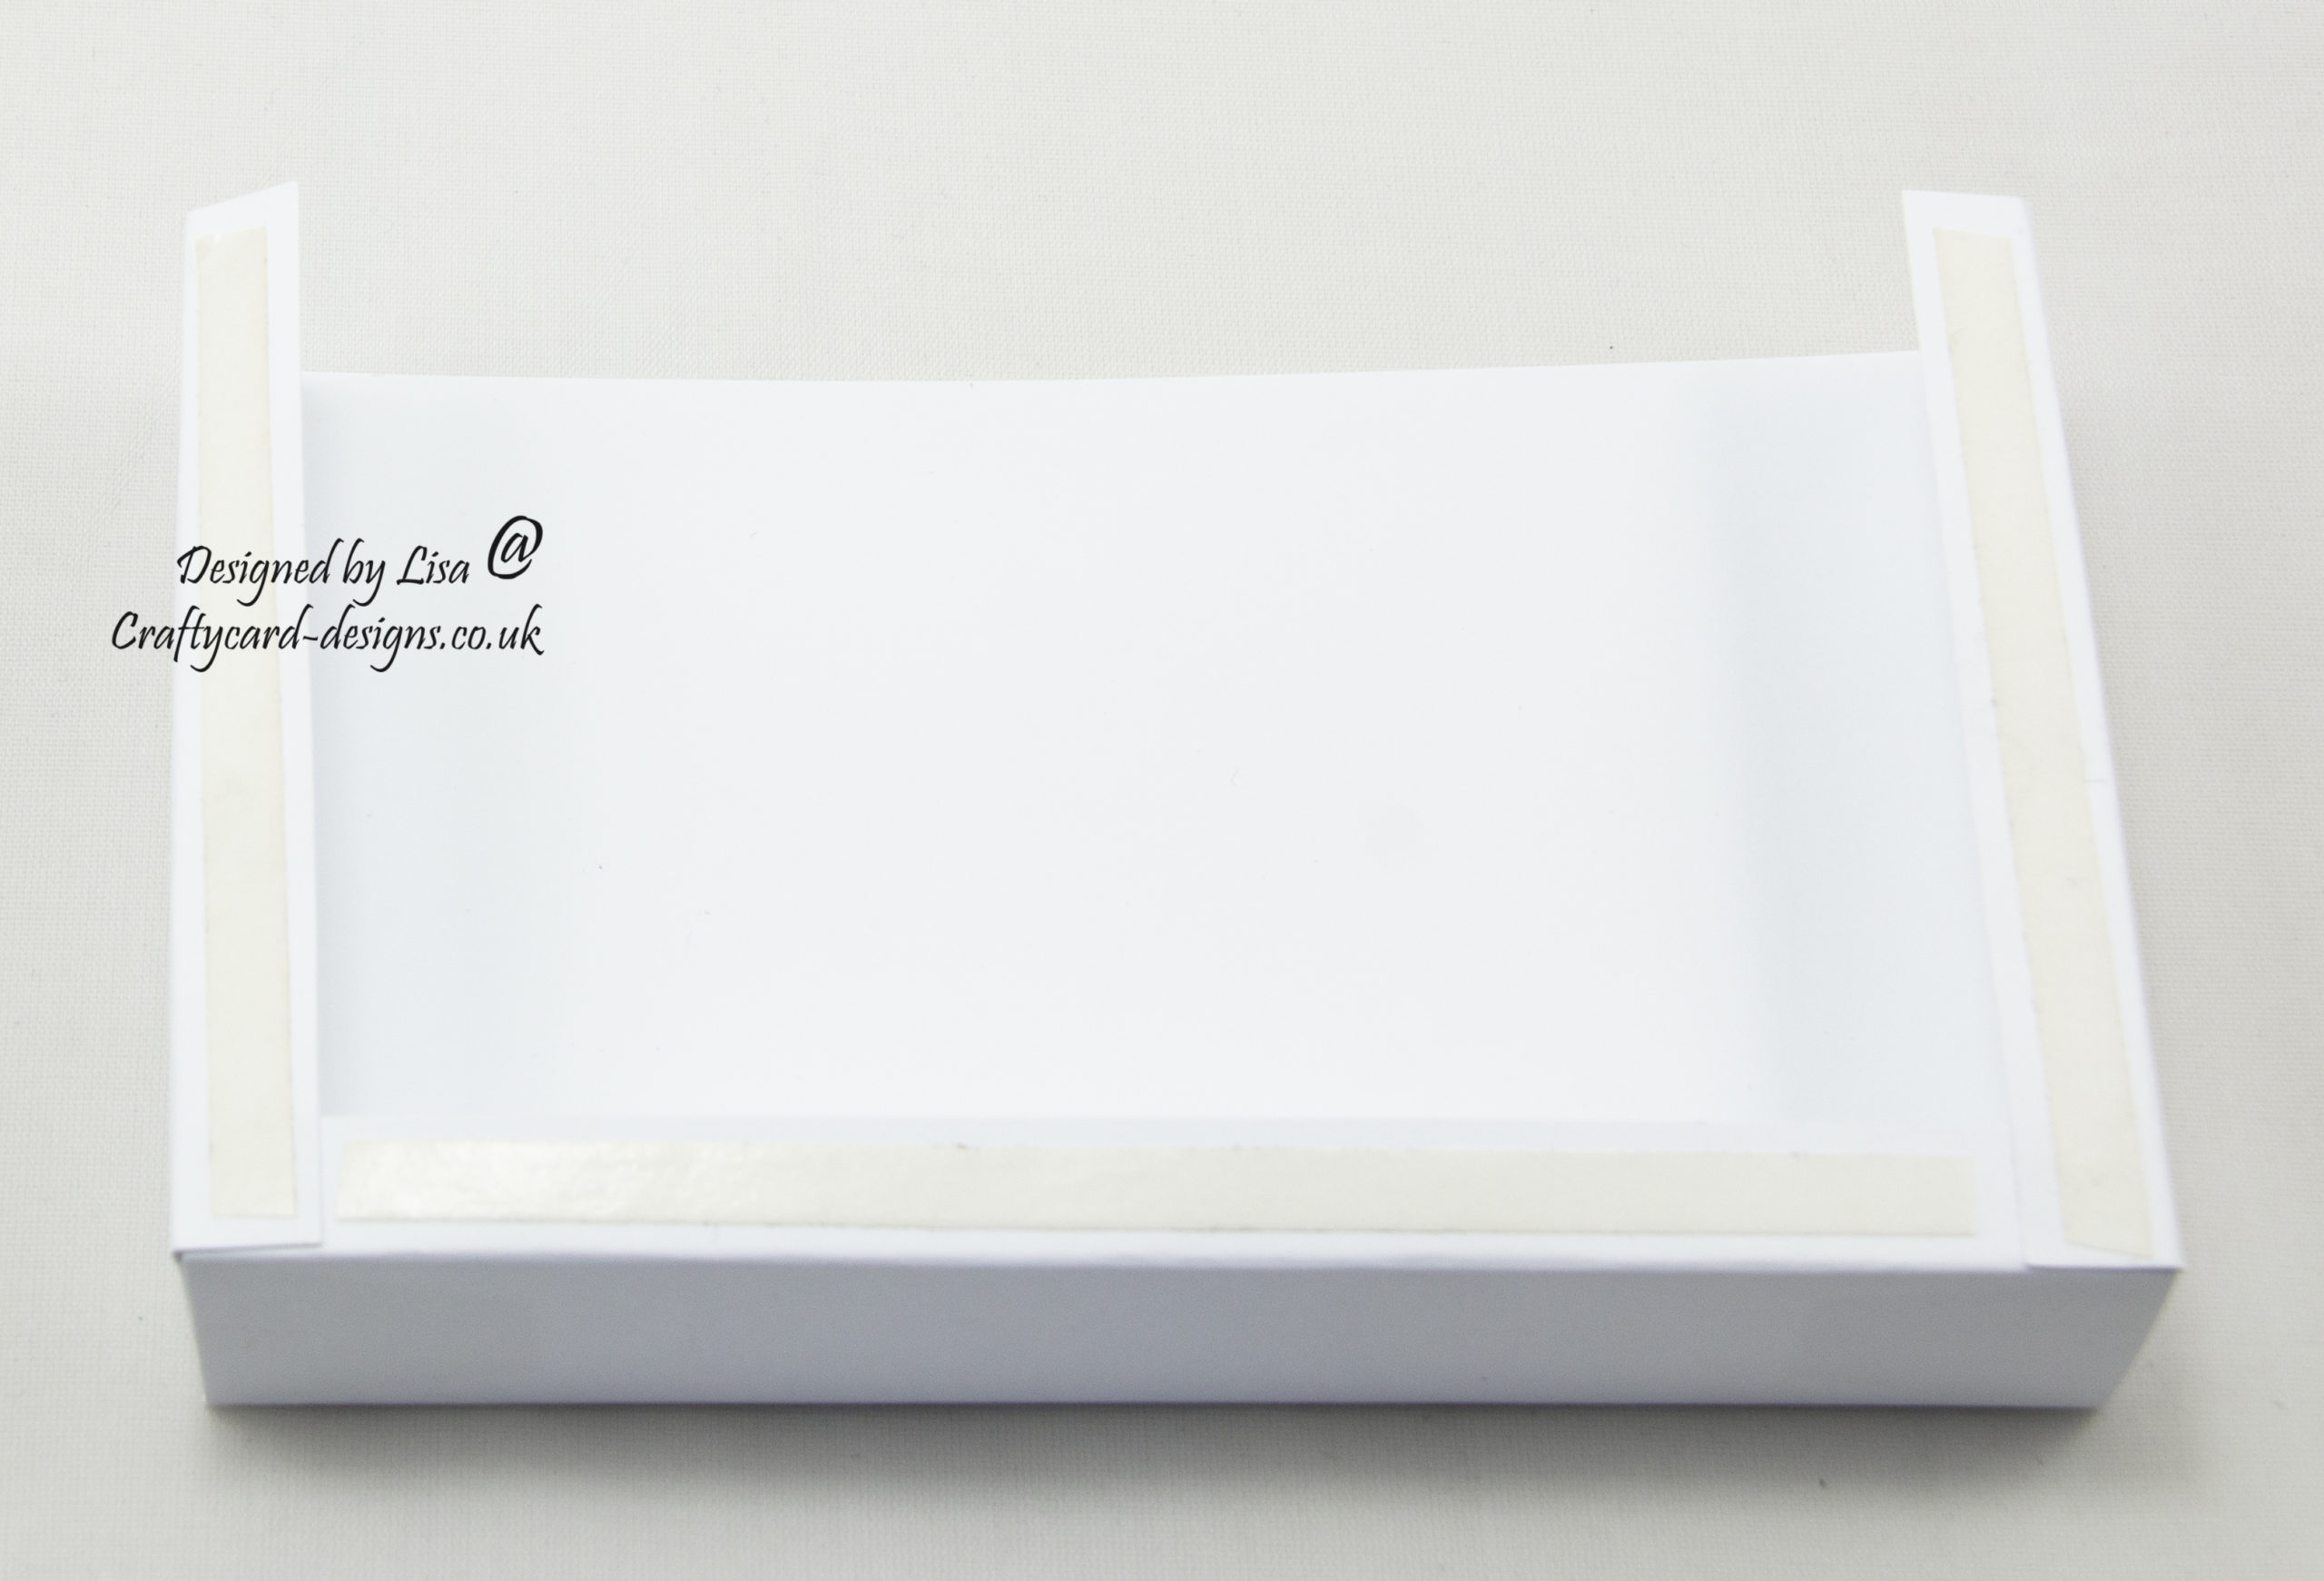
Handbag Inside Construction:
Cut two pieces of white card measuring 21 cms by 12 cms.
Score and fold each shorter side at 1 cm and 3.5 cms.
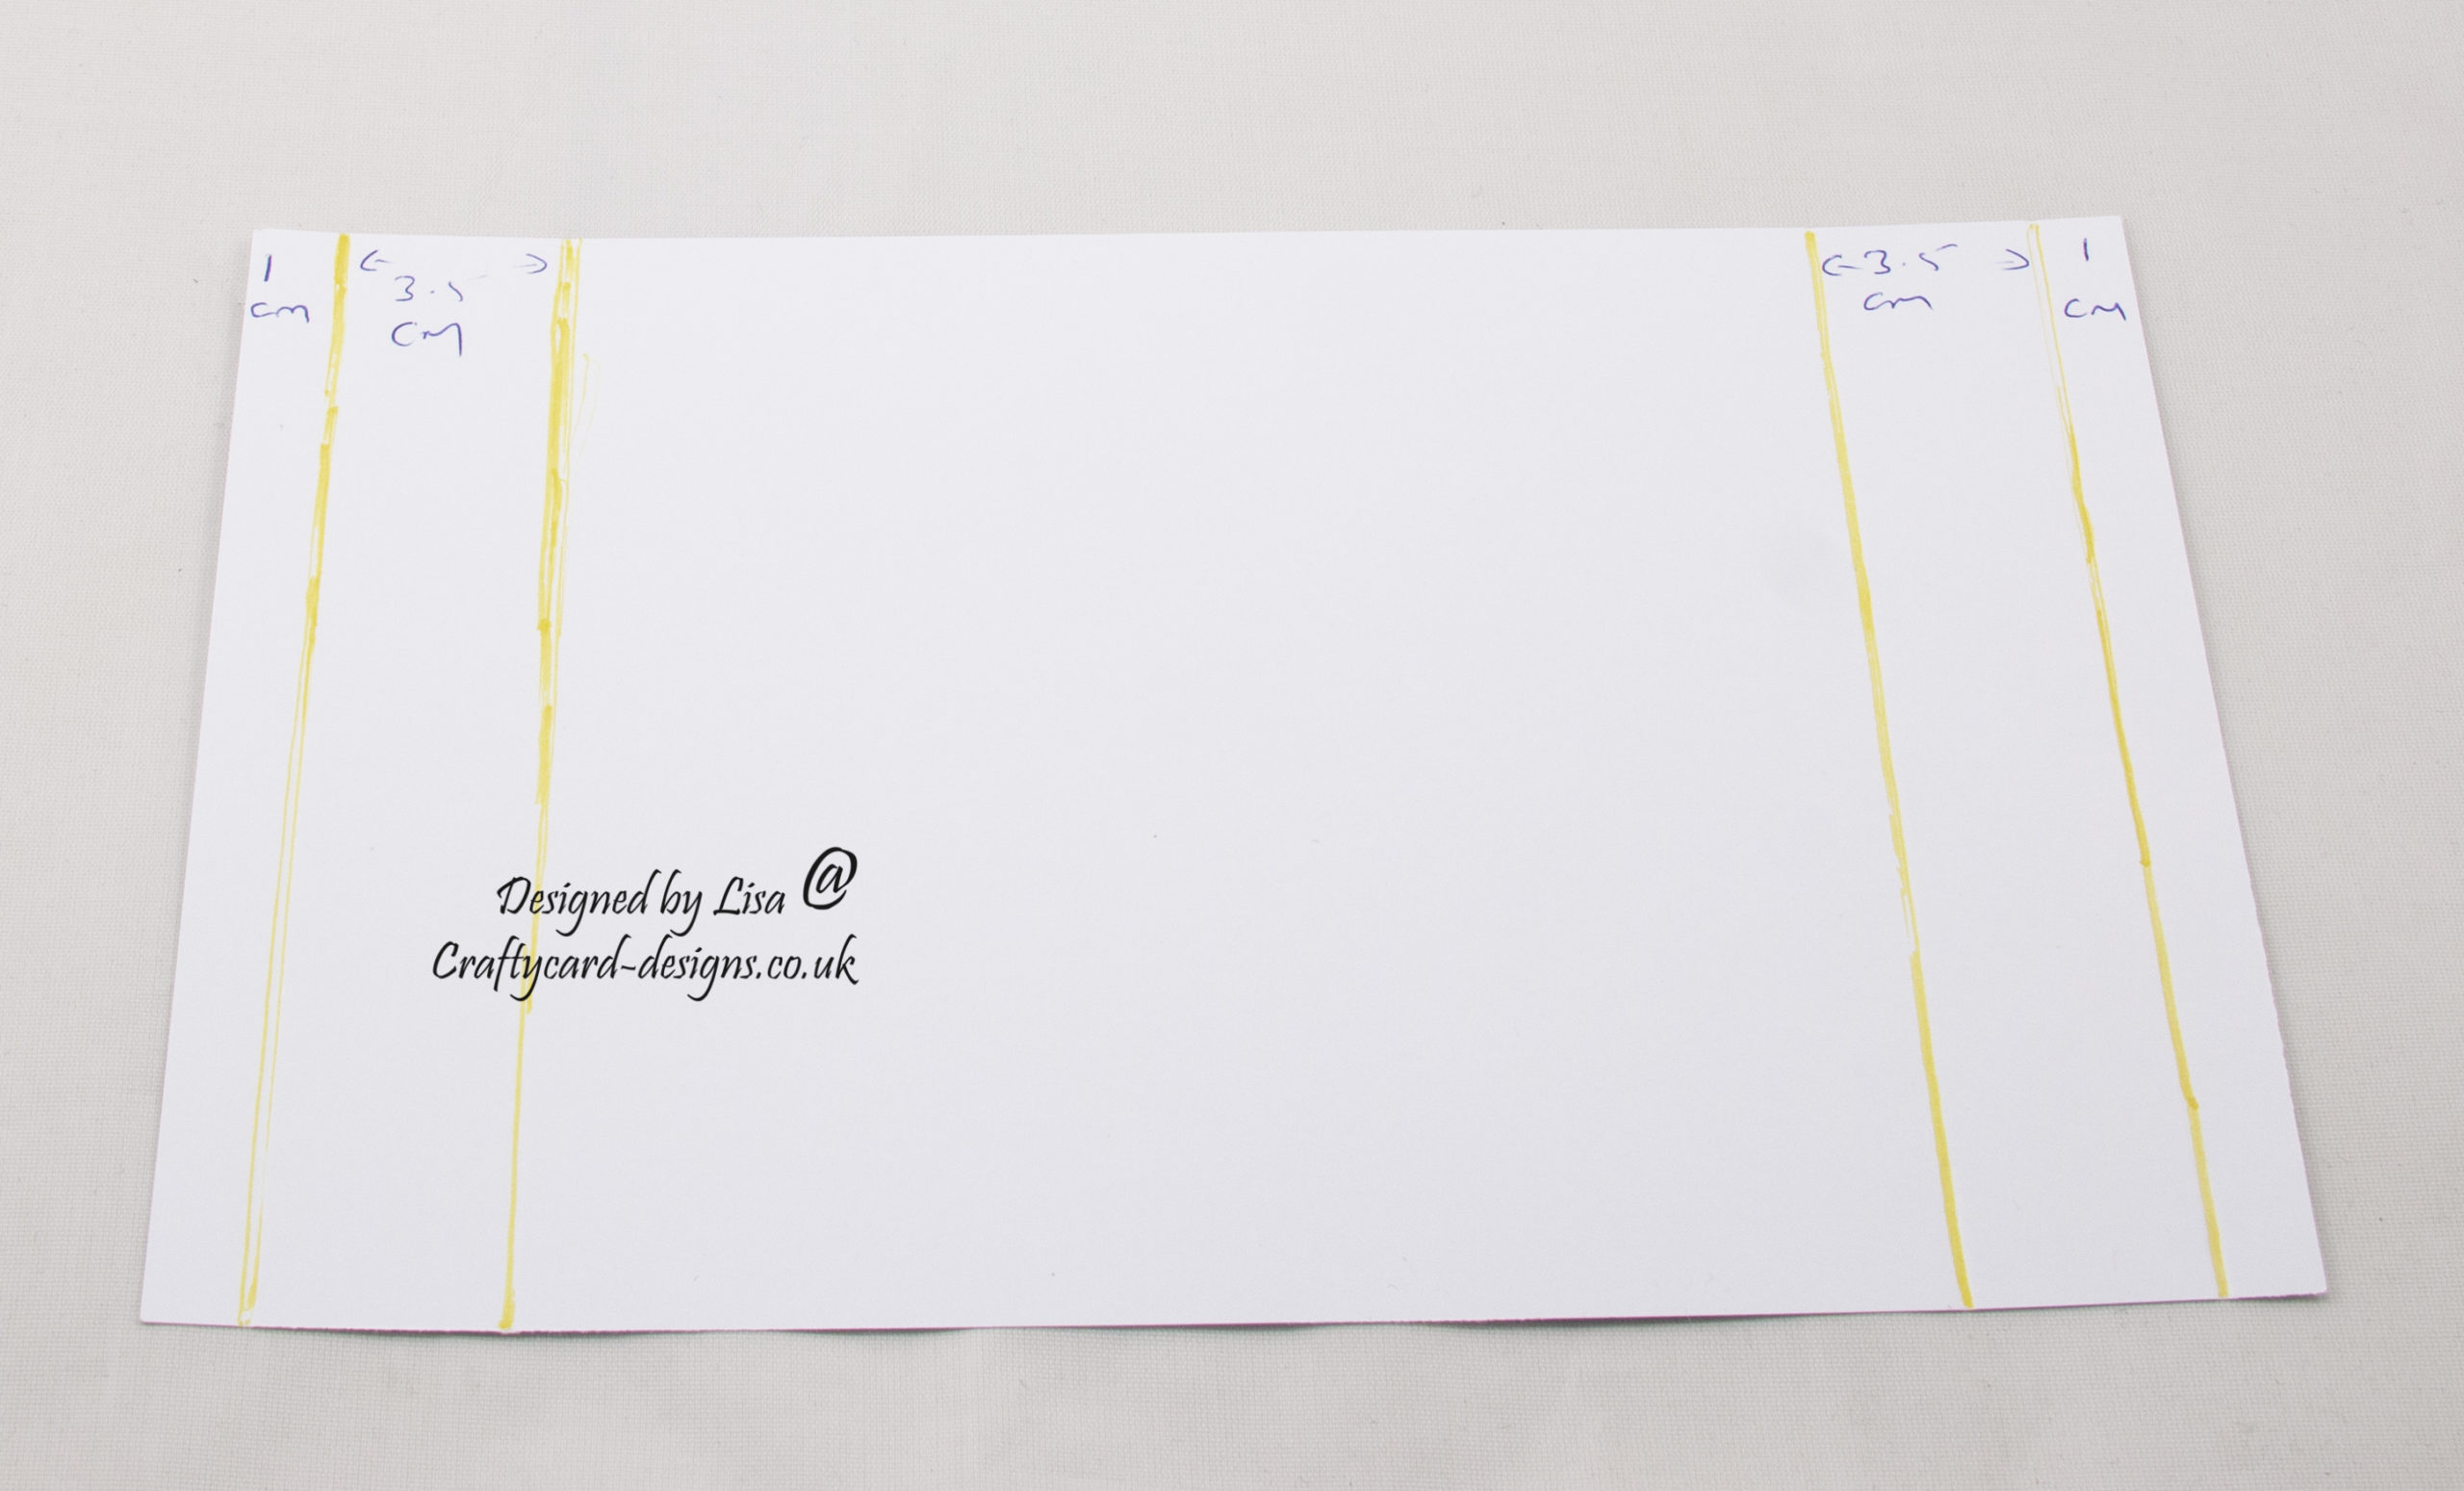
Then on one of the longer sides score and fold at 1 cm and 3.5 cms.
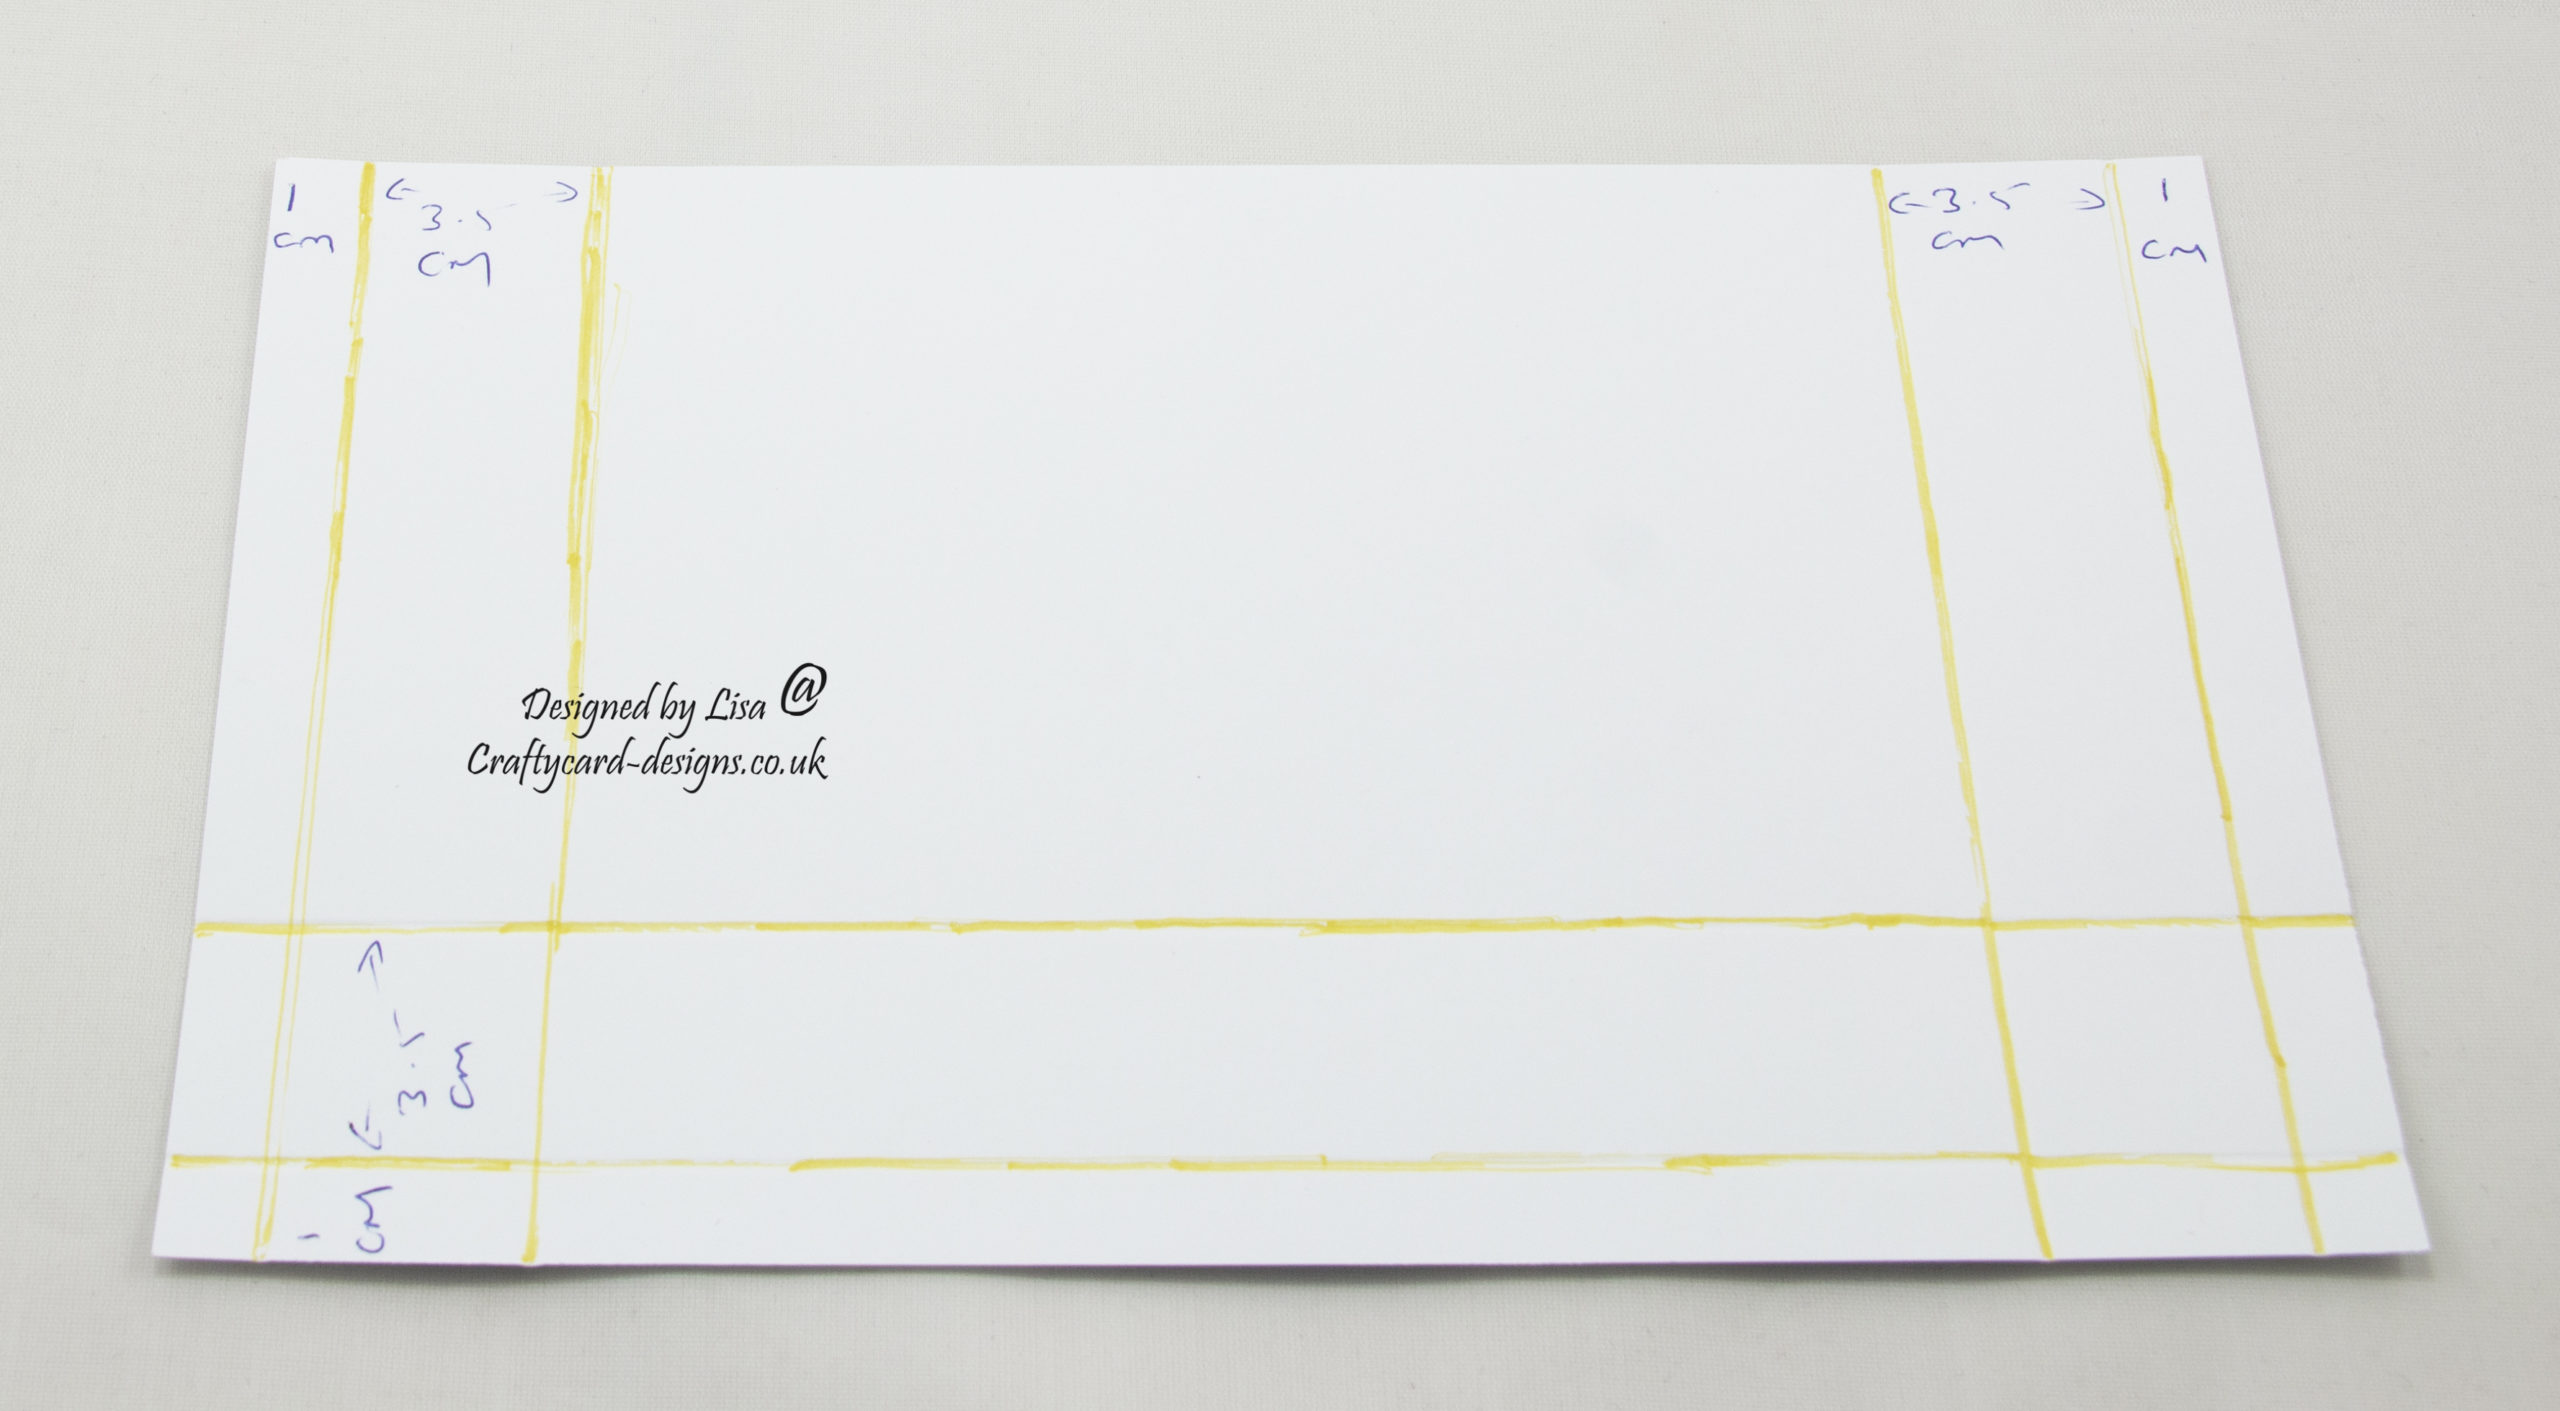
Next a couple of the sections need cutting out from one of the longer edges. Please see the below images.
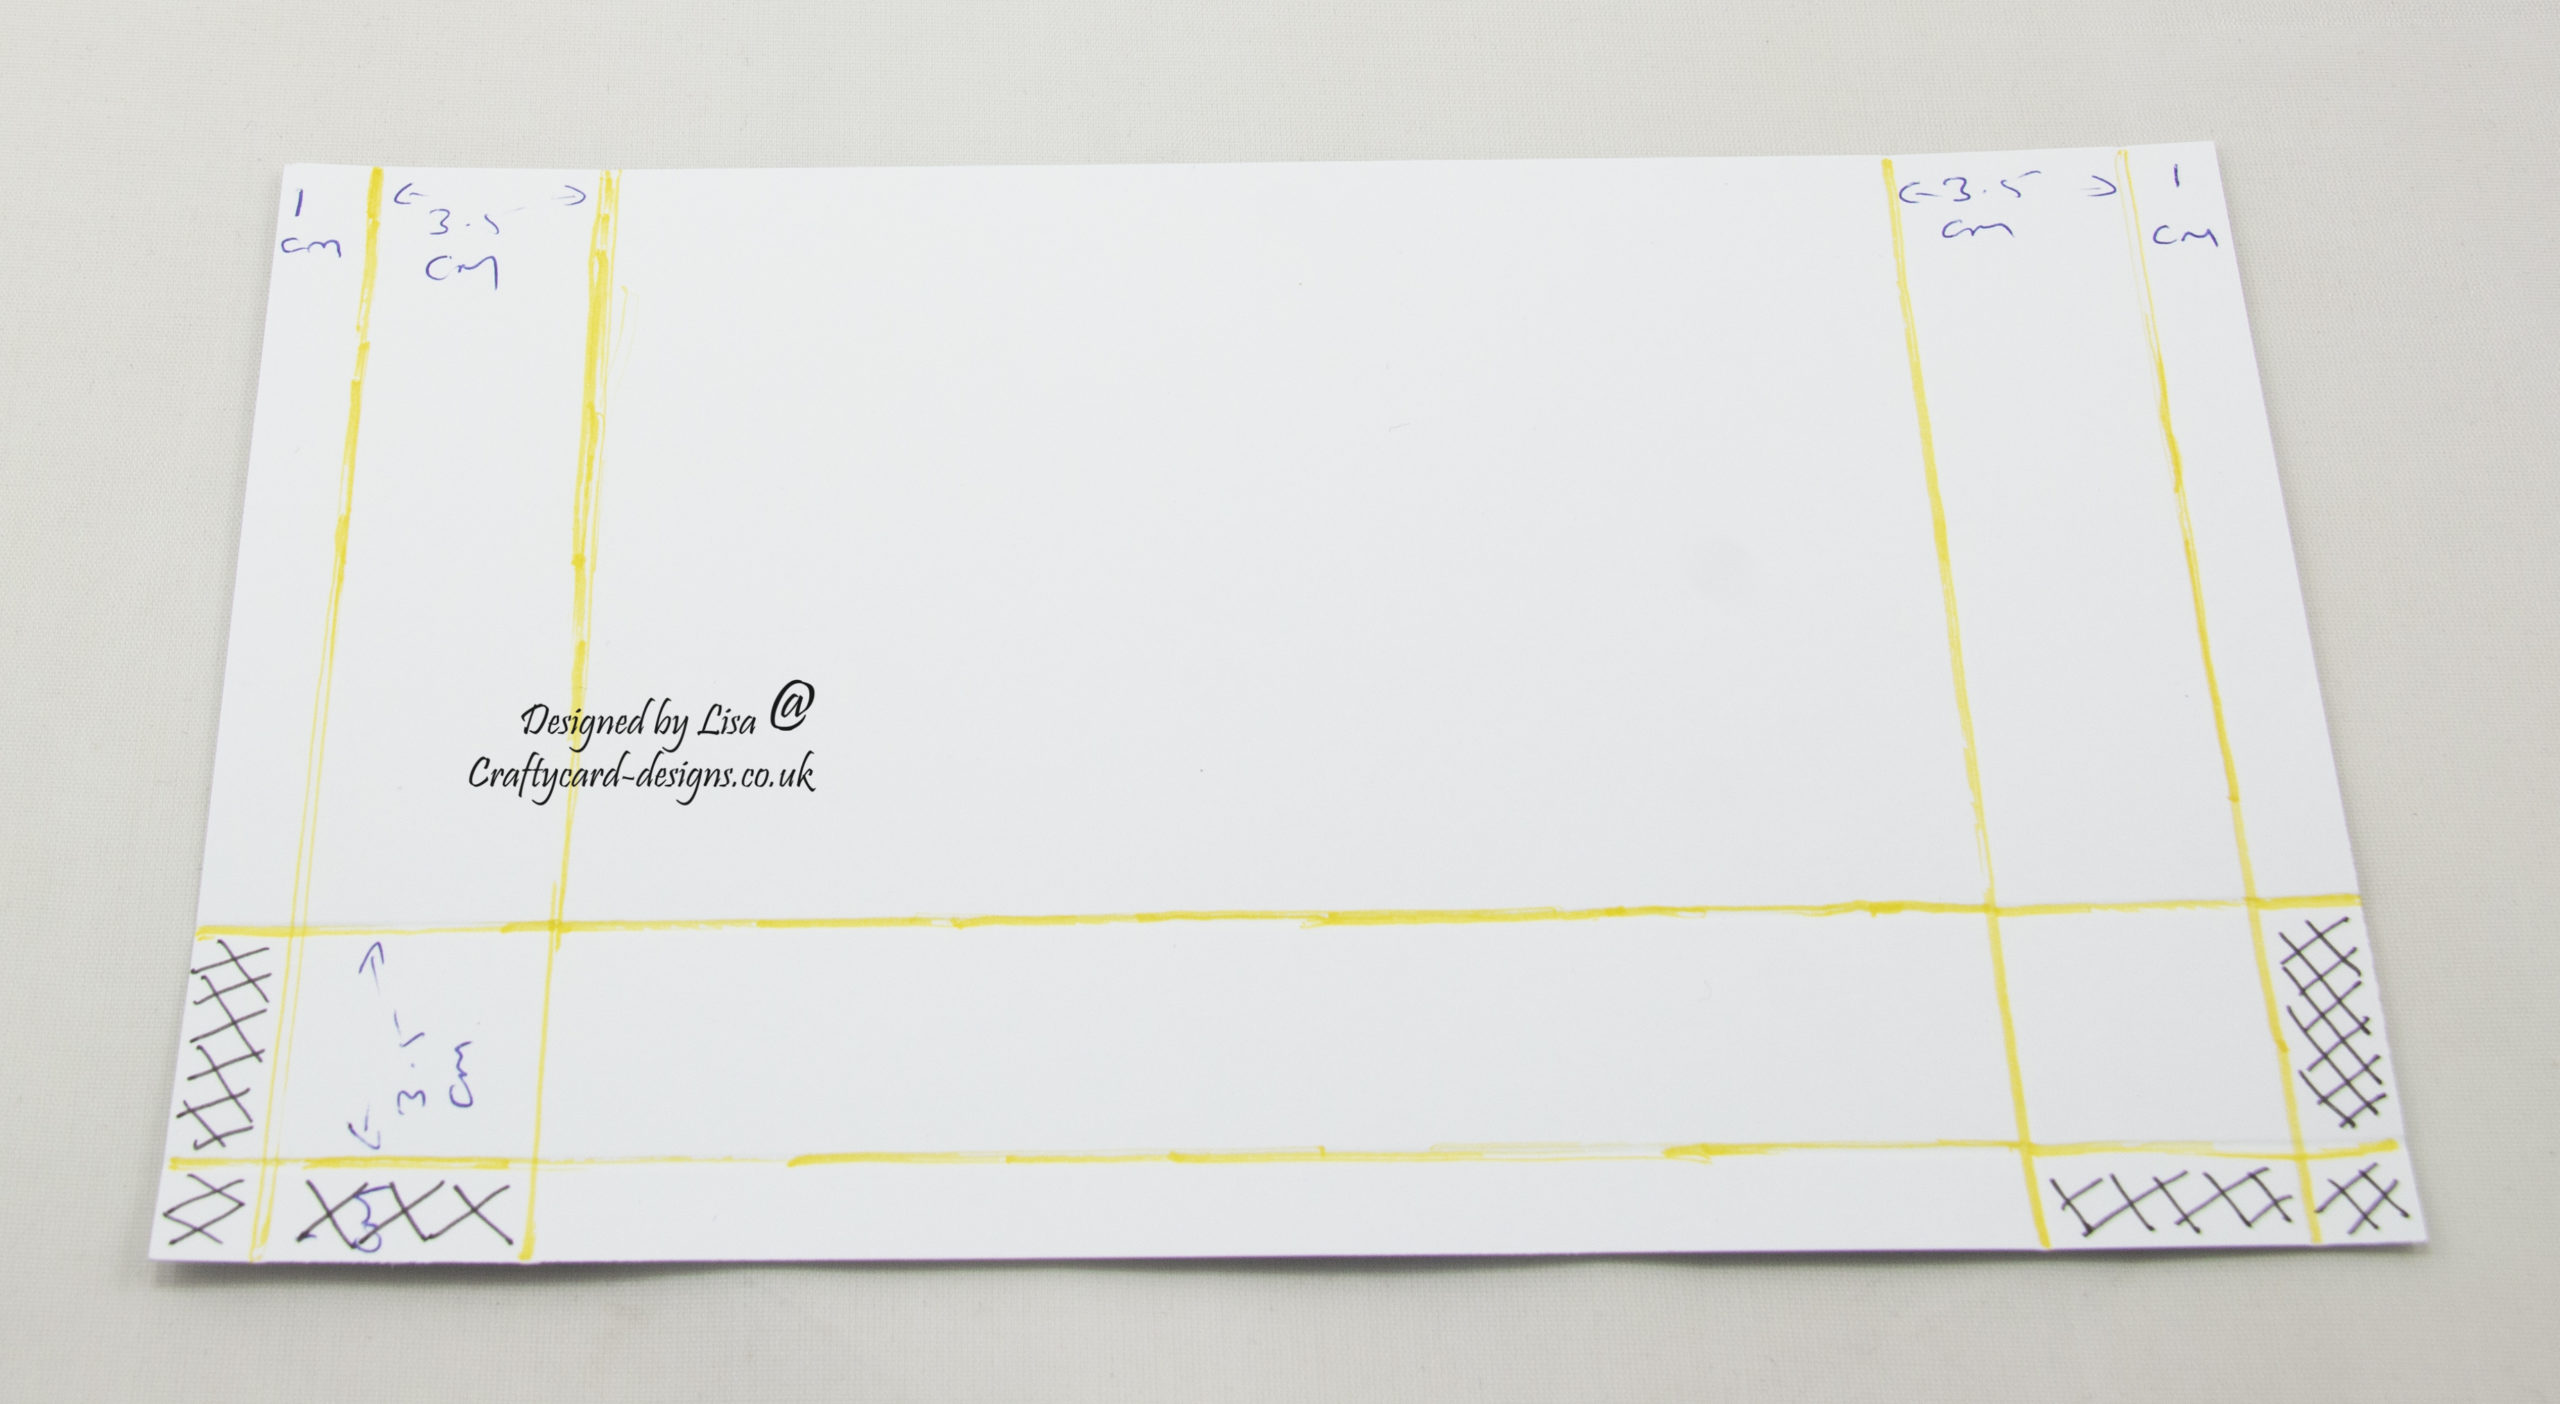
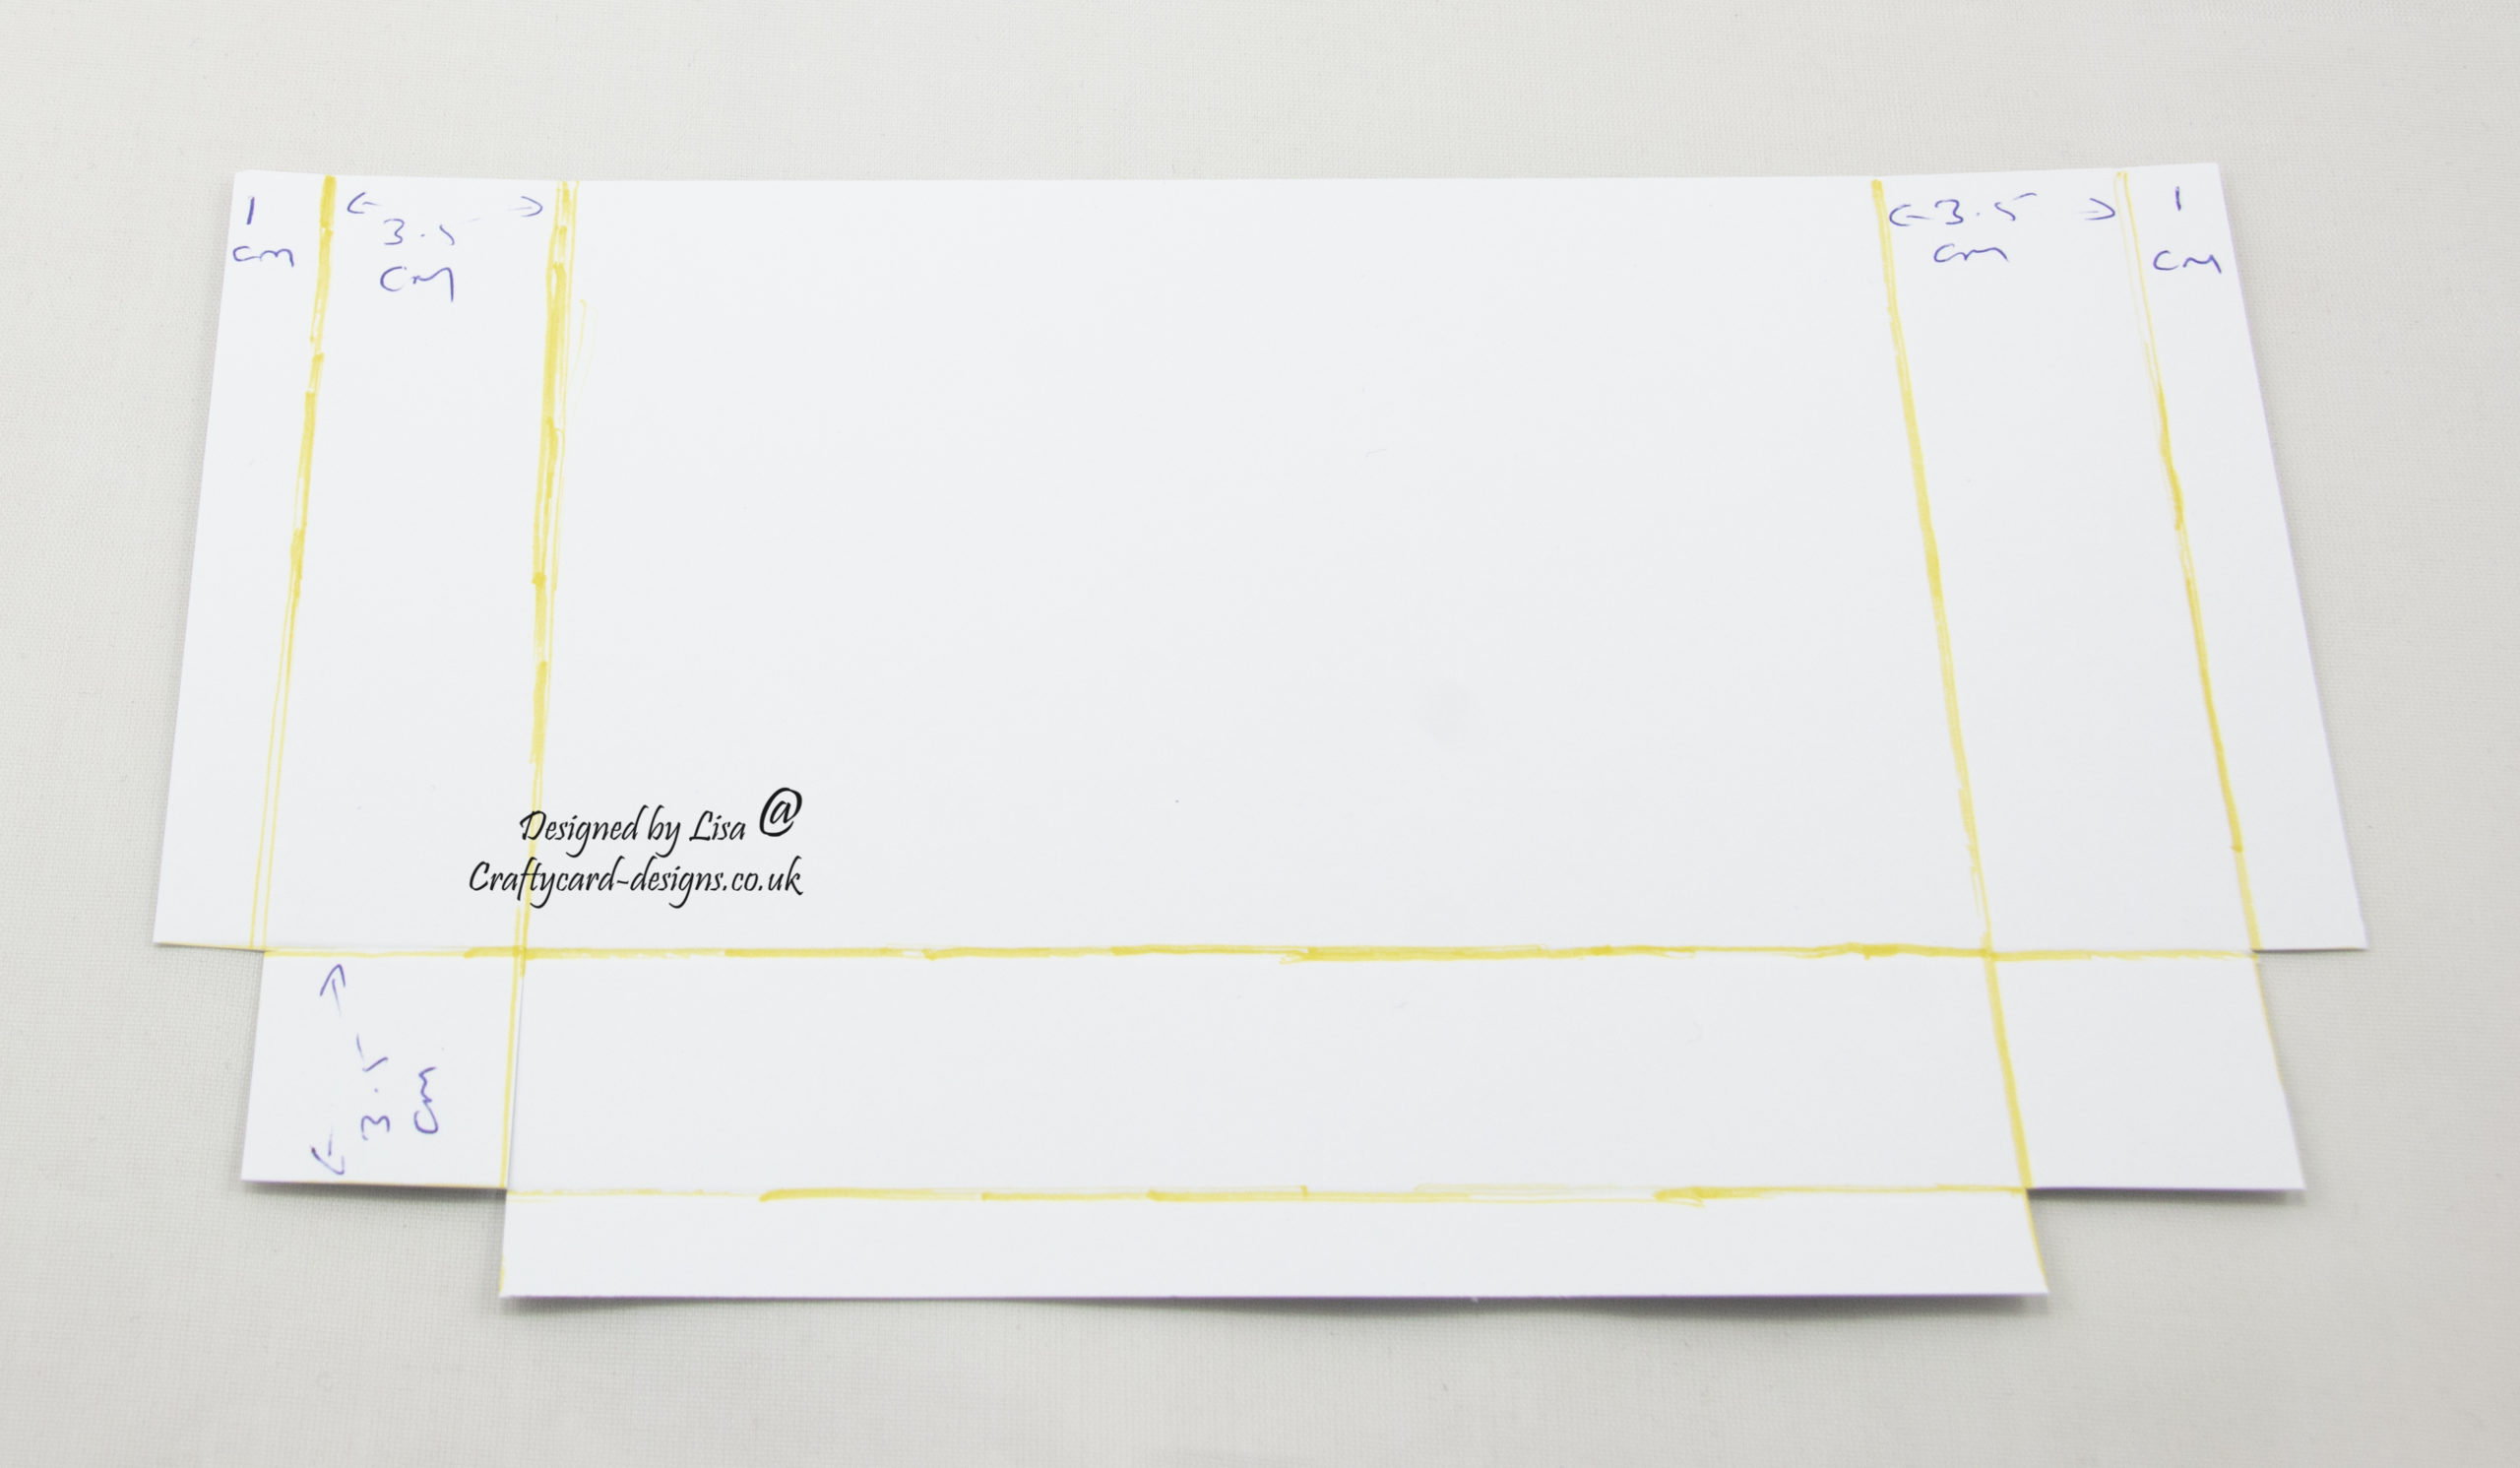
Cut a tab each side.
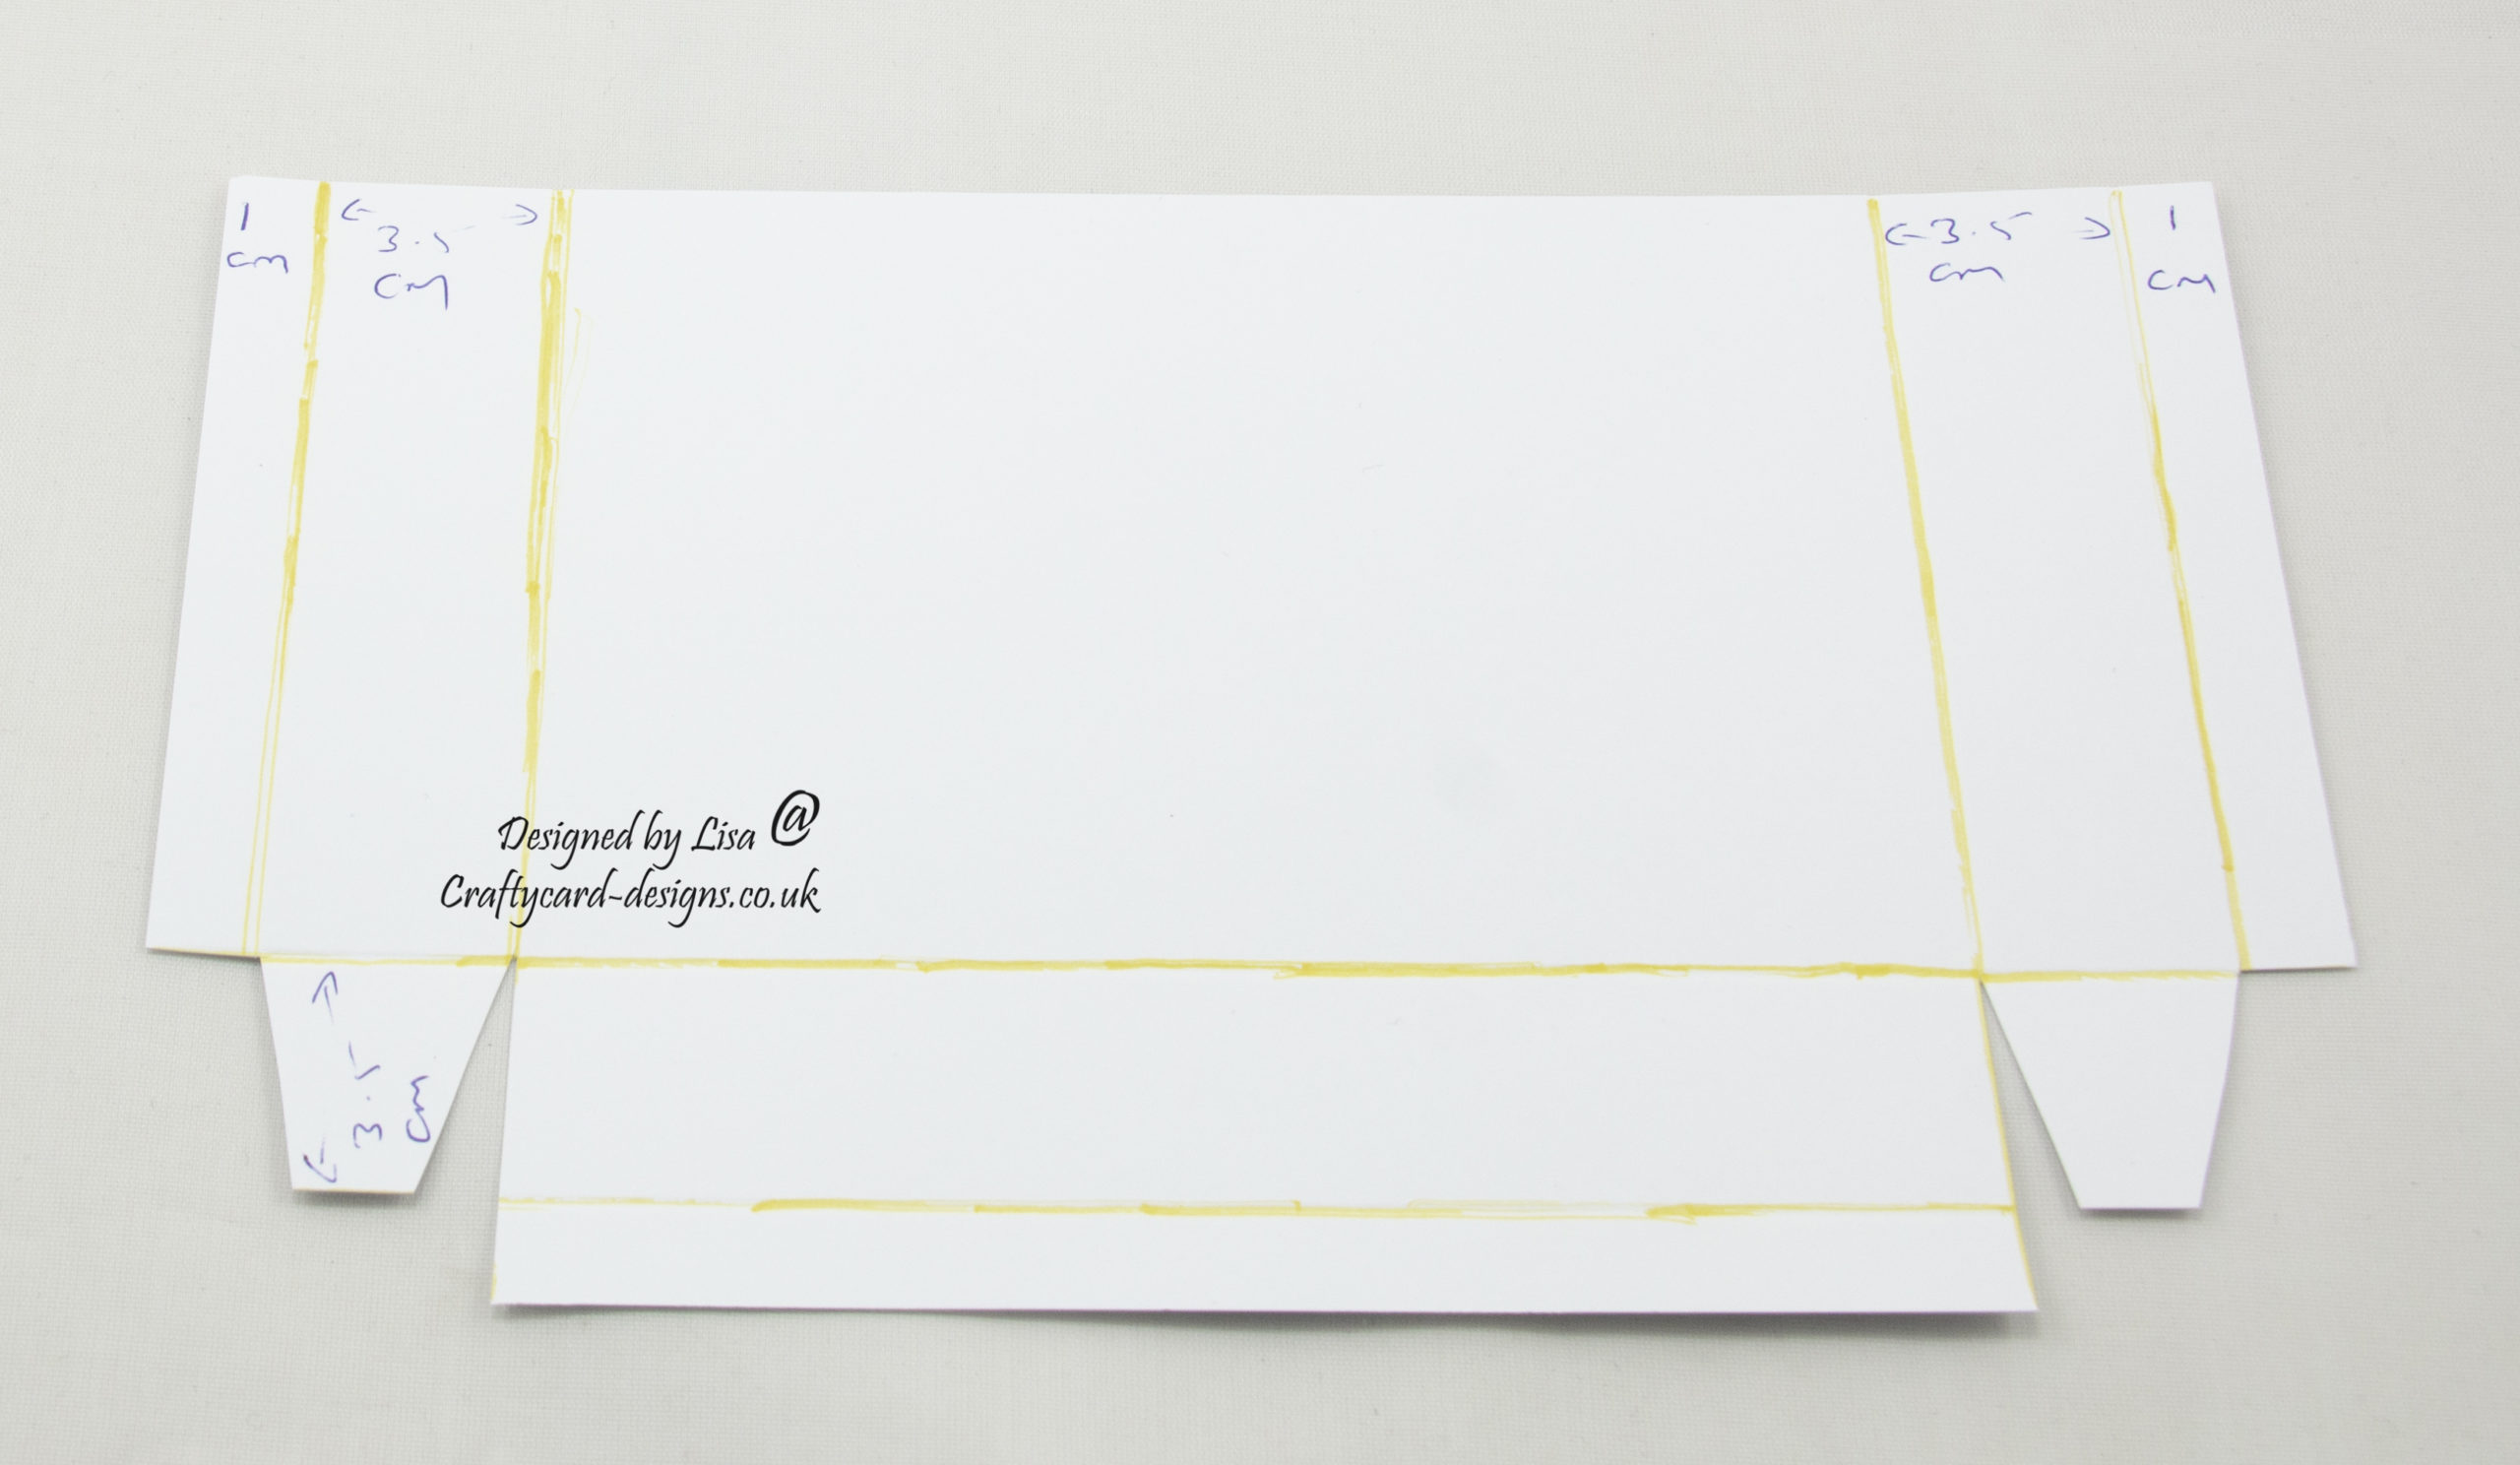
Then on the two 3.5 cm strips, put a score line down the centre, do not fold at this time.
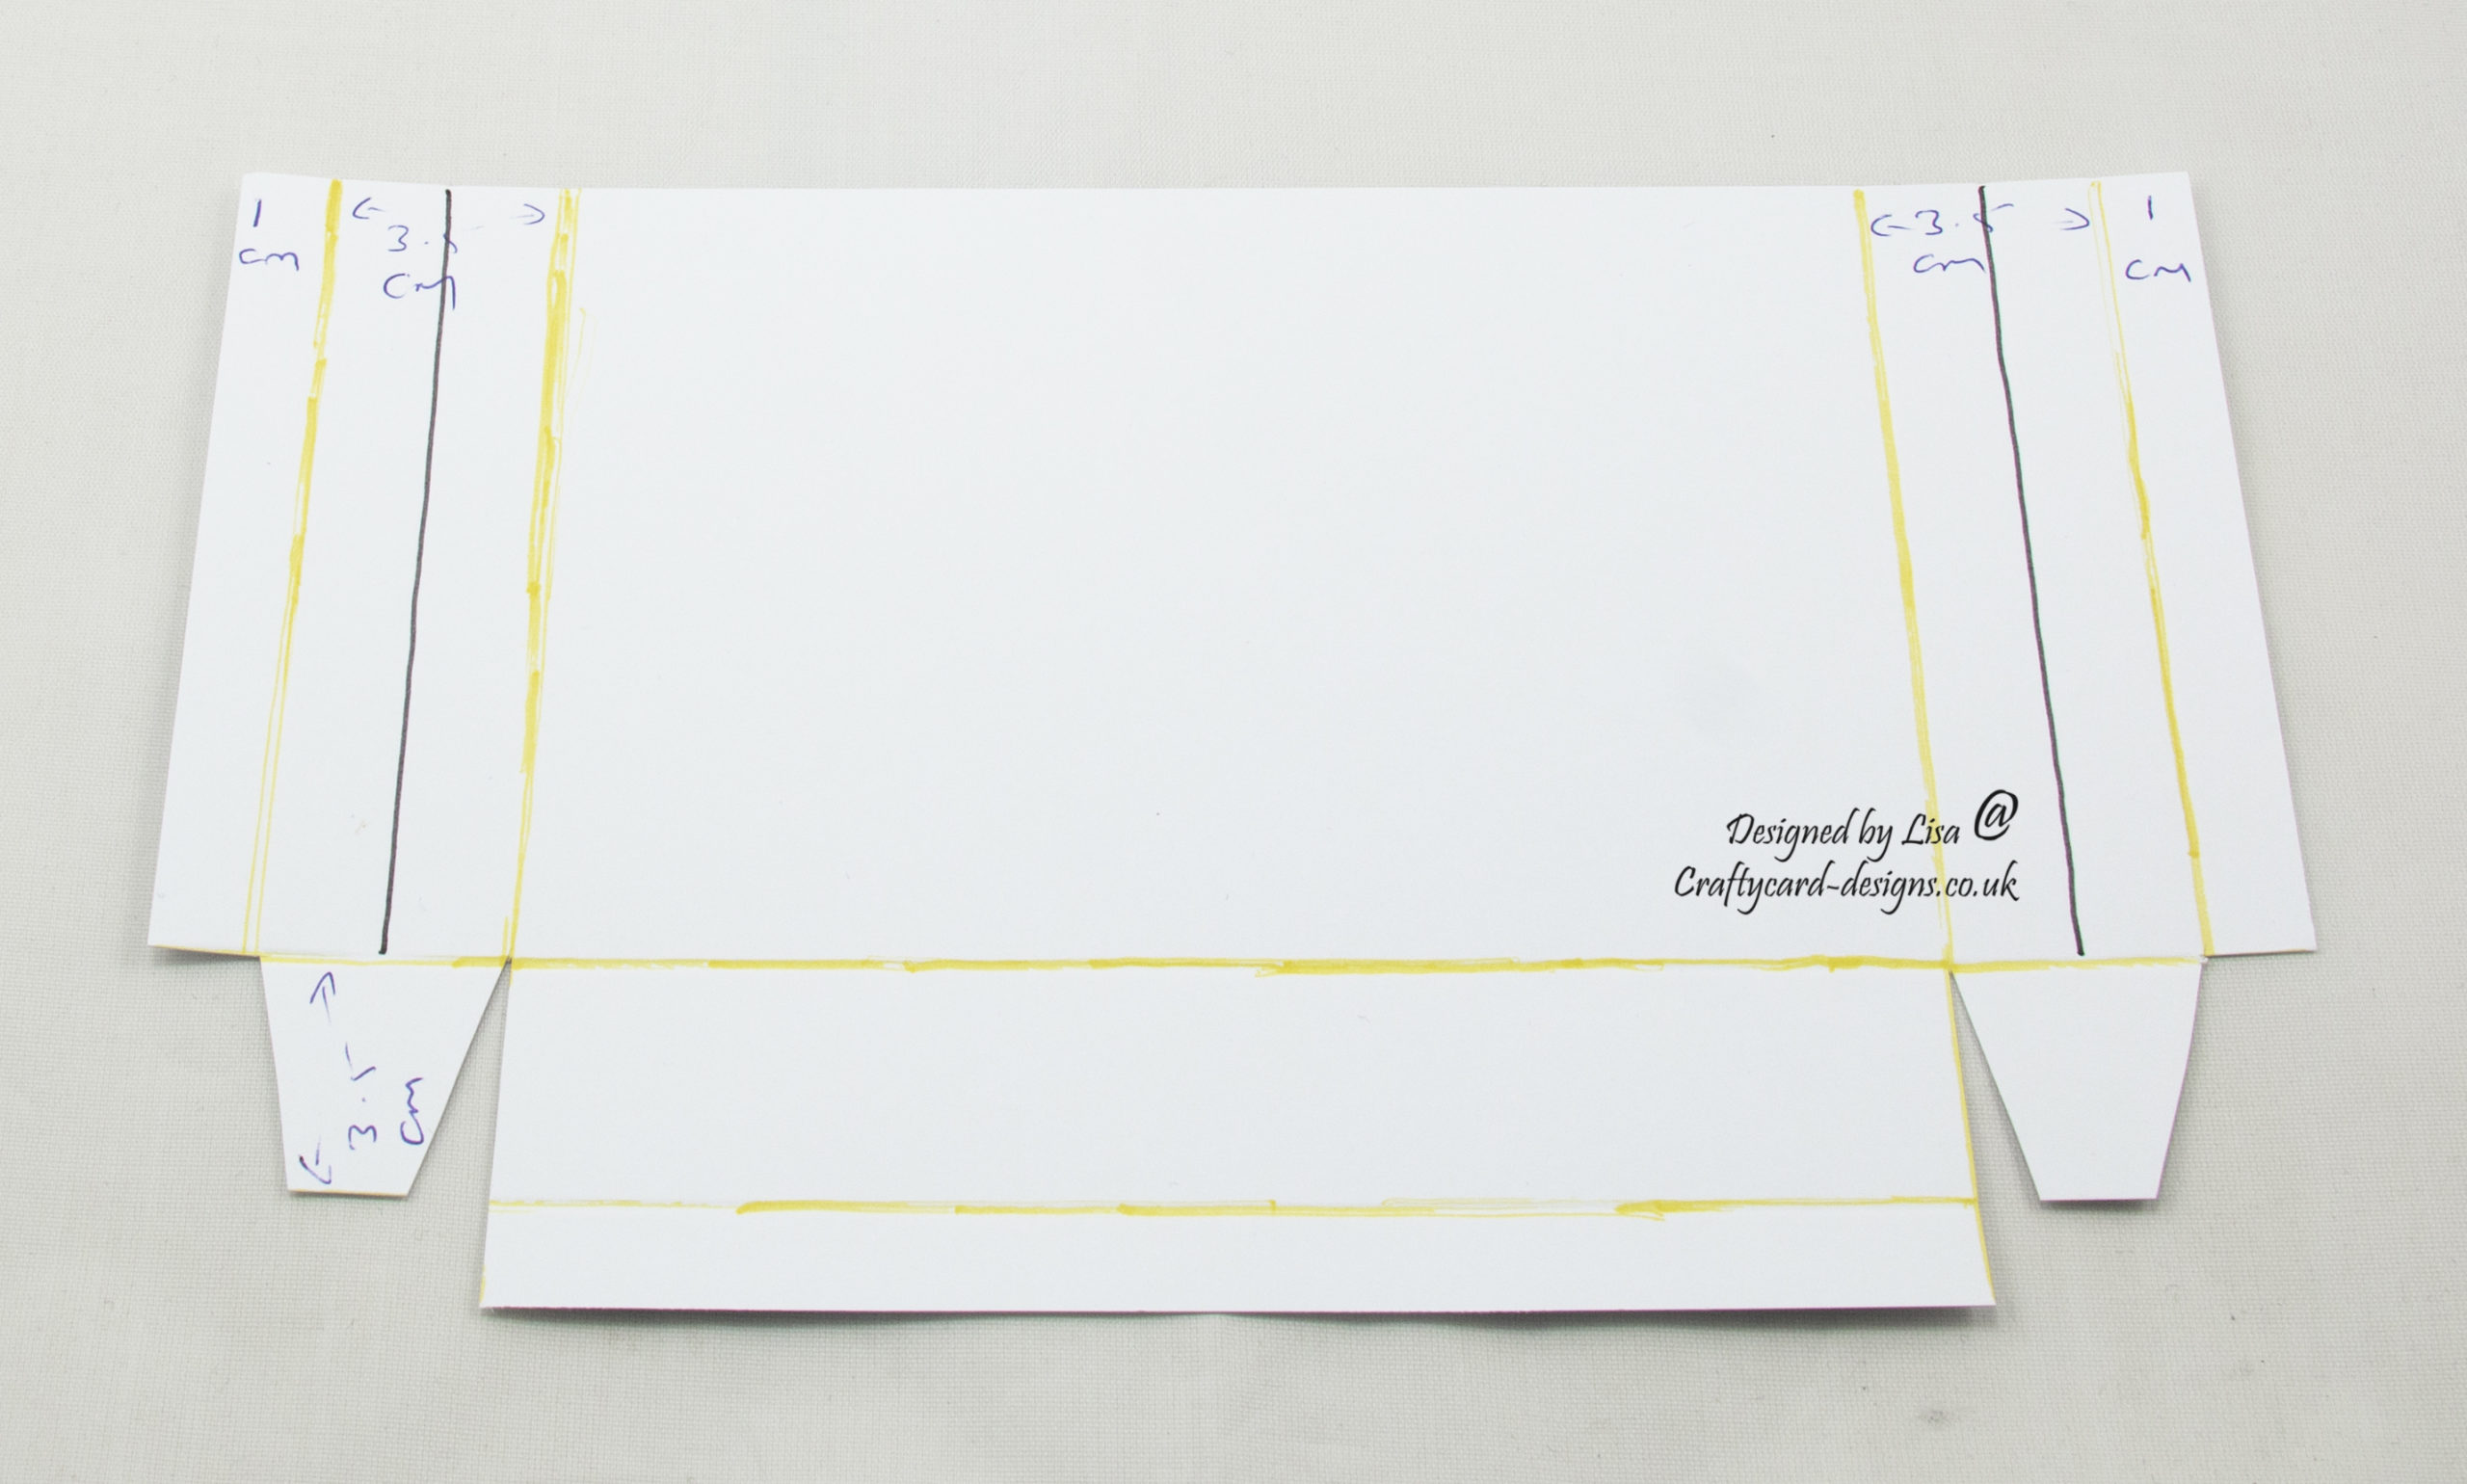
Attach the tabs and fold the 1 cm sides inwards attaching together at the bottom.

Slightly pinch the scorelines together on each side.
Add tape to the 1 cm edges.
Layer one:
Cut two pieces from the first coloured card measuring 8.5 cms by 13.5 cms.
Cut two pieces from the third paper measuring 8 cms by 13 cms.
Matt and layer together and attach to the front of the white card.
Attach both to the inside of the handbag on opposite sides.

Layer two:
Using two of the toppers, cut around the images and attach to one of the boxes.
Next time I make one of these I will add the handle last as it will make it easier to add the inside sections when the handbag lays flat.
………………………………………………………………………….
Thank you for visiting my blog and please feel free to follow and make any of my handmade card tutorials.
If you would like to see other cards I have made please have a look here:
It’s Time For Celebration : Happy Father’s Day-Dad
Wearing Spring – Happy Birthday Sister
Celebration Cake – Happy Birthday
Winter Gnomes – Wonderful Time Of The Year
Gnome For Christmas – Happy Christmas
………………………………………………………………………….
Challenges I would like to enter are:
The Creative Crafters Challenge #51 – Anything Goes
Crafts Galore Encore Challenge April – Anything Goes
Arty Divas Challenge April – Anything Goes
A Perfect Time To Craft Challenge #4 – Anything Goes
Beautiful creation! Thank you for sharing with us over at The Creative Crafters. We hope to see you again.
~ Sherry DT/Admin xx – https://creativecrafterschallenge.blogspot.com
This is such a sweet project and beautifully explained.
Thank you for sharing your project with us at the Crafts Galore Encore “Anything Goes” April Challenge. Good Luck and hope to see you again soon!
Carole x DT Craftilicious Creations